Documents To Go
Getting Started Tips
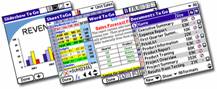
Tip: For graphics like the one above, you can tap on the graphic for a larger, detailed view.
Tip: Use the up/down buttons on your device or the scroll bar at the right of the screen to move up and down within this document.
Tip: This document also contains bookmarks. For long documents, you can use bookmarks to help you jump from section to section quickly and easily. To see the bookmarks in this document, tap on the bookmark icon located on the toolbar at the bottom.
Introduction
Welcome to Documents To Go. This is a Microsoft Word file brought to your handheld using Documents To Go. It is intended to first give you an overview of the major features in Documents To Go, followed by more practical "How To" instructions and tips on using the software.
With Documents To Go you can use word processing, spreadsheet, and presentation* files on your handheld. Simple push-button synchronization will maintain the most up-to-date version of a file on both the desktop and handheld.
Tip: If you have the Premium Edition, you can also take your e-mail with attachments**, PDF files, password-protected Word & Excel files, pictures as well as spell check word processing files and create charts in spreadsheets right on your handheld.
*Available in Premium and Professional Editions only.
**Available in Premium Edition for Windows only.
Components of Documents To Go
Documents To Go includes a desktop application as well as several handheld applications. The edition that you're using will determine which handheld applications get installed. The components of Documents To Go are:
Tip: If you have a handheld with expansion card support, you can put the Word To Go, Sheet To Go and Slideshow To Go applications on the card in order to save space on your handheld. See the "Expansion card support" section below for instructions on how to do this.
*Available in Premium and Professional Editions only.
**Available in Premium Edition only.
***Available in Premium Edition for Windows only.
DocSyncT technology
Documents To Go includes a revolutionary technology called DocSync, which provides seamless synchronization for Word, Excel, and PowerPoint 97, 2000,XP and 2003 for Windows. DocSync technology gives you the freedom to make changes to documents on the handheld without losing the document's original formatting after synchronization. With DocSync technology there is no longer a need to manage multiple versions of your desktop documents in order to retain the original formatting.
Specifically, DocSync technology will apply the changes you've made to a document on the handheld to the desktop documents. In doing so, you will not lose any of the original formatting of your desktop documents. For example, if your desktop document contains embedded worksheets, diagrams, or hyperlinks, those features will remain in the desktop document even after you've made changes to the handheld document and synchronized.
Note: DocSync does not apply to "native" Microsoft Word, Excel and PowerPoint files that did not originate on the desktop and have been edited on the handheld before synchronization. For example, if you bring a native Word file into Documents To Go on the handheld via an expansion card and you make edits BEFORE synchronization, DocSync will not apply to that file.
Native document support
Documents To Go 7 is the first version to support handheld-based "native" document support for Microsoft Word, Excel and PowerPoint* files. "Native" indicates that file is in its original desktop format, specifically Microsoft Word, Excel or PowerPoint. Before native document support, the Documents To Go desktop application converted Microsoft Word, Excel and PowerPoint files to a handheld format first and then the files were synchronized to the handheld for opening. Although you could still do this, native document support gives you the flexibility of using Word, Excel and PowerPoint files no matter how they are delivered - through synchronization, as an e-mail attachment, on expansion cards, via Bluetooth sending and IR beaming.
Tip: As a general rule, if you would like to conserve space on your handheld, you should bring your Word, Excel and PowerPoint files to your handheld as Word To Go, Sheet To Go and Slideshow To Go formats. These are optimized formats for the handheld and therefore have smaller resulting file sizes.
Tip: As a general rule, if you would like the flexibility of sharing your Word, Excel or PowerPoint files with other people (such as a Pocket PC user or a PC or laptop user), you should bring your files to your handheld in their "native" formats.
*View only and available in Premium and Professional Editions only.
How can I get native files onto my handheld?
You can get native files to your handheld using any of the below methods.
Benefits of native document support:
Expansion card support
Documents To Go supports Palm OS 5 expansion technology. The handheld applications of Documents To Go, as well as files, can be stored and retrieved from expansion cards. The following describes how to use Documents To Go with expansion technology.
How do I move files from my handheld to my expansion card?
Tip: Once you've moved the file to the expansion card, a card icon should appear to the right of the file name in the file list. Tapping on the card icon will show the path to the file on the card.
How do I move files from by desktop computer to my expansion card?
Tip: You can also change where you want a file to be stored simply by selecting the file and changing the "Location" drop down menu in the "Details" pane on the right hand side.
How do I move the Word To Go, Sheet To Go and Slideshow To Go handheld applications to my expansion card?
How to .
How to get desktop files to your handheld
To use desktop files on your handheld you must add them to Documents To Go on your desktop computer. To add files, do the following:
On the PC:
Double-click on the Documents To Go icon on your desktop,
OR, go to Start Menu>Programs>Documents To Go>Documents To Go
On the Mac:
Go to Hard Drive>Applications>Documents To Go>Documents To Go
Now that you have added your files to the desktop application, press the HotSync button and the files will be moved to your handheld device (or Card) for viewing and editing.
How to create new documents on your handheld
Documents To Go gives you the ability to create new documents on your handheld. Your newly created documents will be brought back to your desktop as word processing, spreadsheet, or presentation (PowerPoint) files after your next synchronization.
To create a new document, simply open Documents To Go on your handheld and do the following:
You will be prompted with a save dialog once you are done editing the document.
When you synchronize, the desktop version of the handheld file will automatically be created for you. The format of the desktop document will be determined by the following:
|
Format of file created on handheld: |
Resulting format of file on desktop: |
|
Word To Go |
Determined by the document format preference in Documents To Go desktop application |
|
Sheet To Go |
Determined by the document format preference in Documents To Go desktop application |
|
Slideshow To Go* |
Microsoft PowerPoint |
|
Microsoft Word |
Microsoft Word |
|
Microsoft Excel |
Microsoft Excel |
*Available in Premium and Professional Editions for Windows only.
The new document will be placed in the default location on the desktop, which is C:\MyDocuments for Window users and HD:Documents for Macintosh users. The default file formats and file locations can be changed by going to the Preferences option under the Tools menu in the Documents To Go desktop application.
How to save documents on your handheld
To save documents on your handheld you can either tap the File menu and choose Save or Save As or tap the Done button.
Saving options when tapping Done for new documents:
Saving options when tapping Done for existing documents:
Tips.
Word To Go, Sheet To Go, and Slideshow To Go contain features that allow you to edit documents, spreadsheets, and presentations quickly and easily. Some useful features and tips are listed below:
Word To Go features and editing tips
Use formatting buttons on the toolbar or access detailed menus by tapping the Menu icon (below the House icon).
Perform basic text editing such as adding and deleting text, cut, copy, paste, undo, and redo. Use graffiti keystrokes or the onscreen keyboard for these simple and quick commands!
Create new documents by tapping the New button in the Documents application.
Change the font style, size, color and format from the "A" button on the toolbar.
Format characters using bold,
underline, italics, strikethrough,
superscript, subscript, and all caps, available from the "A" button or from the Format
menu.
Change the paragraph alignment, spacing and indents from the Paragraph Format button on the toolbar.
Insert bullets and numbered lists by tapping on the Bullet or List buttons on the toolbar.
Format bullets and numbered lists by tapping on the Menu icon and selecting Format: Bullets & Numbering.
Tap on an embedded graphic to see a larger screen view of the graphic.
Insert tables by tapping on the Insert Table button on the toolbar or tapping on the Menu icon and choosing Insert: Table.
Edit tables by tapping on the Edit Table button above the table.
Insert page breaks by tapping on the Insert menu and selecting Page Break.
View PDF files with formatted text and tables.*
If you are using a high resolution device, select from three Zoom options by tapping on the File menu and choosing Zoom or tapping on the Zoom button on the toolbar.
Tap the Find button to search for text within the document. Or choose Find & Replace or Find Next, depending upon your search needs.
Sheet To Go features and editing tips
Access detailed menus by tapping the Menu icon (below the House icon).
Perform basic text editing such as adding and deleting text, cut, copy, paste, and undo. Use graffiti keystrokes or the onscreen keyboard for these simple and quick commands.
Create a new spreadsheet by tapping the New button in the Documents application.
Move between sheets in a workbook by selecting a sheet from the drop down menu in the upper right corner of the screen.
Format cells (including alignment, number formatting, text formatting, cell and text color, and cell locking) by tapping the Format menu and selecting Cell, Number, or Sheet.
Sort data by highlighting the data range with your stylus, tapping the Menu icon, and choosing Format: Sort or tapping on the Sort button on the toolbar.
Insert functions into your spreadsheet by tapping on the Formula icon or the Insert Menu, and then selecting Insert Function. Next, select the function you wish to use in your spreadsheet. That function will appear on the data entry line with the arguments highlighted. Use your stylus to select data cells to be placed into the arguments.
Edit formulas by tapping on the cell containing the formula and editing the arguments within the formula. To edit the arguments, place the cursor within the formula that appears on the data entry line and either change the values or tap on the cell within the spreadsheet that you would like to add to the formula.
Use charts and graphs by tapping on the Chart icon and selecting the desired chart*.
Create new charts by selecting the data range and choosing New Chart from the Chart icon.*
Tap on a row header to freeze cells, insert or delete a row, or to select the entire row.
Tap on a column header to freeze cells, insert or delete a column, hide, or to select the entire column.
If you are using a high resolution device, select from three Zoom options by tapping on the File menu and choosing Zoom or tapping on the Zoom button on the toolbar.
Change values in cells and see the spreadsheet recalculate.
Tap and hold on a cell to format a cell or number, or freeze panes.
Locate specific data with Find or Find Next, accessible by tapping the triangle in the upper left corner of your spreadsheet or tapping on the Find icon on the toolbar.
Tap the Go button to navigate to a particular cell, comment or bookmark.
Slideshow To Go features and editing tips*
Perform basic text editing such as adding & deleting text, cut, copy, paste, and undo.
Create a new presentation by tapping the New button in the Documents application.
Move between Outline, Slide, and Notes View by tapping the buttons on the toolbar.
Rehearse a presentation with or without a timer from Slide View by tapping on the Slide Show menu and selecting View Show.
Insert new slides by tapping on the Insert menu and selecting New Slide.
Duplicate slides by tapping on the Insert menu and selecting Duplicate Slide.
Insert Bullets from Outline View by tapping on the Insert menu and selecting New Bullet Item. Promote or demote bullets with the left/right arrows at the bottom of the screen.
Sort and organize slides from Outline View by tapping on the Edit menu and selecting Slide Sorter.
Identify bullet animations and slide transitions below each slide in Slide View.
Add or modify notes for any slide from Notes View.
Tap the Find button to search for text within the document. Or choose Find Next depending upon you search needs.
*Available in Premium and Professional Editions only. Tips do not apply when viewing a native PowerPoint file.
How can I get the Premium Edition?
Registered owners of Documents To Go may upgrade at a discounted rate to the Premium Edition. Upgrades are available directly from DataViz on CD or by download. For a full list of Premium Edition features and special upgrade offers for owners of Palm handhelds, please call 800-733-0030 or visit the DataViz website at www.dataviz.com/documents.
Help & additional tips
Documents To Go contains a useful help file designed to answer many of your questions. To access Help, simply launch the Documents To Go desktop application, and click the Help button. Also in the desktop application's Help menu you'll find an Interactive Tutorial that will guide you through the many features of Documents To Go.
DataViz, Inc.
www.dataviz.com
Merritt Corporate Woods
612 Wheelers
Phone: 203.874.0085
Fax: 203.874.4345
Sales: 800.733.0030
Tech Support: https://support.dataviz.com
|
