ALTE DOCUMENTE
|
|||||||
REPAIR MODULE CHECK CONTROL IN A BMW E36
Before beginning, pediros that you pardon the quality of the photos, are taken with one webcam and more cannot be requested.
NECESSARY
MATERIAL:
Small flat screwdriver and of star.
Tin soldering iron.
Mesh to desoldar or desoldador.
Tin.
Power supply 12v
Four pieces of cablecillo.
Knowledge of electronics or experience in manipulation of apparatuses (to be a
little manitas)
Patience in great doses.
IN THE VEHICLE
We underneath removed
to the module from its lodging in the vehicle, introducing 313d35d the finger and
pushing towards outside.
We disconnected the connector raising the tongue-piece of the same one to
unblock it.
DESMONTAGE OF THE MODULE
First not to exert on
pressures or force in all the process, he is very delicate and it must
manipulate with precaution.
The four the back cover dismounts tightening clips of plastic and stretching
(it did not leave the photo). We unblocked the four and we removed the cover.
Now we removed to the module from the screen unblocking both clips lateral
and stretching with care, it seems that it costs because the cable hose that unites east module with the button seller is a little stiff, but leaves.
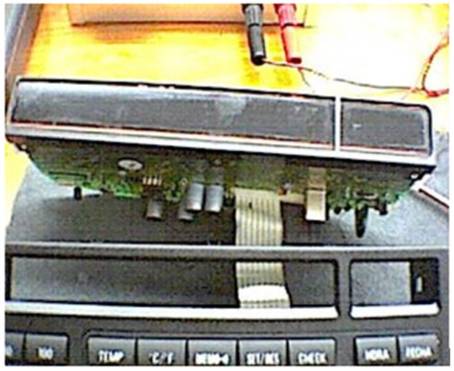
Following step, to disassemble the plastic title page that holds the crystal with the support of the light bulbs of illumination of display. It takes clips by all his around.
We separated the title page and from now on to carry far the cares since the crystal is frees and if we turned around to light the all set this one runs risk of striking itself and of breaking itself. CARE, I will not get tired to be writing this word, because we are touching and very fragile earthenware vessel.
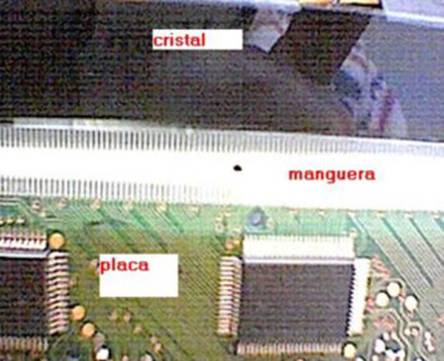
Either we have outside the title page well and or you see that the crystal is free and it only subjects by the hose of connections that takes beaten to, the conexionado incline of. The lamina orange that is appraised underneath the crystal is the one that gives to the color to the illumination of the letters and numbers him.
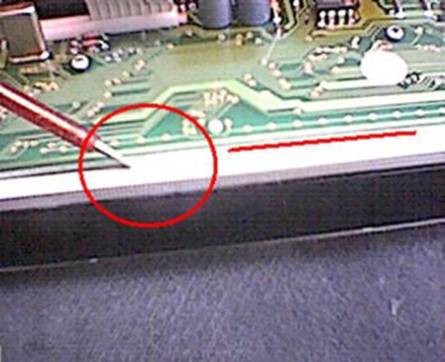
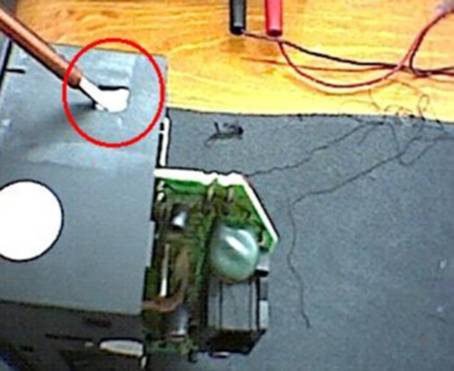
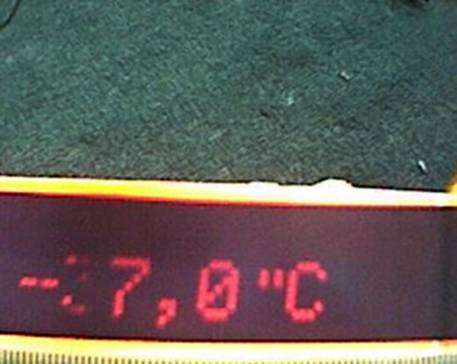
This image shows our problem. The failure of some vertical bar
and like consequence the nonvisualization of some character in the screen,
comes produced by a failure in the feeding from that bar, and this failure is
produced generally by a deficient contact of the hose of connections (white)
either with the crystal or with the plate of components. If the problem is with
the crystal, will take with a small screwdriver (as it shows the image) and
makes flexible the rubber strip (white) that is the one in charge to make
pressure in the contacts so that these do not fail. This rubber with time takes
form and it becomes hardened slightly exerting less force and as consequence
can fail some contact. TAKEN CARE OF.
But the failure also can come from the connection with the plate and if it is
thus we will have much more delicate work much more and if it fits. To my
therefore it happened and I had to disassemble it to me whole. If you have a
power supply of 12v with protection of crossing in case moscas(no I advise to
use a battery, since if some cablecillo is crossed to us it can cause a
catastrophe), is the moment for connecting it and thus we will be able to
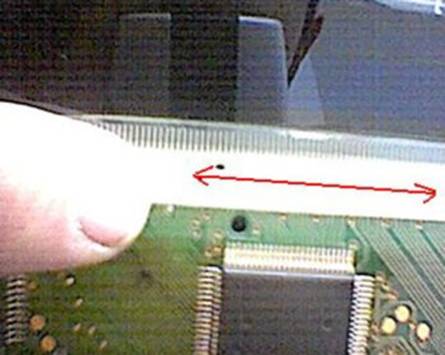
estimate the white hose of contacts with the finger and to find out if it fails
of a side or another one. TAKEN CARE OF. For that you prune it to prove,
the feeding goes of the following way:
Terminal 17 of the general connector (the one that we have loosen of the car
in the beginning) MASS
Terminal 14 POSITIVE
Terminal 16 POSITIVE (it is the illumination of the button seller)
Terminal 18 POSITIVE
TOGETHER TERMINALS 14.16.18 CONNECTED To + (POSITIVE)
I welded in the terminals behind the connector cablecillos to be able to put
the clamps of the power supply comfortably and not to run crossing risks.
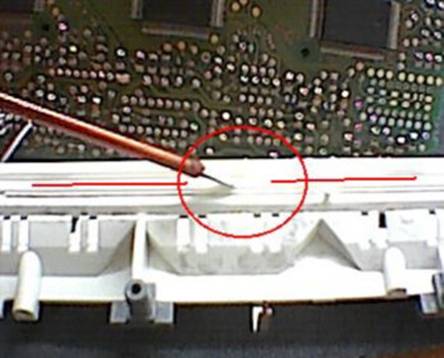
Returning to the white gomita that makes pressure the contacts
of the crystal, I tried to put a finite lamina to him of sticky paper to
replace the possible cession of the rubber and that this made more force, but
in the end as I had to disarm several times I cleared it and soon no longer he
needed to me. Just by to magrear the gomita from a side to another one (without
taking off it) several times this one returns to take elasticity with which
when mounting later it makes it pressure correctly the all contacts. 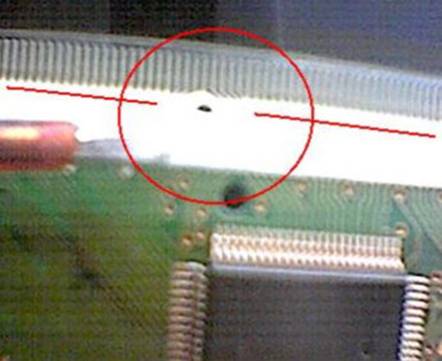
Here we see that magreo the rubber with the screwdriver end, we deformed it but
it returns to her site.TAKEN CARE OF!
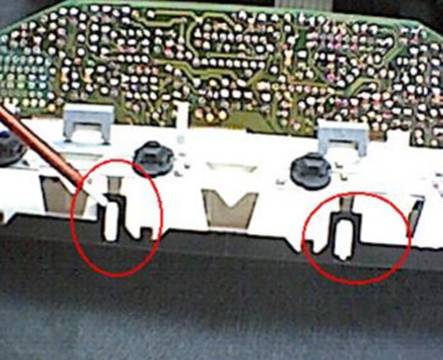
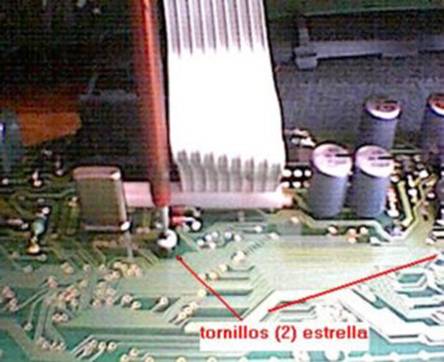
DESMONTAGE Of the PLASTIC SUPPORT LAMPHOLDERS to smooth the rubber of the contacts with the plate.
In order to disassemble this one it is necessary to clear
screws both, and to desoldar the three metallic legs that take feeding to the
light bulbs. In the photos east step is not appraised very well but once you
have check disassembled you will see it without problem, there is no loss nor
there is other things to disassemble to lose it
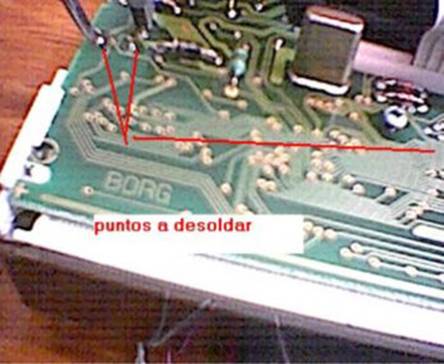
Next we opened a paper clip that holds by a side the plate of
components to the white plastic and cleared éste(no I have photo). Now already
we see the contacts with the plate and see that in the plastic we have left the
other rubber in charge to press these contacts and that they do not fail.
The black rayitas (following photo) that seem a bar code, between the crystal and the plate they are the contacts that usually fail and that the gomitas mentioned ones tighten.
Here this the rubber that there is to magrear.
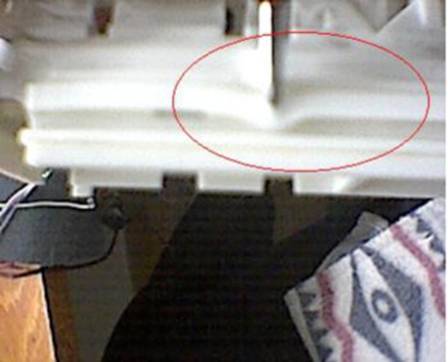
Aside from magrear the rubber I tightened with well-taken care of first with the finger later I used a pencil of which they have rubber behind and with this rubber I went making pressure of side to side by all the hose thus to tighten or the contacts that although seem that it is all the stuck hose or and that that cannot fail, is here where fail. Care, taken care of much because it is not necessary to take off the hose of contacts, to only exert a slight pressure so that the contact that is failing tightens again.
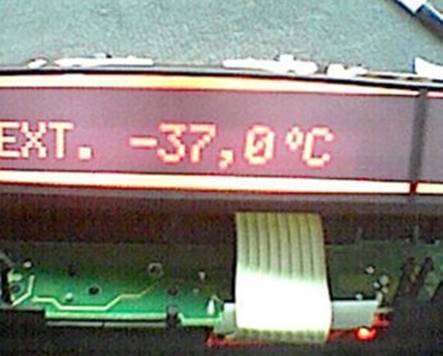
This was the image that I saw before, in that is appraised that the 3 of the 37 fail a pair to him of bars and is not ***reflxed mng well and the cerito of ºC is not complete either. (You will say: porqué marked thermometer to you - 37º, Because I have check connected with the power supply and it does not receive data of the sounding of temperature with which defective his it takes to mark the minimum to him.)
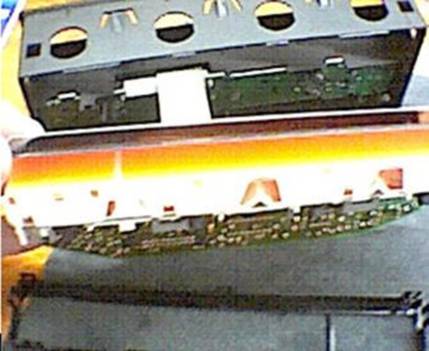
With this image the joy happened to me after returning to mount everything
following the inverse procedure the disassembling and paying attention not to
leave tracks behind the crystal (when being touching it constantly) that later
can cause shades in the illumination.

And here the module assembled again and ready to be mounted in the vehicle.
Only deciros that if it fails to you a line you do not do anything, because the truth is a very delicate repair and with a high risk of obtaining an opposite effect, that is that to you more lines fail than before. To me it cost to disassemble it several times to me until obtaining that all the happy gomita made pressure sufficient so that all the contacts worked, and the truth I did it because to part of three lines that failed, the clock began to also fail, and as all electronic one burns the entrails to me when I have something it does not work correctly.
Greetings and luck in your repair,
Cobretti by www.bmwfaq.com users.
|
