Sample Documentation: Recompiling a 32bit application to target a 64bit platform
Left shift elements in the List
|
Sample Developer |
Vaishnavi Sannidhanam |
|
PM |
Kang Su Gatlin |
|
|
Mukul Kumar |
|
Documented by |
Vaishnavi Sannidhanam |
Prerequisites:
Visual Studio should be installed on the machine
The cross compiler for Visual Studio should also installed
The solution should be downloaded onto your local machine and should be opened in Visual Studio
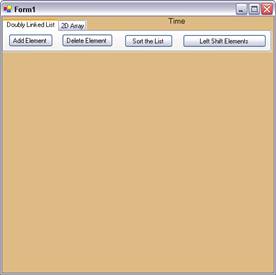
This sample implements a doubly linked list and a 2D Array.
Using the doubly linked list, the user can add and remove elements (numbers), sort the list and left shift all the elements in the list. The user can also look at where the tail is pointing, where the head is pointing, the addresses of where the head and tail pointers are, the difference between where the head and tail pointers are pointing.
Using the 2D Array, the user can add and remove elements (strings), sort the rows and columns of the array based on the string length of the elements in the array.
On a 32bit machine the sample compiles and works just about fine. One has to go through the walk through to make the sample function appropriately for a 64bit machine (and during this process fix places where the sample might crash).
Prerequisites:
Visual Studio should be installed on the machine
The cross compiler for Visual Studio should also installed
The solution should be downloaded onto your local machine and should be opened in Visual Studio
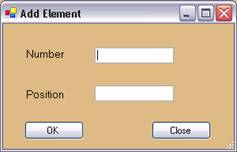
o To add an element to the doubly linked list, click on the "Doubly Linked List" tab.
o Then click on the Add Element button under this tab
![]()
![]()

o A dialog box pops up asking you to enter a number and a position. You can add a number to a particular position in the linked list. For adding, type in a number and a desired position and press OK. If you don't want to add anymore then press close.
o However keep in mind that, you can add to the start, end or some where in the middle of the list and cannot add an element anywhere beyond this. The sample does give you errors and tells you what might be going wrong.
o After you add an element, the linked list gets drawn showing the contents and where they are. It also shows where the head and tail pointers are located, where they are pointing to and what the difference is between them.
o To add an element to the beginning of the list, enter the position to be 0. If no position is specified, the element is added to the end.
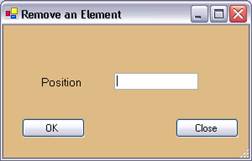
o To remove/delete an element from the doubly linked list, click on the "Doubly Linked List" tab.
o Then click on the Delete Element button under this tab
![]()
o A dialog box pops up asking you to enter a position. You can delete a number at a particular position in the linked list. For deleting, type in a number and a desired position and press OK. If you don't want to delete anymore then press close.
o You can delete elements that are already in the list. If you give a position that is larger than the number of elements in the list or smaller than 0, then an error message is shown.
o After you remove an element, the linked list gets updated and re-drawn to show the contents and where they are. It also shows where the head and tail pointers are located, where they are pointing to and what the difference is between them.
o To remove an element to the beginning of the list, enter the position to be 0.
o To sort all the elements in the doubly linked list, click on the "Doubly Linked List" tab.
o Then click on the Sort the List button under this tab
![]()
o The list gets sorted and a sorted list is drawn on the form.
o To left shift all the elements in the doubly linked list, click on the "Doubly Linked List" tab.
o Then click on the Left Shift Elements button under this tab
![]()

o Each element in the list gets left shifted once, each time you hit the button. The list gets updated with the new values and this is shown on the form.
Prerequisites:
Visual Studio should be installed on the machine
The cross compiler for Visual Studio should also installed
The solution should be downloaded onto your local machine and should be opened in Visual Studio
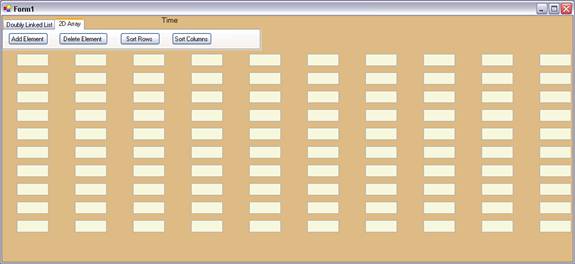
o To add an element to the 2D Array, click on the "2D Array" tab.
o Then click on the Add Element button under this tab
![]()
![]()

o A dialog box pops up asking you to enter a string and a position. You can add a string to a particular position in the array. For adding, type in a string and a desired position and press OK. If you don't want to add anymore then press close.
o However keep in mind that, this is an array of size 10 X 10. So, you can add elements that fall between 0X0 and 9X9. The sample does give you errors and tells you what might be going wrong.

o After you add an element, the array gets drawn showing the contents and where they are.
o You can add strings of length 6 or less than 6.
o To remove/delete an element from the 2D Array, click on the "2D Array" tab.
o Then click on the Delete Element button under this tab
![]()
o A dialog box pops up asking you to enter a position. You can delete a string at a particular position in the 2D Array. For deleting, type in a number and a desired position and press OK (rows X cols). If you don't want to delete anymore then press close.
o You can delete elements that are already in the 2D Array. If you give a position that is larger than the size of the array or smaller than 0 X 0, then an error message is shown.
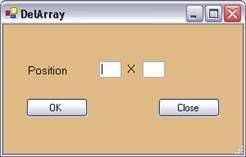
o After you remove an element, the 2D Array gets updated and re-drawn to show the contents and where they are.
o To remove an element to the beginning of the 2D Array, enter the position to be 0 X 0.
o To sort the rows in the 2D Array, click on the "2D Array" tab. It sorts based on the length of the strings in the rows. Each row is sorted independently of all the other rows, however, all the rows are sorted.
o Then click on the Sort Rows button under this tab
![]()
o The 2D Array gets sorted and a sorted 2D Array is drawn on the form.
o To sort the columns in the 2D Array, click on the "2D Array" tab. It sorts based on the length of the strings in the columns. Each column is sorted independently of all the other columns, however, all the columns are sorted.
o Then click on the Sort Columns button under this tab
![]()
o The 2D Array gets sorted and a sorted 2D Array is drawn on the form.
Prerequisites:
Visual Studio should be installed on the machine
The cross compiler for Visual Studio should also installed
The solution should be downloaded onto your local machine and should be opened in Visual Studio
If you roll your mouse over the Time label, the current date and time are displayed. And if take your mouse away from the time, it changes back to being a label that says "Time"
![]()
|
