A Guide to Developing Windows Presentation Foundation Gadgets for Windows Sidebar
Packing and Installing Gadgets
Saving Gadget-specific Settings
Gadgets which take advantage of Windows Presentation Foundation can be written and tested on both Windows Vista and XP or Server 2003 with the necessary tool set. Below is a list of required and recommended development tools which could be helpful during the process of writing Gadgets.
Developers should be familiar with Gadget basics, Visual Studio and .NET Framework languages such as Visual Basic, C# or Managed C++.
Microsoft Visual Studio 2005 Professional Edition
https://msdn2.microsoft.com/en-us/vstudio/
For development under Windows Vista:
None other - Microsoft .NET Framework 3.0 is pre-installed in Windows Vista
For development under Windows XP or Windows Server 2003:
Alky for Applications 1.0 or later
https://www.fallingleafsystems.com/compatibility/ (Optional, but required for actual use of Windows Sidebar)
Microsoft .NET Framework 3.0 Redistributable
https://www.microsoft.com/downloads/details.aspx?FamilyID=10CC340B-F857-4A14-83F5-25634C3BF043&displaylang=en
Optional, but helpful tools for designing scenes for use in Gadgets are:
Microsoft Expression Blend
https://www.microsoft.com/expression/products/overview.aspx?key=blend
Microsoft Visual Studio - WinFXT Development Tools
Gadget packages contain a special file - a manifest, which contains various Gadget-specific properties such as name, type, author, description and more. While the actual format of the gadget.xml file is similar to the one used in usual DHTML-based Gadgets, there are two notable differences - the type of the host required, and an optional wpfClass attribute. The latter is used when Gadgets have to load a WPF executable or control (class) library.
The following shows the contents of the WPF Gadget manifest file and highlighted are the actual changes to the format.
<?xml version="1.0" encoding="utf-16"?>
<gadget>
<name>Test Gadget</name>
<namespace>stoyanov.sidebar.wpf</namespace>
<version>1.0.0.0</version>
<author name="Stanimir Stoyanov">
<info url="https://www.stoyanoff.info" text="www.stoyanoff.info"/>
</author>
<copyright>© 2006</copyright>
<description>A sample WPF gadget</description>
<hosts>
<host name="sidebar">
<base type="WPF" apiVersion="1.0.0" src="TestGadget.exe" wpfClass="TestGadget.Window1"/>
<permissions>Full</permissions>
<platform minPlatformVersion="1.0"/>
</host>
</hosts>
</gadget>
The type of the host has to be set to WPF in order for Windows Sidebar Styler to handle the Gadget. Depending on the Gadget contents - whether it shows a plain XAML document or a FrameworkElement from a class library, the source of the Gadget should point to the XAML document or the executable/class library file (DLL), respectively. In the latter case, an additional attribute has to be added, wpfClass whose value is to be the fully qualified name of the class which you would like to present.
For the test Gadget, you will create a compiled class library which will contain the Gadget content.
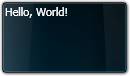 The "Hello, World" Gadget
 Start up Visual Studio and create a new project using the File menu. For the respective language (either C# or Visual Basic), choose the .NET Framework 3.0\Windows Application (WPF) template, type an appropriate name for your Gadget (e.g. TestGadget) and proceed. The project and will be created as well as startup files. You can now make the necessary changes in order to be able to debug the Gadget via Visual Studio in a rather real environment - a translucent window, instead of the default window chrome.
In order to ensure that the kind of FrameworkElement which is to be presented in the Gadget is compliant with the WPF Gadget requirements, please do the following:
From the Solution Explorer pane, open the Window1.xaml file. Remove the inner Grid node and replace the two references to Window with Grid. Likewise, in the Window1.xaml.* file replace System.Windows.Window with Grid, after which remove the Title attribute along with its value.
Open the App.xaml file and remove the line which reads StartupUri "Window1.xaml" so that WPF does not create a new standard window with the Gadget content.
Open the App.xaml.* file and insert the following as a method of the App class:
protected override void OnStartup(StartupEventArgs e)
MainWindow.ShowDialog();
This method will allow the Gadget content (here known as Window1) to be shown in an environment very similar to Windows Sidebar - a translucent window placeholder with dragging capabilities.
Now that this is done, you can save all edited files, go back to Window1.xaml and include any visual elements, such as the infamous Hello, World text.
In order for the Gadget window to have background, open the Solution Explorer pane. Right-click the project node and select too add a new folder. Name it images and drop the enclosed background.png file do it. At compile-time the resource will be embedded to the binary so that you do not have to worry about distributing the file separately.
In the Window1.xaml change the grid Height and Width attributes to 76 and 130 pixels, respectively, and include the following markup code inside the Grid element:
<Grid.Background>
<ImageBrush ImageSource "images\background.png" />
</Grid.Background>
This change will add an image background to the Gadget. Note that the size of the Grid element was set to match the dimensions of the background image.
Before compiling (F6) or starting (F5) the project, you can add the following line of code which will draw the Hello, World guidelines to a close. Note that the white font color was chosen because of the dark background image.
<Label Foreground "White">Hello, World!</Label>
The Gadget package consists of two groups of files:
Gadget manifest file (gadget.xml)
o Related Logo, Icon and 'Drag' images
Gadget sources
o XAML Document/Compiled Class Library File
o Any related images, sounds or other resources
In order to pack the Hello, World Gadget for use in Windows Sidebar, please do the following:
Create a folder which will hold the Gadget contents.
Select the Gadget manifest contents and copy it to the system clipboard.
Open Notepad or another text or XML editor and paste the contents.
You can now amend any of the available Gadget-specific properties, including name, namespace, description, version and author and copyright information.
Note that the source file has to refer to your Gadget executable or compiled class library file, which is TestGadget.exe in the case. The type class which is to be presented is TestGadget.Window1 and is set to the wpfClass attribute.
Save the manifest file as gadget.xml, making sure Unicode is selected as Encoding.
Copy or move the aforementioned source file to the Gadget folder.
Select the two files and from the context menu, select Send To > Compressed (zipped) Folder in order to create an archive.
Rename the archive to an appropriate name, e.g. Test Gadget, ensuring that the file extension is .gadget, so that Windows Sidebar can handle it.
Now that the Gadget file is created, you can double click it to install it - an instance of the Gadget will be created and will be accessible from the Add Gadgets dialog.
Once testing is done and any issues are resolved, you can distribute your Gadget on various places such as the Windows Live Library or AeroXperience, noting that it requires Windows Sidebar Styler in order to run.
In the current release of Windows Sidebar Styler there is no unified API for saving Gadget-specific settings. You can use the registry or a user account-specific file to store and read information from.
 Using 3D Graphics in Gadgets
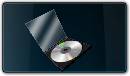
The powerful framework of Windows Presentation Foundations allows for nesting 3D graphics on a 2D plane and this is supported in Gadgets, too. The following is an example of embedding the 3D CD Button template, written by Nathan Dunlap, in Gadgets.
To embed it, please follow the steps:
Resume your Test Gadget project in Visual Studio.
Drag the enclosed cd2.png, cd_case.jpg and defaultplastic.png files and drop them to the images folder found in the Solution Explorer - these will be used by the 3D scene.
Open the Window1.xaml file, if it is not already open, and remove the whole Hello, World line. In its place paste the contents of the enclosed 3DCDButton.txt text file.
Recompile the solution (F6) and start the project if you wish to preview the changes (F5).
You can update the executable file used as a source in the Gadget package in order to install and preview this Gadget in Windows Sidebar.
In version 2.0.4 of the WPF extension, support for localized resources was implemented. Please follow the instructions at MSDN Library (https://msdn2.microsoft.com/en-us/library/ms788718.aspx) in order to localize your Gadget binaries. Distributed packages should contain the main assembly as well as all generated satellite libraries in their respective locale folders.
|
E-mail: | |
|
Contact: |
https://www.stoyanoff.info/contact/ |
|
Nathan Dunlap's Web-site: | |
|
Gadget Archive - AeroXperience: |
https://gadgets.aeroxp.org |
|
Windows Live Gallery: |
https://gallery.live.com |
|
AeroXperience: |
https://www.aeroxp.org |
|
Author's Web-site: |
https://www.stoyanoff.info |
|
