ALTE DOCUMENTE
|
||||||||||
To begin, start Plan Write by double clicking its icon on your main screen. This will initiate Plan Write and display its welcome screen as shown below.
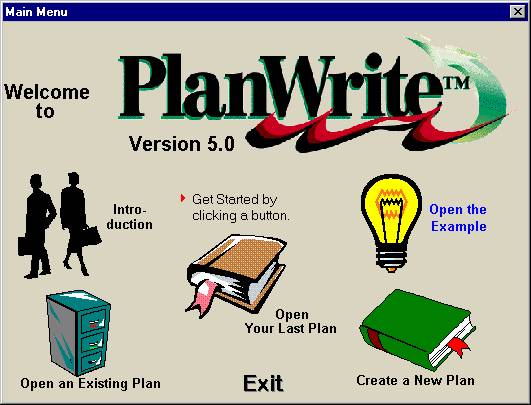
Notice that there are several buttons. Clicking on the Introduction button will step you through a brief explanation of the various features of Plan Write . The Open the Example button will open a sample plan of a fictitious golf club manufacturer. The Create a New Plan button will be used each time you want to begin a new plan. The Open Your Last Plan button will open the last plan you were working on. The Open an Existing Plan button will allow you to choose a specific plan for review.
When you create a new plan you will be asked for a name. Type in a descriptive name that you will recognize in the future and choose the Save button.
The following screen will be displayed.
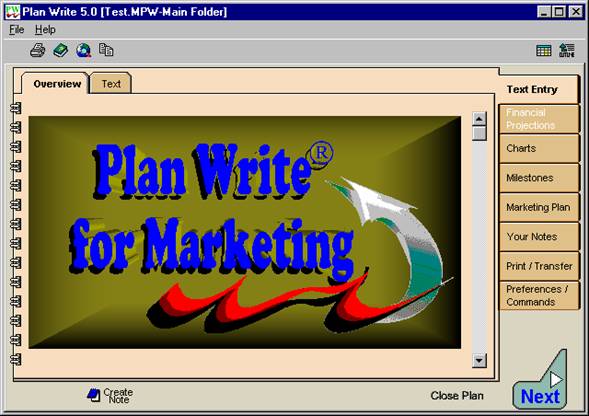
The Plan Write user interface is in the form of a set of folders that can be opened by clicking on the folder tab. The display shown above is called the "Main Folder". Within the main folder are eight primary folders whose tabs are positioned down the right side of the display. Each primary folder has two or more sub-folders whose tabs are positioned across the top of the display. The first sub-folder is always an overview of the primary folder's purpose. The screen shot above shows the Overview sub-folder within the Text Entry folder. The overview explains that the Text Entry folder describes the concepts you must address as you document your marketing plan. The other primary folders are:
Financial Projections - questions and tools for helping you create the necessary financial projections for your marketing plan
Charts - graphical displays showing critical aspects of your financial projections
Milestones - an event calendar for measuring the plan's success
Marketing Plan - your plan presented in an appropriate format for reading by managers, bankers and investors.
Your Notes - provides a list of all of the notes you have created as you were entering information and reviewing the plan.
Print/Transfer - provides the functions necessary to print or transfer to a file any of the questions or the plan document.
Preferences/Commands - this folder provides tools to tailor Plan Write and make a copy of your plan.
Some Plan Write features and settings are applicable whether you are viewing an outline, text, worksheets or charts.
The File tab in the Preferences/Commands folder will display check boxes that give you the ability to set two options.
The Auto-Save Feature
The program normally saves text, worksheets and charts whenever they have been modified. You have the option to change the process from an automatic save to one of displaying a message asking you whether a save should occur. This can be of value if you are experimenting with charts or worksheets, but normally it is more bothersome than beneficial. Therefore, it is recommended that you leave the setting on Auto-save. To change the setting, click the Automatically Save all Changes option on or off.
Show ToolTips
This feature causes a concise explanation to pop up whenever you allow your mouse pointer to rest for more than three seconds on an icon in the button bar. This option is normally set to on. To change the setting, click the Show ToolTips option on or off.
The Options tab in the Print/Transfer folder will display check boxes that give you the ability to set the following options.
Worksheet/Chart Printing Orientation
Plan Write provides the ability to print worksheets and charts in landscape format while printing the remainder of the document in portrait format. It is also possible to specify the print orientation for a worksheet on an individual basis. 22522m1221w
The orientation can be specified as Current Printer Orientation, Default to Portrait or Default to Landscape. If either Landscape or Portrait is chosen here, all worksheets will be printed in that format regardless of the specification of the individual worksheet. Choosing Current Printer Orientation will cause each worksheet to be printed as specified within the worksheet.
Scaling Worksheets for Printing
The program provides the option to scale the type font used to print a worksheet so that all columns of the worksheet can be printed within the specified margins of the page. It is possible to specify this option for a worksheet on an individual basis. 22522m1221w Set the Scale worksheets to print within margins option on to cause all worksheets to be scaled before printing. The option will override the specification for an individual worksheet.
Word 97 Enhanced Metafiles
When any portion of the plan is exported to a rich text format type of file, graphics that are included are normally formatted to be compatible with Word 97 enhanced metafiles. If you are using a word processor or other program that cannot accept this format you should set this option off prior to exporting the file.
Shade Worksheets
The Financial Projection worksheets have the total lines shaded to present a more professional appearance. On some printers this causes difficulty in reading the numbers. If you encounter this problem, set this option to off and the shading will be removed from the projection worksheets.
The Internet tab in the Preferences/Commands folder allows you to specify the initial web page to be displayed. The Command: line will default to the address to access the Business Resource Software information page.
|
|
As you are writing your marketing plan you may wish to look for information on the Internet World Wide Web. You may access Internet by choosing the Internet Access... command from the View menu or by clicking on the Internet access button from the button bar.
The Internet Access command will use the default information described in the Internet Preferences section just above.
Your initial reference to the Internet will be in a page maintained by Business Resource Software, Inc. This page has a variety of pointers to other pages that may be of value to you as you develop your marketing plan.
The Statistics tab in the Preferences/Commands folder displays usage information pertaining to your marketing plan. The information includes file name and path, creation time and date, preparer's name, date last revised, date last printed and, if desired, you may enter and save comments relevant to the marketing plan.
The Save As tab in the Preferences/Commands folder allows you to save the plan you are working with under another name . It then opens and makes available the plan under the new name.
|
|
There will be times when you will want to do some one-time calculations that require more than a pencil and paper. The General Worksheet command is always available from the View menu or by clicking on the General Worksheet button from the button bar. The general worksheet has most of the features you would expect to find in stand alone spreadsheet products.
You may quit Plan Write at any time by selecting the File menu and choosing the Exit command or by clicking on the Close Plan button. When you do this, your plan will automatically be saved if you've made any changes to it.
When you start a new plan the first display will be the overview of the Text Entry folder. When you have finished reading the overview, click on the Text tab along the top. This will display the Text folder.
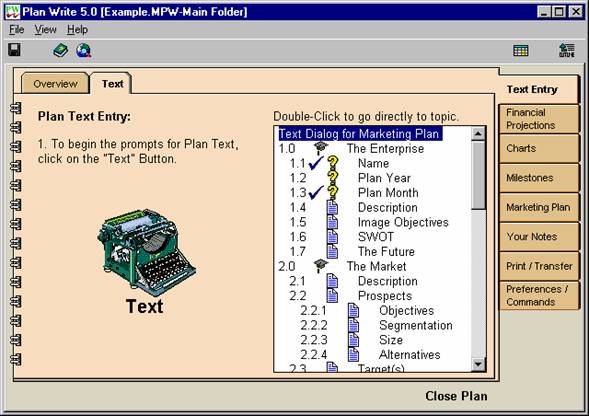
An outline of the concepts you will be addressing is displayed with the Using Plan Write topic highlighted. Clicking on the Text button (the typewriter) will display the topic that is highlighted, in this case The Enterprise. You can also double click on any topic label in the outline to go directly to that concept. Clicking on the Text button will result in the following display.
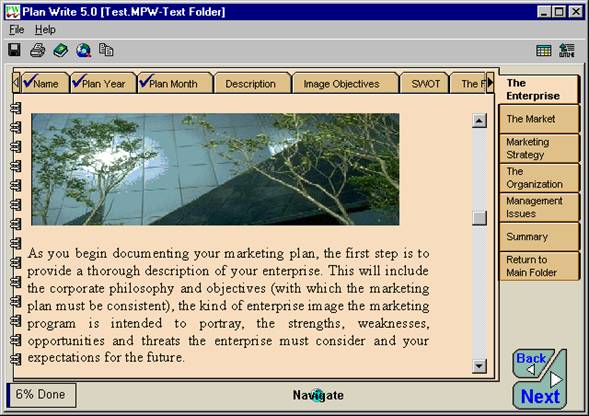
Within the primary folder, tabs for secondary folders are displayed down the right hand side while tabs for categories within a secondary folder are displayed across the top. In this case there are several secondary folders. The bottom tab on the right is always the Return to Main Folder tab. Clicking on it will return you to the main folder described earlier.
For the Text Entry process you will encounter three major forms of display. One is an explanation of what is to come, like the overview shown above, the second is a question asking for information relevant to your plan and the third is a description of some factor important to the documentation of your plan with a request for you to enter text.
When one of these is displayed the normal method of use is to read the explanation or question, provide the answer or text and then click on the Next button in the lower right hand corner of the display. This will move you to the next topic. To return to the previous topic, click on the Back button.

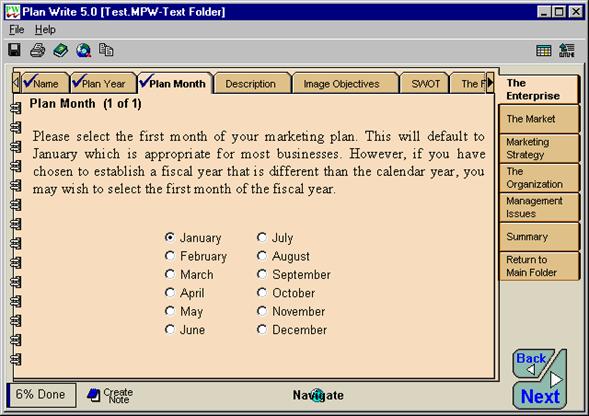 As
you move through the Text Entry process you will encounter two question formats. The simplest format would be a request to enter
the name of your enterprise or a numeric value. Another format offers a menu of
options for you to select from as shown below.
As
you move through the Text Entry process you will encounter two question formats. The simplest format would be a request to enter
the name of your enterprise or a numeric value. Another format offers a menu of
options for you to select from as shown below.
With this format just click on the most appropriate answer from the menu and then click on the Next button.
The following is a typical example of a request for you to provide text for your plan.
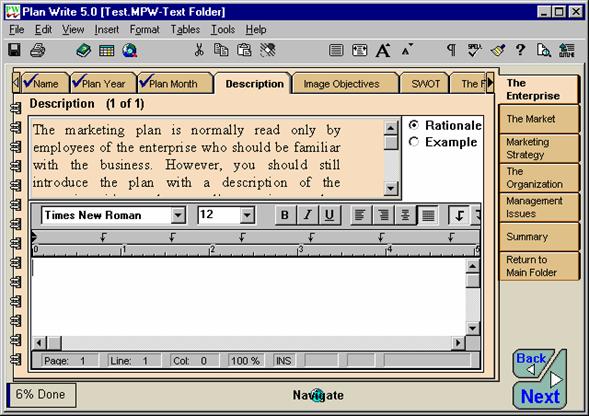
The rationale, shown at the top part of your window, explains why this topic should be included in your plan and offers suggestions for content. To see the text of the plan example, click on the Example button to the right of the rationale window and the rationale will be replaced by the example. To return to the rationale click on the Rationale button.
At this point you are faced with actually beginning to document your marketing plan. The cursor will be positioned at the beginning of the document space. All you have to do is start typing!
![]() You may wish to have a larger
window for entering text. To do this, click on the Zoom button in the button bar. This will remove the
rationale window and expand the text window to full screen size. To redisplay
the rationale click on the Zoom button again.
You may wish to have a larger
window for entering text. To do this, click on the Zoom button in the button bar. This will remove the
rationale window and expand the text window to full screen size. To redisplay
the rationale click on the Zoom button again.
The width between margins of the document page will default to six inches and on most monitors you will be able to see the entire page. If your display is limited in size you may want to redefine the display format.
![]() By choosing the Size to Margins
command from the View
menu or by choosing the related icon from the button bar, you can insure that
the complete width of the page will be displayed on the screen. This is accomplished by reducing the font
size for display purposes. It will not
effect the font size when the text is printed.
By choosing the Size to Margins
command from the View
menu or by choosing the related icon from the button bar, you can insure that
the complete width of the page will be displayed on the screen. This is accomplished by reducing the font
size for display purposes. It will not
effect the font size when the text is printed.
![]() You may return to a normal display
by choosing the
You may return to a normal display
by choosing the
The Button Bar, Ruler and Status Bar commands from the View menu will toggle the display of the related information displays on or off as you choose them. They are initially set on.
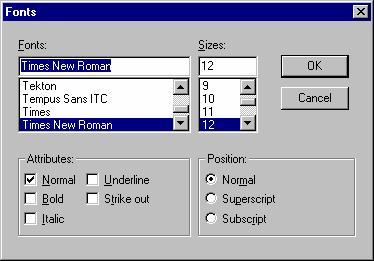
For your text characters, Plan Write allows specification of the font type and size as well as special effects such as bold and underlining. To set these characteristics, select the desired portion of the text and then choose the Character... command from the Format menu. This will display the following dialog box. Select each of the desired characteristics and click the OK button. The selected text will take on the specified characteristics.
Text alignment functions to align right, left, center and on both margins are available on the text button bar. Alternatively, you can choose the Paragraph. command from the Format menu.
![]()
Tab stops are defined by using the mouse to position the tab indicators on the ruler. Position the mouse pointer on the desired tab, press the left mouse button and drag the tab to the desired location. To create a new tab, choose the type of tab desired from the button bar (shown above), position the mouse pointer on the desired ruler location and click. To remove a tab, position the mouse pointer on the desired tab, press the left mouse button and drag the tab down and off of the ruler.
Alternatively, you may choose the Tabs... command from the Format menu. A dialog box will be displayed that allows you to modify or add any desired tab stops. Default tab settings are every one half inch. To reset to the defaults, delete all of the current settings.
Plan Write provides the editing commands you are familiar with for most Windows applications. From the Edit menu, the Undo command will reverse the most recent Cut, Copy, Paste or Clear command you have issued for selected text. The Cut and Copy commands will delete or copy selected text from the plan into the clipboard while the Paste command will transfer text from the clipboard into the plan. The Clear command will delete selected text while the Select All command will select all of the text in the current text window. The Select All command is beneficial when you want to make global format changes. The Cut, Copy, Paste and Undo commands are also accessible through the button bar buttons.
Plan Write gives you the ability to check the spelling in your plan at any time. To check the spelling in the text of a specific topic, display the desired topic from the Review Document outline of the Marketing Plan folder and choose the Spell Checker... command from the Tools menu or click the spell checker button from the button bar.
You may also check the spelling for the entire plan. Display any topic from the Review Document outline of the Marketing Plan folder and click on the Navigate button which will display the marketing plan outline. Then click on the Spell Check button at the bottom of the display.
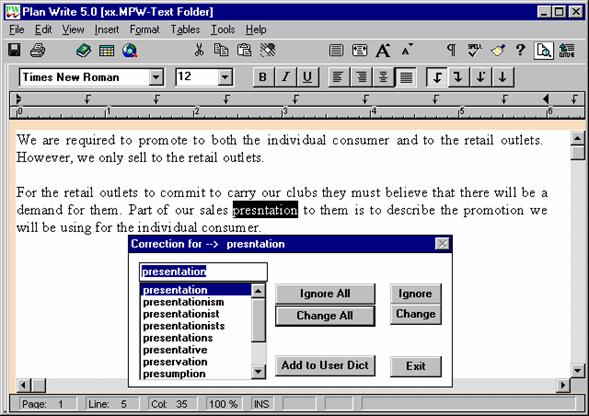
When you launch the spell checker, it will scan your text until it finds a spelling error. If an error is detected, a dialog box similar to the following will be displayed. Note that the misspelled word is highlighted and the suggested change is displayed in the Correction for box. Clicking the Change button will change that occurrence of the word. Choosing the Change All button will change all words that are misspelled in the same manner within the text segment you are checking. If it is a valid word that is not in the dictionary, you may add it to the dictionary with the Add to User Dict button. Or, if it is a valid word but you don't want it in the dictionary, you would normally click the Ignore All button.
You may search for a word or phrase within your current text window by choosing the Find... command from the Edit menu. A dialog box will be displayed. Enter the search criteria and if case is important, select the Match Upper/Lowercase option and then click the OK button. If the search is successful the text will be displayed with the search criteria highlighted. If the search is unsuccessful, you will be advised that a "Match was not found". If your search was successful and you want to search for another occurrence, you may choose the Repeat Last Find command from the Edit menu or you may use the CTRL+F3 shortcut key combination.
To search for and replace a value in your current text window choose the Replace... command from the Edit menu. A dialog box will be displayed. If case is important, select the Match Upper/Lowercase option. Then type the search criteria in the upper text box, the replacement value in the lower text box and click the Find and Verify button. Each time an occurrence of the search criteria is found Plan Write will give you the option to "Change" the text and move to the next occurrence or just "Skip" to the next occurrence.
Searching the Entire Document
To search the entire document, display any topic from the Review Document outline of the Marketing Plan folder and choose the Navigate button which will display the marketing plan outline. Then click on the Find or Find&Change button at the bottom of the display. To search for the next occurrence of the word or phrase, click on the Next button at the bottom of the display.
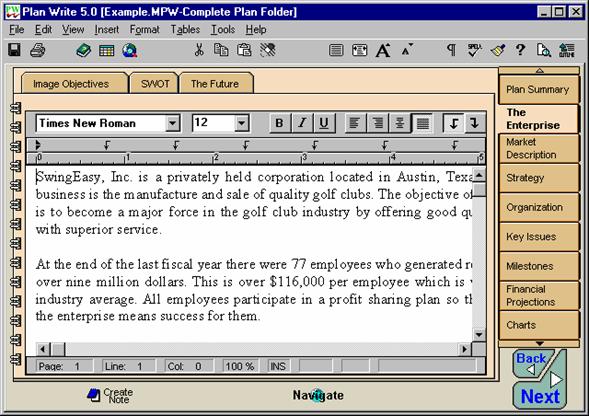
Plan Write is accompanied by an example marketing plan.
The marketing plan is for a fictional enterprise named SwingEasy, Inc., a privately held corporation. Their main business is the manufacture and sale of quality golf clubs. The objective of the enterprise is to become a major force in the golf club industry by offering good quality products with superior service.
![]() If you want to go to a specific
topic within any folder use the Navigate feature. Clicking on the Navigate
button might result in a display similar to the following.
If you want to go to a specific
topic within any folder use the Navigate feature. Clicking on the Navigate
button might result in a display similar to the following.
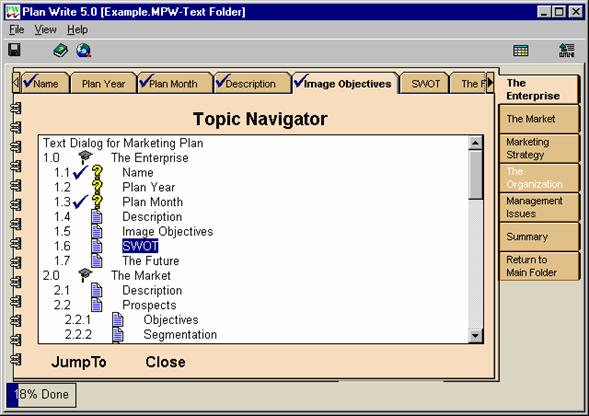
An outline of all of the topics in the folder is available to scroll through. Use the up and down arrow keys or the scroll bar to locate the desired topic and, with the topic highlighted, click on the JumpTo button or double click on the topic label. If you want to return to the topic you started with click on the Close button.
Plan Write keeps you informed about where you are in the text entry process. In this example, the lower left-hand part of the display shows that you are 6% of the way through the complete text entry process.
![]() The Create Note
button allows you to enter your thoughts or comments
about any subject pertinent to your plan. You may want to indicate the source
of the information used to produce the answer or you may want to leave a
reminder for you or a colleague that the answer needs more research. Plan Write
provides the ability to display all of your notes and go directly to the
related question. Once a note has been created, the button changes to read Edit Note,
to indicate that a note exists for this factor.
The Create Note
button allows you to enter your thoughts or comments
about any subject pertinent to your plan. You may want to indicate the source
of the information used to produce the answer or you may want to leave a
reminder for you or a colleague that the answer needs more research. Plan Write
provides the ability to display all of your notes and go directly to the
related question. Once a note has been created, the button changes to read Edit Note,
to indicate that a note exists for this factor.
You may want to print the Text Entry questions so that someone can answer them off-line. To do this, select the Text tab from the top of the Print/Transfer folder. This will result in the following display
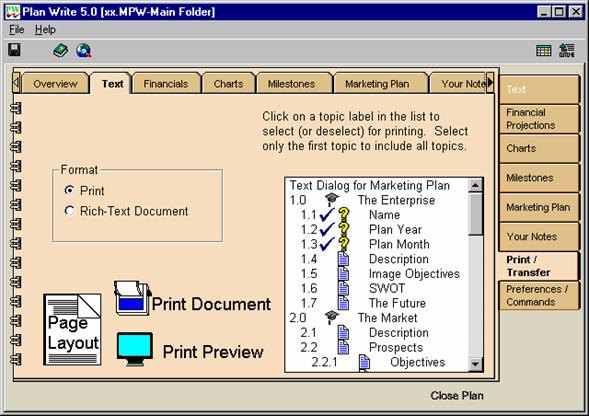
You may limit which questions are printed or exported by selecting the specific outline entries you wish to be printed or exported. When you click on an entry it will be highlighted, showing it has been selected. To turn the selection off, click on the entry again. If none of the entries are selected, all of the questions will be printed.
Then choose whether you want to send the output to the printer or to a rich text formatted (RTF) file on the hard disk. Next, clicking on the Page Layout button will allow you to choose from a variety of format options. For a detailed explanation of the options click on the Page Layout button and press the F1 key.
If you wish to preview the output prior to printing or exporting, click on the Print Preview button. Lastly, to print or export the questions click on the Print/Export Document button.
NOTE: You could print the Financial Projections questions in the same manner by clicking on the Financials tab in the Print/Transfer folder.
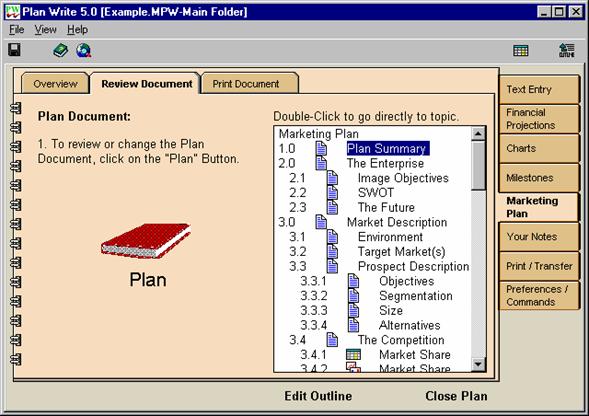
After going through the dialog answering the questions and entering the text you will want to see how the finished plan will look. That is what the Marketing Plan folder is designed for. When you choose the Review Document tab an outline of your plan will be displayed (the Plan Summary will be highlighted the first time). The plan is ordered in a way that is appropriate for reading by managers, bankers or investors. To begin the review just click on the Plan button on the left.
Often as you are viewing your writing as others will be reading it you will decide to word it differently. You may edit the text directly in your review copy and Plan Write will automatically update and save the changes. All of the word processor features described earlier are at your disposal.
You may wish to change a label in column A of one of the worksheets. To do this position on the first "non-grayed" cell in column B and choose the Unfreeze Titles command from the Options menu. Modify the desired label then reposition to the appropriate cell in column B (usually B3) and choose the Freeze Titles command from the Options menu.
Another common desire is to inhibit certain (unused) rows from printing. A simple way to do this is to position on a cell in the desired row, choose the Row Height. command from the Format menu, set the row height to zero and click on the OK button.
**CAUTION** The various worksheets are linked together through numerous formulas. Therefore, you should not change their structure by adding or deleting rows. If you want to add more detail you should use the Create Detail. command.
For example, if you were working on the Product Sales Revenue row in the Revenue projection you may have a number of products that contribute to that revenue source. You would like to enter revenue projections for each product, total them and then show the total in the Product Sales Revenue row.
Plan Write allows you to create a support worksheet for any selected range of cells in one row for which you have responsibility to enter data.
To do this take the following steps:
From the primary worksheet select the range of cells (within a single row) for which you wish to create detail
Choose the Create Detail... command from the View menu, a new "linked" worksheet will be displayed with a labeled column for each of the selected range of cells
Enter as much detail as desired for each labeled column and sum the detail on the bottom line
Choose the Save command from the File menu
A dialog box will be displayed specifying a range of cells to be exported into your primary worksheet. Verify these are the cells desired. If not correct the cell range.
Choose the OK button.
Click on the Back button to close the detailed worksheet.
Control will return to your primary worksheet
Thereafter, any time you wish to change the data for this cell range, double click on any one of the primary worksheet linked cells and the detail worksheet will be redisplayed.
At the time you create the detail worksheet, an entry will be placed in the Marketing Plan outline just below and subordinate to the entry for the primary worksheet. It will be included in the printed plan unless you choose to remove it from the outline.
**Caution** Once removed from the Marketing Plan outline you may not reenter a detailed worksheet into the outline.
Removing Detail from Your Worksheet
For any of a number of reasons, you may decide the need no longer exists for a detailed worksheet you have created. This requires that you remove the link between the primary worksheet and the detailed worksheet. This involves the following steps.
Select the cells in the row for which detail has been created. (Be sure that you do not include the Total column at the end of the row.)
Choose the Cell Protection command from the Format menu. A dialog box will be displayed with the "Locked" indicator checked on. Click on the Locked indicator to turn it off and the choose the OK button.
Once again, select the cells in the row for which detail has been created. (Again, be sure that you do not include the Total column at the end of the row.)
Choose the Clear command from the Edit menu (alternatively press the Delete button). A dialog box will be displayed with the "Clear only content" option set on. Leave it that way and choose the OK button.
Finally, when you created the detail, an entry for the detailed worksheet was placed in the marketing plan outline as a sub topic of the primary worksheet. When you are viewing the marketing plan you should remove this entry.
To edit the contents of the marketing plan at the outline level you must first display the outline. Choose the Review Document tab in the Marketing Plan main folder and click on the Edit Outline button to display the marketing plan outline.
The plan outline may use terminology that you would like to change. To edit the label for any topic, position on the topic to be edited and choose the Edit Descriptor command from the Edit menu or press the F2 key. Make the desired changes and press the F2 key or the Enter key to exit the edit mode.
The plan outline may not cover all of the specific factors that are appropriate for your plan. The outline is hierarchical in nature and you may want to add a topic at any level in the hierarchy. To add a topic to the outline click on the topic where you wish to add the new topic. You then have the following options:
Press the key or Select Menu and Choose Command to Create
F9 function key Insert - After A new topic at the same level
F8 function key Insert - Before A new topic at the same level
F7 function key Insert - Child A new topic at the next lower level
F6 function key Insert- After Parent A new topic at the next higher level
Following any of the above actions type the label for the new topic and press the F2 function key or the Enter key to exit the topic label edit mode.
*** NOTE *** There will be no rationale for the new topic.
You may associate a text window, a chart or a worksheet window with the new topic. To do this double click on the new topic label and the following dialog box will be displayed.
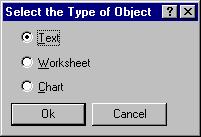
Select which type of data you wish to create and display for this topic and choose the Ok button. The new window will be displayed and you may begin entering data.
The plan outline may cover more
factors than are appropriate for your plan. You have the ability to delete any topic from the outline, however, you should be very
cautious in doing so. If you delete a
topic the related "rationale" is lost, even if you add a topic back
in the same location with the same label. Another caution is that because the outline is hierarchical in nature,
if you delete a topic that has subordinate topics, all of the subordinate
topics are deleted as well. (More good reasons to back up your plan.) You may
delete any topic from the outline by positioning the highlight on the topic and
pressing the
*** Note *** If you accidentally delete a topic, it can be restored if you immediately choose the Undo command from the Edit menu.
The plan outline may cover the factors that are appropriate for your plan, but you may want to order them differently. You have the ability to move any topic in the outline by positioning the highlight on the topic to be moved and using the following conventions:
Press the key or Select Menu and Choose Command to Take Action to:
TAB Order - Demote Demote the topic
SHIFT+TAB Order - Promote Promote the topic
Numeric keypad + key Order - Exchange with Above Exchange with the topic above
Numeric keypad - key Order - Exchange with Below Exchange with the topic below
The Milestones folder is designed to allow you to specify significant activities or events that are to occur during the course of your plan. Each milestone entry contains a brief description, an indication of what individual or department is responsible for achieving the milestone, the starting and completion dates of the milestone and the planned cost for completing the milestone.
Milestones can be used to track any anticipated event that is of significance to your enterprise. Examples might be; obtaining a venture capital investment, completing the development of a product, getting publicity coverage in an important publication, selling your nth product, getting your new prospect tracking system installed, completing an acquisition, establishing a relationship with an international distributor or any of thousands of other events.
To enter a new milestone, position to the first cell in the Task column (containing the words "Enter first task here") and type a brief task description. You may then move to each of the other columns to enter the task information relating to responsibility, schedule and cost.
To enter your second and succeeding milestones, position on the blank cell just below the last task entered and type a brief task description. A new entry line will automatically be created.
Don't worry about the order in which you enter the milestones. When you have entered them all you can position to any column in the milestone chart and request the milestones to be sorted in ascending or descending order using that column's information. So, if you would like to have the milestones grouped by responsibility, position to the top cell of the responsibility column, select the Sort menu and choose the Sort Ascending or Sort Descending command.
When you are ready to print your plan, choose the Print Document tab in the Marketing Plan folder.

Normally you will want to print the entire plan, however, in some instances you may only want to print a portion of the plan. You may limit which topics are printed or exported by selecting the specific outline entries you wish to be printed or exported. When you click on an entry it will be highlighted, showing it has been selected. To turn the selection off, click on the entry again. If none of the entries are selected, the entire plan will be printed.
Then choose whether you want to send the output to the printer or to a rich text formatted (RTF) file on the hard disk. A rich text formatted document can be read into any generalized word processor for more customized formatting if desired.
Select the number of copies to be printed.
Next, clicking on the Page Layout button will allow you to choose from a variety of format options.
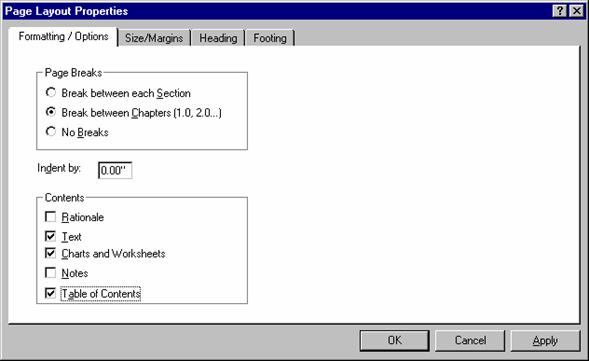
This dialog box will allow you to specify page breaks and which portions of the data content you wish to be printed (the default is the text, charts, worksheets and a table of contents). In addition you can establish paper size and print margins, customize headers and footers and specify page-numbering criteria.
For a detailed explanation of the options press the F1 function key while this dialog box is being displayed.
If you wish to preview the output prior to printing or exporting, click on the Print Preview button. Lastly, to print or export the questions click on the Print/Export Document button.
|
