By Benjamin Kapidzic
Welcome to the sequencing workshop for beginners. If you want to learn more about creating and mixing your own sound you should go on reading.
This workshop could be useful if you want to record your own band's songs or if you're just interested in spectacular sound-matter. In this workshop you will learn the basics about recording, editing, mixing and mastering digitally with your PC/Mac. Every step will be described more precisely in different advanced workshops here soon.
Back in the days, studios used tape recorders (which are still used in high-class studios) or hard-disc recorders to record, mix and edit. Nowadays, PC and Mac + software provide better financial and functional options - the so-called "sequencer".
A sequencer is a virtual multitracker where you can record, edit and mix your material. The most used sequencers are:
Steinberg Cubase (VST, LE, SX, 4)
Apple Logic
Digidesign Pro Tools
Other applications include: SonicFoundry Acid, Steinberg Nuendo, Reason, Cakewalk Sonar and others. Another useful program is Steinberg Wavelab, which is actually not really a sequencer but a really useful editing and mastering tool. There are several professional mastering programs which will be described in the next workshops.
I will use Cubase to lead through this training but you can also find similar functions in Logic, Pro Tools, Acid, etc.
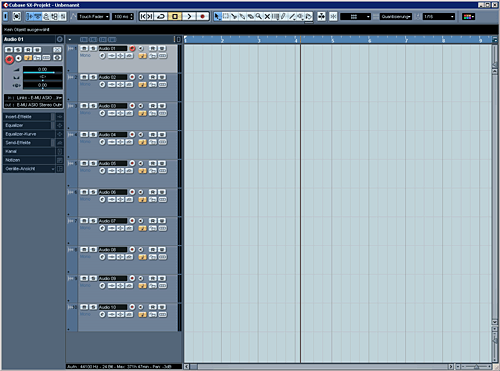
We want to record a band, edit the tracks, mix it and master it so it sounds passable. So 19219v2114t let's start with creating a new project and tracks.
In my Cubase SX3 I create a new project, give it a name (like "song1") and save to the hard disc. Now we need several tracks. But first we should check the preferences. Let's use a sampling rate of 44,1kHz and a bitrate of 24 bit. The 24 bit gives us more dynamic while recording. The 44,1kHz is a standard. This should work properly with every soundcard.
Now let's create 10 mono audio-channels.
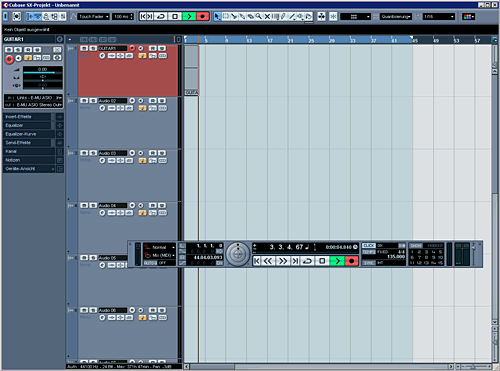
The band we're recording has a bongo, bass, guitar and vocals. If you don't have a separate audio-interface you can use your onboard-soundcard. For the vocals, guitar and bongo-recordings connect a microphone to a preamplifier, via the gain/trim you can choose the amplification (a drum-set or electric-guitar can be much louder than a triangle, so the triangle needs more gain).
Let's start with the guitar. Place the microphone in front of your guitar-amp, crank it up and gain your preamp, so it is not distorting.
> For more information about soundcards and preamps please check this website or ask your local music store <
Now open the edit-channel-window and set up the input correctly, so you get the signal. Click on the small loudspeaker-symbol to hear your signal. Adjust the output of your preamp so your soundcard-input is not distorting. To do this turn the output of your preamp (if there's no output-volume, use the gain/trim to control the volume). The maximum should be around -10dB at your sequencer.
Now we can add a metronome/click to play on a beat. To do this open the transport-window and switch the "click off/on". Press Tempo to "Fix" and adjust the speed to your song's. Now get on play - you should hear your guitar plus the metronome.
So now we're ready to record. In the track-list activate the small "record enable" button. It should be red now. Now name the track for example "guitar1".
If you click the record button on the transport-window you can wait some beats and start recording. There you go. If you want to record a different guitar-take now just adjust your setting on the next tracks and there you go. That's how we do it for all the instruments. You can also drop the recorded take to the next track below and go on recording on the same track. In this case don't forget to name the tracks correctly.
The bongos are recorded in the same way, just without the guitar-amplifier of course. Place the mic in front of the Bongos and gain/trim on your preamp. The vocals the same. The bass can directly be plugged into the preamp and recorded.
If you listen to your recorded tracks and it is crackling there are many possibilities. Try to record again with less preamplification. Or check the cables and connectors. This may solve the problem. If your song is still crackling check your soundcard- and cubase-manuals for more information.
Now let's colour the tracks so we can work easier.
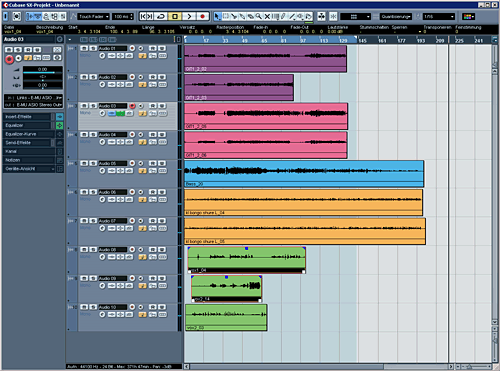
The pink and purple tracks are guitar tracks (L and R), the blue track is a bass-track, orange is bongos and green vocals. This is my favourite colouration. You might have your own. Now let's arrange them so we have a good overview. If not done yet, name the tracks.
I arrange the tracks by putting the percussive instruments above, then the bass, then guitars and then the vocals. It's kinda standard, though every engineer has their own system.
What is editing? Editing is cutting and re-arranging parts so they fit properly into the song arrangement. We will also have to cut out unnecessary parts to get a cleaner sound. We should work non-destructively: this means everything we are doing can be undone. This is necessary if changes are unwanted later on.
The most important tool in the edit process is cutting and fading. We need this to put two regions in a line or to fade in/out a part smoothly. Here are 3 ways to do this.
How you do it wrong:
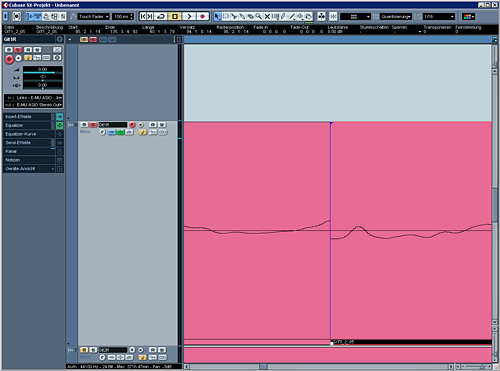
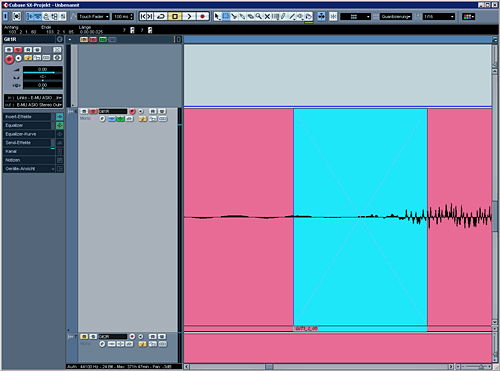
The 2 parts were put together in no zero crossing-case. Your loudspeaker will try to make an infinite huge move which will result in a crackle.
The right way:
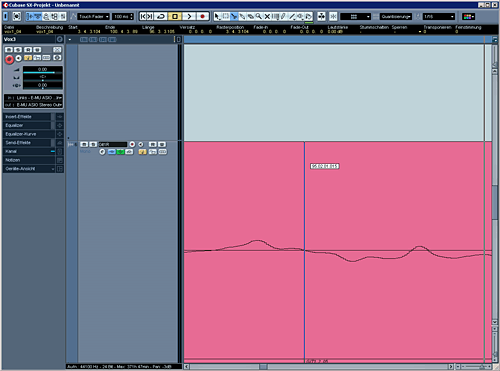
The cut was proceed on the zero crossing of the curve. If we put together 2 parts, which were cut at the zero crossing the transition will sound good.
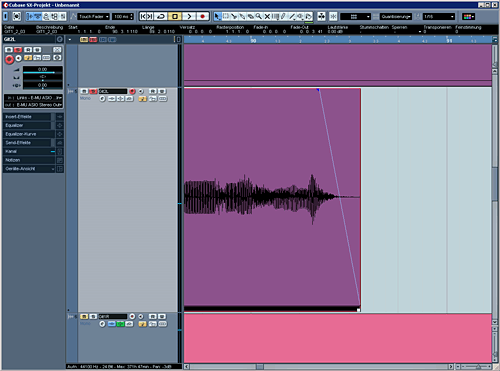
If you want to fade-in/out a track you can either use the
region-fades or the volume-fades.
The longer the fade the smoother it sounds.
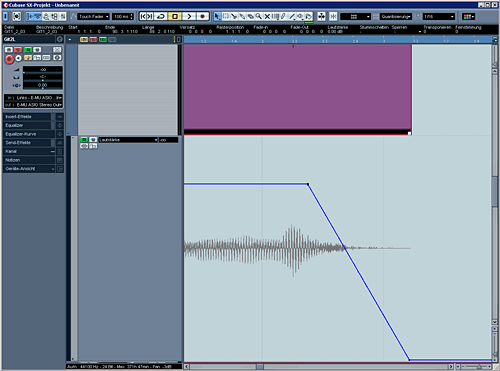
The region-fade:
The volume-fade:
The main-difference between the region-fade and the volume-fade is
that the volume-fade is post-insert, which means that the volume is being
controlled after the inserts. If you chose region-fades the more the volume is
being decreased, the less signal comes to the insert, which can colour the sound. Therefore an easy to understanding rule:
"Dynamic in the insert of the audio-track - Use the volume fade!".
The volume fade is found in the Automation submenu.
The fastest way to put together two parts is using the crossfade (do this by overlapping two regions and mark, then audio>crossfade.) Here it's automatically created a fade out and a fade in which are overlapping on the region you marked.
We have to be careful, though. If the crossfades are too long it will sound whammy and imprecise. When the crossfade is too short the change from one part to another can sound untight or wrong.
Parts of audiotracks with no useful information can be deleted. No one wants to hear sneezing a singer in a break, he/shes waiting to sing again. Or guitar crackling etc is not needed.
Make a cut, then mark the region and delete or mute it. This is really important if you have a drumset. The parts where the toms aren't played can be muted, so we get a cleaner sound. It's the same effect like a noise-gate, but handmade we can control the parameters (hold, attack etc.) much better.
Muting and cutting clean:
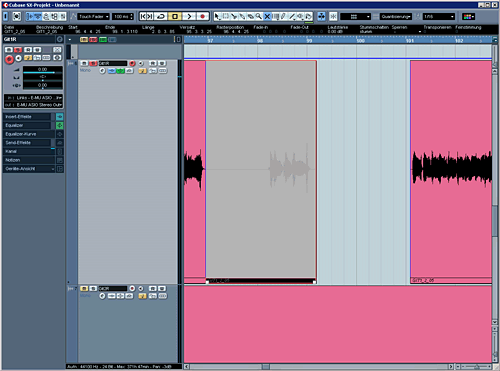
Cleaned Tom track:
(Don't forget the fade-ins and fade-outs!)
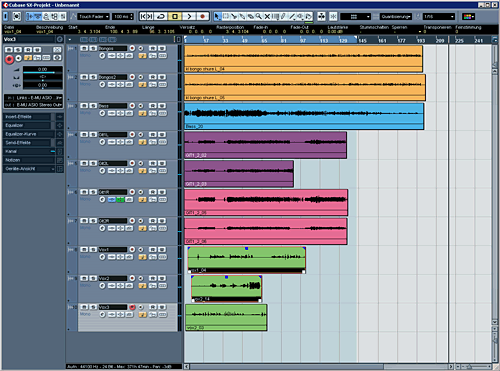
Our arrangement should now, after the editing, look like this:

Actually we cleaned the tracks. Even now it should sound better because we removed all unnecessary information. We can also cut the single vocals parts and rearrange them. For creating remix-version it's also really important to know how to edit properly.
When you now think "Now comes the most important part!" you're wrong. When the recording and editing is well done, the song will sound good, even without mixing, just by adjusting the volume-fader.
Let's open the Mixer in Cubase and see what we can do.
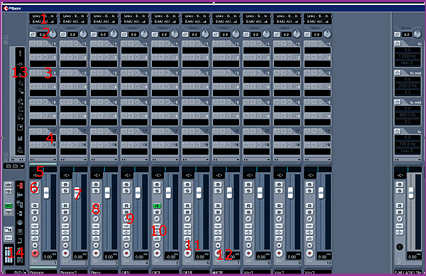
Input / Output
Chose the input and output channels you want to use.
Trim and Phase Reverse
Trim to gain or damp the signal.
Inserts 1-6
Insertpoints where you can load in eqs, dynamics etc. Those are prefader
wich means it doesn't matter what youre
doing on the channel fader, the input volume to the inserts stays the same and
is just controlled by the trim above.
Inserts 6-8
The same as #3 but the inserts are postfader,
so you can control the input to the inserts via the fader. Only use this as an
advanced user.
Pan/Balance
Mute and Solo
Channelfader
Controls the volume of your audiotrack.
Automation Read/Write
If you created a volume-fade or a pan-automation, the
green "R" will light. This means the track reads your Automation. If its turned off the Automation wont be read.
If you want to have a unique handmade fade you can turn on the "W",
start the song playing, doing the fade with the channelfader,
press stop and then turn to "Read". When you play this part again
your fade will be replayed as you did it with the fader.
Attention: Adjusting the normal channelvolume with
the channelfader is not possible anymore when you've
written a volume-automation. So only for experienced users.
Edit channel window
Separate window for channel-settings plus equalizer details.
Insert / Eq / Send-Bypass
Listen Input
Click to listen to the incoming signal from the soundcard and mute the
recorded.
Record activation
Show Inserts / EQs / Sends
Mixer view setting
Sends 1, 3, 5, 7 are prefader which means the channelfader has no influence on the send-volume. Sends 2, 4, 6 and 8 are postfader. Usually the posfader-sends are used for sending to channels with reverb, delay effects etc. = less signal, less effect.
This should be enough of the mixer-tools. If you want to learn more about the details open the manual of the sequencer or wait for the next workshop.
Now let's see what we can do with the inserts. Those are for replacing signals. Example: If you have vocals which are not loud enough you want to have them replaced with the loud signal through a dynamic.
There are two components nearly used in every channelstrip:
equalizer and dynamic.
If you don't like the standard Cubase eq you can also add a different into the insert of the
audio tracks.
We only have a bandwidth of 20Hz to 20kHz for our audio signals. If two instruments are overlapping in a frequency the two signals will be added and the audible signal will be the one which was louder. That would be wasted energy so we will give every instrument each a frequency-area.
There are different types of Equalizers:
Lo Cut/Hi Pass
Cuts a lot (about 24db/Octave) under the cutoff-frequency.
Example: Cleaning tracks of low rumble and unnecessary information.
Lo Shelve / Hi Shelve
Cuts/adds in the basses or highs
Shelving/Peaktype
Cutts/adds around the cutoff-frequency.
High Cut/Lo Pass
To cut high frequencies.
Little trick:
If you want to get a fat rock-guitar, you will probably turn in the bass
frequencies and the highs. But try it like this: Put a high pass filter on
200Hz. (The bass-guitar will give it the blast in those frequencies.) Now put a
peaktype filter around 500Hz and lower those area with kind -5 to -10dB. Now turn in the highs from
5 to 8KHz. Mostly good results with that. Try it.
What I wanted to show is there are easy solutions for a good sound, just learning by doing. Cutting rumble of vocals, snare and bass-guitar under 50Hz and guitars under 150-200Hz gives more space for a clean precise sound in the lows by bass and kickdrum. Cymbals/overheadtracks can also be cut under 1kHz. If you don't want a big natural drum-room, try this.
With a high Q-factor boost/cut you should sweep through the whole frequency-band and check which frequencies are disturbing and remove them.
Enough of equalizer, let's get to the...
Why dynamics? Dynamics control the volume of your audio-signal. We
want a loud song, so we have to control the volume of each audio track. The
louder parts should be adjusted to the quiet ones.
There are different ways to do this. Here a list of different types:
Noise gate
Closes the signalflow of the
audio if the signal is under the Threshold.
Example: Everything between 2 kickdrum-hits is being
muted.
Compressor
Reduces the audio signal above the Threshold with a
ratio.
Example: Loud vocals are being reduced so the quiet signals are more even.
Limiter
Compressor with an endless high ratio. There is no signal over the Threshold.
Example: A limiter in the Insert of the Masterfader
so in the bounce there is no distorting signal above 0dB.
Multiband-Compressor:
3 or more bands are compressed seperatly.
Example: A static fat bass of a kickdrum, but the
highs are kept dynamic.
The compressor is the most used.
What about the parameters? The most important are the Threshold, Attack,
Release, Ratio and MakeUp-Gain.
Threshold: controls the point at which input gain the compressor starts working.
Attack: How fast the compressor works. Low frequencies can start crackling at really fast attack times. So use attack times above 5 ms for bass or similar. Kickdrum should have an attack time of over 15ms to remain the "kick".
Release: The time the gain reduction is being released. For pad-sounds (bass/synth) try slow releases (long time 100ms - 1s), for subtle gain reduction a faster release (20-100ms).
Ratio: The factor of the gain reduction.
(Example: signal -10dB, threshold -20dB, Ratio 5:1 a fifth the signal over the
threshold will be let through = -18dB). The higher the ratio the more the
signal will be reduced. A Compressor with a ratio of (infinity):1 is a limiter
(No signal over the threshold is been let through).
MakeUp-Gain: The volume on the output of the compressor.
So the dynamics are usually making undynamic.
If a signal is too compressed, there is a tool called Expander or De-Compressor
which is doing the opposite.
Panorama / balance is used to place an audiosignal
in the stereo mix, from the very left, the mid to the very right.
What is the difference between panorama and balance? Panorama knobs are for
mono signals. When we have a stereo track and just one knob, it is a
balance-adjuster. When we turn the balance to the very left, the right channel
will be muted (we lose this information!) and just the left channel will be
audible. But when we have two panorama buttons in a stereo track and turn both
to the left, both channel (l and r) will be placed to the very left and mixed
(no lost information!).
Some basics for placing audio in the mix:
Kick, snare, bass and vocals always pan to the mid. Toms, overheadtracks,
guitars in the pan from left to right.
So now we have our project, in every channelstrip an eq and a dynamic and a stereopanorama Now we can control the colouration of each instrument (by eqing and the dynamic).
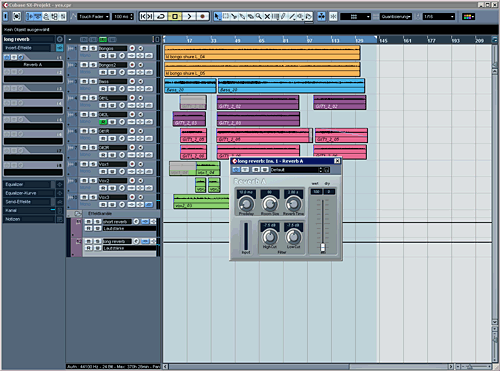
Using reverberation as an aftereffect gives you the possibility to control the room in the mix.
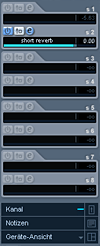
Let's work with two room simulations. I will create two stereo fx-channel and as inserts chose reverb-plugins. Name the first fx-channel "short reverb" the second "long reverb".
For signals which shall appear as in a small room we have the "short reverb". Set here the size to about 20 to 40 and the timeparameter to about 1-1 seconds. For the long reverb set the room size to about 70-100 and the time between 2 and 3 seconds. Set the mix-parameter to "100% wet". Why to a hundred percent? Well, we will send signals from our original tracks to those fx-tracks (also called "aux-tracks") and want a pure reverberation sound in those tracks. Unlike to the dynamics in each audiotrack we don't want to replace the original tracks, but add some new signal into the stereo-mix. Our project should look like this now:
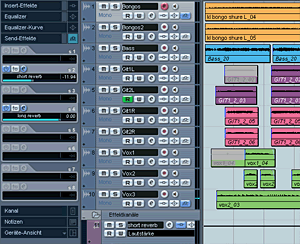
But we have to "feed" the fx-tracks. For this we will create aux-sends. Let's do this for the vocals. We will send signals to the short reverb. If we fade out the vocal-track, the reverb shall decrease too so we will use one of the postfader-sends (2, 4, 6 or 8):
The Bongos shall have a little bit short reverb and lots of the long reverb, there we go:
If you can't hear your reverb make sure...
the audiotrack and the fx-track is not muted and
the send is switched on (in Cubase you have to turn on every send manually!).
Make sure your reverberations sound subtle and natural.
We have an edited song, know how to equalize and control the dynamic and have two room-simulations. So far, so good. Now let's check some...
Try effects like Chorus, Flanger, Modulation, Delay, Distortion, Rotary or Tremolo for unique sounds in your songs. But beware: less is more. Don't use too much special effects, this could appear disturbing.
Okay, let's try some effects. Here just two examples:
Want a telephone-voice?
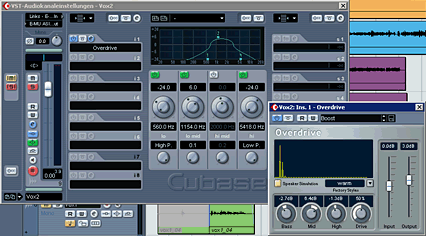
First let's distort the additional vocals tracks. To do this add a distortion plugin ("Distortion", "Overdrive" or
similar) into the insert of the vocal-track. Now use an eq,
a lo-cut at about 500Hz and a hi-cut at about 5kHz.
Now boost the area between (at about 1-2Khz
centre-frequency) with a few dB. Et voila, a telephone
voice.
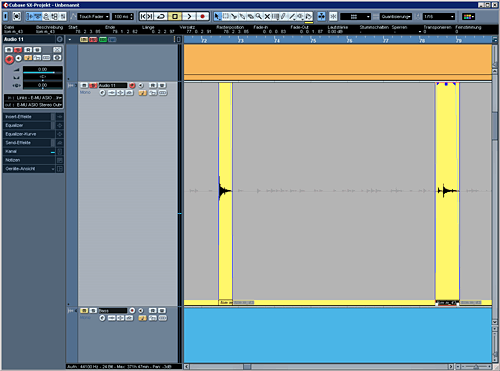
Another nice effect can be a delay. Let's try it on the bongo-tracks. But just in one part, not on the whole track. First let's create a stereo fx-channel, insert a delay-plugin. (Adjust the parameters as you like it after creating the send). The most important parameters are the delay time and the feedback. With the feedback-parameter you can chose how often the delay shall reappear.
Now create a send. But how to activate the send
for just one part in the bongo track?
Well for this we need a send-automation. To open the submenu for this press the
little plus-symbol in the audiotrack left in the
corner. Now click on "volume" (the standard-parameter which can be
automated), "more." and chose the sendvolume
you want to automate. Then click the "Read / (R)" button in the audiotrack to activate the automation and here we are. Now
you can draw an automation-curve for the send-level. The higher the curve the
more will be sent to the fx-channel:

The automation is a really useful tool. As we learned in the
beginning we can automate volume curves for post fader fade outs too. Nowadays
sequencer can automate nearly everything like fx-parameters,
volume, pan etc.
Another way to automate is just to click the "Write / (W)" button and
click play. Now turn the knobs which you want to automate. When you're done
click stop, de-activate the Write-mode and activate the Read-mode.
We have learnt the basics about editing and mixing. Now go on
yourself, adjust your tracks with the inserts, add
some room and special effects. Fade ins and fade outs
in the beginning and the end of the song should be done in the end of the
production-process. (If you don't want to master your song do it now.)
When you want to master your song, skip the final fade in and fade out.
When you're ready we're going to finish the song. Let's go
Bouncing is the same like "Mixdown", "Rendering" or similar. When a signal is above 0dB, the signal will distort. Therefore we will use a limiter in the insert of the main-output.
When the limiter works all the time you're mix is too loud and it won't sound adequate, so you should reduce the volume of your tracks. (Note: If you're using volume-automations, you can't use the channelfader anymore, so you have the control on the automation-points). If the limiter is just working rarely you've done everything good. Now let's do the mixdown as Wave, 44,1Khz, 16Bit, stereo-interleaved. If you want to try mastering, save the song with the same settings of the project (Wave, 44,1kHz, 24 Bit). Save the track as a stereo-interleaved-file.
Now we have a finished audiotrack. Put it into your audio-player and put some other, professionally mixed songs into it (for example of your favourite bands). I'm sure your song will be really quiet compared to the professional songs.
Without professional equipment it's closely impossible to make your song that loud that the listener doesn't have to crank up the volume. But there are some easy ways to improve the final sound level. If we have more than one track we will also have to adjust one to another song so they sound similar. For this we need mastering.
For more songs the process looks a little bit different. In our case we have just one song to master.
First we need to create a new project, name it something like "song1Mastering". Import the bounced stereo-file to a new stereo track. There are countless ways to master but this shall show the most comfortable and easiest way in my eyes.
Insert a stereo eq and a stereo compressor into the audio track. Put a limiter into the main output.
Open the eq set a lo-cut at about 20Hz. There is no useful information in this area. Now add some highs with a high shelve (about +3dBfrom 10kHz to 20kHz). This gives more "air" and freshness to the song. Now try cutting some of the frequencies between 250Hz and 600Hz with about -1dB to -4dB. The cut of mids and boost of highs is what makes songs sound "fat".
Now use the compressor gently. The attack should be above 15ms with a long release. The gain reduction should be less than 3dB, so the sound is not distorting too much. Now adjust the output of the compressor so the limiter is working but not audible. Just try with the eq and compressor until you get the desired result.
Make the final fade in and fade out, bounce your song in 44,1kHz and 16 Bit (because this is the format usual audio CDs are working with) to the hard disc.
That's it: your final version of your own recorded, edited, mixed and mastered song.
I hope this workshop was useful to you and had some fun reading this.
(Be aware that Steinberg, Apple, Digidesign and the other companies are all trademarks of their respective owners and here just named for educational reasons.)
|
|
About the author: |
|