ALTE DOCUMENTE
|
|||||||||
How to fully customize Windows XP
When Windows XP was introduced, we were excited with its new look at feel, however, Microsoft did not include many additional styles to choose from. We were limited to a silver theme and a few additional alternatives when Plus! for Windows XP was released. By now, many of us are sick of the same old styles. Today, we will show you how to break away from the limited choices Windows XP has to offer. We will show you the best sites to acquire themes, boot screens and even logon screens. We will also show you some great tools that will make it easier for you to customize its appearance, as well as add a few nifty features.
This guide will be split into three sections as follows:
Boot Screen Customization
Logon Screen Customization
Visual Styles and shell replacement
Before we continue, we would like to get a disclaimer out since most of what will be discussed is complex and is recommend for advanced users.
Perform any of these modifications at your own risk. We will not be held responsible for any damages. We recommend that you backup any files that are modified and follow the directions carefully. Only perform these modifications if you feel comfortable enough to do so.
Now that you have agreed to this, let's begin shall we?
The first thing we are going to need are some themes, boot screens & logon screens!
There are a few great websites out there were you can grab some of these.
Here are the ones I recommend:
Modifying the Boot Screen
Warning: Changing the boot screen palette in Windows XP will involve making changes to the kernel of your system. If not done correctly, your system can become unstable or even get to the point where it will not boot.
Sorry folks but I need to emphasize that as the Windows XP boot screen is quite difficult to change or modify. It is not as simple as most older windows operating systems like Windows 95/98. In fact, it is the most difficult modification of the three we will be looking at today. There are various methods you can use to change your Windows XP boot screen. I have explored each and every one and will be showing you the one method I think is the easiest and safest.
Before we begin, you will need a small freeware application called Boot Editor.
You can download it here: https://members.rogers.com/userxp/indexbe.htm
Boot Editor is a small tool for creating or modifying boot screens in Windows XP (Pro & Home editions). Main important features are:
Creates boot screens (the ntoskrnl.exe file)
Change the default palette of boot screens
Change the position of the progress bar
The file you will be modifying is located in your \Windows\System32 directory. Look for a file named "ntoskrnl.exe". This is the file you will be working with so the first thing you will need to do is make a backup of this file! This is very important! Make an additional copy of it that will be used to do your hacking on.
Extract the Boot Editor application into a directory of choice. Do not run Boot Editor just yet. First, place the copy of ntoskrnl.exe in the Boot Editor directory.
Next, open the Boot Editor application.
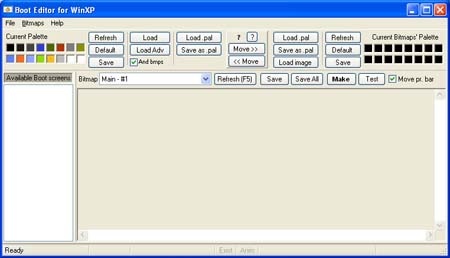
Click on File then "New Boot Screen". The following dialog should appear:

Here you will enter a Name for the new boot screen. For this tutorial, we will be installing the Blue MatrixXP Boot screen which can be downloaded at themexp.org.
We will call this new screen "BlueMatrixXP"
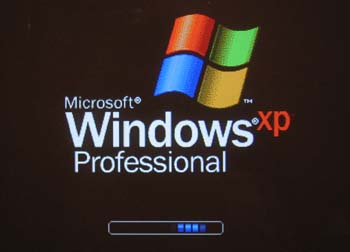
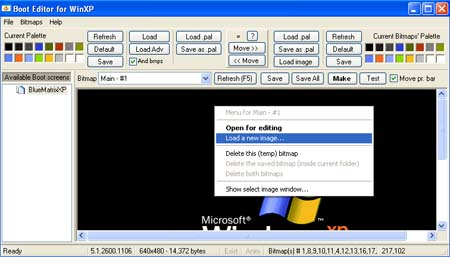
Once you enter the name of the new screen, a folder will be created in the Boot Editor directory with this name. Boot editor will now open the original windows copy of ntoskrnl.exe as shown below:
Notice the original windows boot screen. We now have access to this and can make the appropriate changes.
Before we continue, I would like to provide you with more information on the ntoskrnl.exe file so you can familiarize yourself with it and understand what we will be modifying.
When you open ntoskrnl.exe with Boot Editor, ResHacker or any other utility, you will see a series of numbers from 1-18. These are the actual individual bitmap images that the boot screen contains. The images you will be changing or modifying will depend on which edition of Windows XP you are running. Here is an explanation of the main bitmaps we will be modifying:
1 - Number "1" is the main boot logo screen. This is the background image for the boot screen.
8 - Number "8" is the blue progress bar used by XP Professional Edition.
9 - Number "9" is the green progress bar used by XP Home Edition.
10 - Number "10" is the text overlay for XP Professional Edition.
11 - Number "11" is the text overlay for XP Home Edition.
Most of the boot screens you download from the sites we recommended will contain 2 images. One will replace number "1" which is the main logo screen, and one will replace number "8" or number "9" depending on which edition of windows you are running. 8 and 9 are for the progress bar.
For this tutorial, we will be modifying bitmaps "1" and "8" since we are using WinXP Professional Edition.
Now that we are more clear as to what images need to be changed, lets go ahead and make the proper changes.
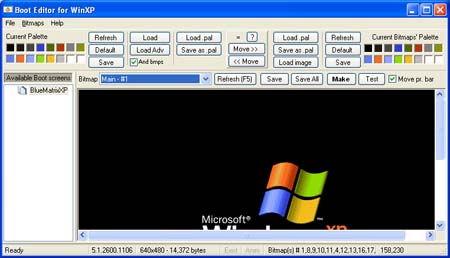
You will notice on the main Boot Editor screenshot above that number "1" has already been opened for you. Right-click anywhere on the original boot screen image and select "Load New Image" as shown below:
Browse to the location where you have stored the boot screens you have downloaded. We will be adding the Blue Matrix XP boot screen so we will load image number "1" as shown below:

You should now see the NEW main boot screen image!
Now I would like to explain why we chose "Boot Editor" as our preferred tool for this modification. Notice that the color palette for the bitmap has changed on the upper right hand corner of the screenshot above. Because we have loaded a different image, the color palette has changed. In order for this Blue MatrixXP Boot screen to show up properly when you boot your computer, we need to save the new color palette. This palette is "hardcoded" in the ntoskrnl.exe file. Boot Editor is great cause it will not only allow you to change the image, but also save the new color palette. What we need to do next is hit the "Save" button located to the left of the bitmap palette on the upper right hand corner. This will save the palette to current ntoskrnl.exe file.
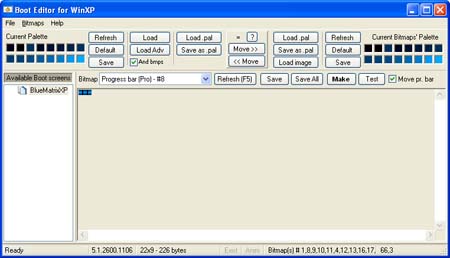
Now that we have changed the main boot screen properly, let us move to the next bitmap. Because we are using WinXP Professional, the next bitmap we will change is number "8". Select this bitmap from the drop down menu located right above the screen preview as shown below:
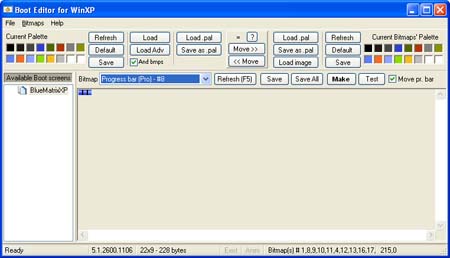
Right-click anywhere on the image preview as we did with the first bitmap and browse for the new progress bar image. Again, we will be using the one for the Blue MatrixXP boot screen as shown below:
Again, notice that the color palette to your right for the bitmap has changed. We need to hit the "Save" button again to save the new palette to the ntoskrnl.exe file.
That's it! Well, almost. Now let us save all changes and create the new ntoskrnl.exe file! right above the image preview window, hit the "Save All" button to save all changed bitmaps. A confirmation dialog will appear asking if it is ok to save new bitmaps. Click "OK". Finally, click on the "Make" button located right next to it.
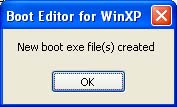
The following window should
appear:
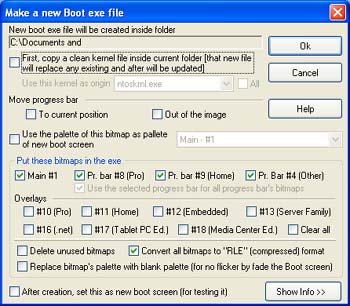
You can simply click "OK" here and leave everything as is. You will get a confirmation window indicating the new boot file has been created!
The new ntoskrnl.exe file will then be added to the BlueMatrixXP directory it created. This will be the new file we will use.
OK! So we have the new boot file. Now what?
In order to replace this file, we need to restart the computer in "Safe Mode".
Once you are in Safe Mode, copy this new ntoskrnl.exe file to your \Windows\System32 directory replacing the one that is already there. Reboot the computer.
Enjoy your new Boot Screen! :)
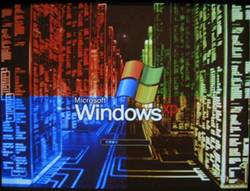
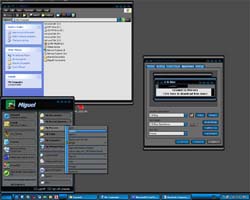
Here are a couple of shots of some cool boot screens I installed:
|
**click to enlarge** |
**click to enlarge** |
As you can see, replacing the Windows XP boot screen has proved to be a difficult task. There are other ways of doing it but they are more complicated and are not exactly the safest methods. If you do not understand any part of this tutorial, we recommend that you ask questions in our forums first. A link to the thread will be provided at the end of this article.
We have a new boot screen! Now let's work our way up and change the logon screen shall we?
Modifying the Logon Screen
Changing the WinXP Logon Screen is much easier. Similar to that of the Boot Screen, you need to replace or modify a file located in your \Windows\System32 directory. The filename your looking for is "logonui.exe".
Please make a backup copy of this file BEFORE you continue.
You will need a small freeware utility called "Logon Loader". You can find it here:
https://www.radfiles.com/logonloader
Logon Loader is a small application that will allow you to preview and change Logon Screens. Once you have made a backup of the "logonui.exe" file, open the Logon Loader application. It should look like the screenshot below:
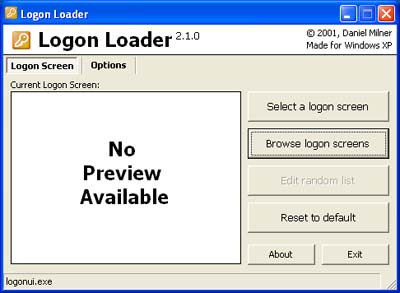
You can either click on "Select a logon screen" to browse to where you have your new downloaded screens or click on "Browse logon screens" to preview the different screens you have downloaded before making a change.
A majority of the logon screens that you download from the websites we recommended will usually contain two files. One is the "logonui.exe" file and one will be a simple preview image of the screen.
We will browse and preview the screens for this example.

Unlike the boot screen, you can change the logon screen without having to reboot or be in safe mode. Just select the logon screen and click on the "Set As Logon Screen" button. That's it!
Log off. You should now see the new screen! :)
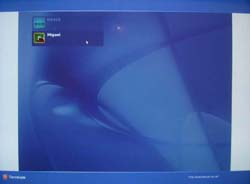
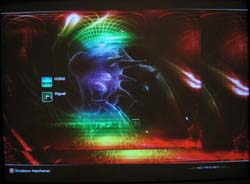
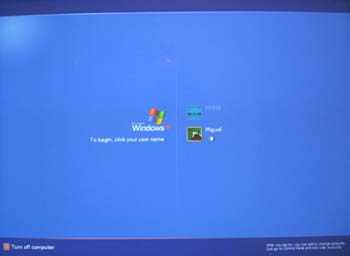
Here are a couple of logon screens we used:
|
**click to enlarge** |
**click to enlarge** |
"CyberAntz" is very impressive and highly recommended!
Now that we are in Windows let's change the GUI!
Modifying the Windows GUI
Possibly the best feature rich application to modify your Windows GUI is WindowBlinds by Stardock Corporation. WindowBlinds has been around for years. I remember using it a few years back to change the themes in Windows 98. WindowBlinds is part of the Object Desktop Suite which allows you to change your title bars, scrollbars, radio buttons, Start bar and nearly every other part of the Windows GUI. It works on all versions of Windows and especially well with Windows XP's Visual Styles.
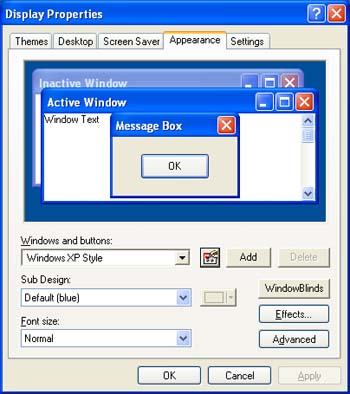
Changing Visual Styles with this application is fairly simple. Once installed, you can access it through the Appearance tab in your Display Settings Window as shown below:
You can download a variety of great Visual Styles for WindowBlinds at WinCustomize.
Simply select a new style from the drop down menu as you would normally do it in Windows XP.
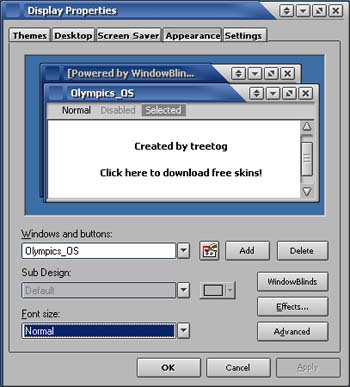
But that's not all! Once you have selected and applied one of the WindowBlinds Skins, you can gain access to some additional features and customize your style even further by clicking on the "WindowBlinds" button.

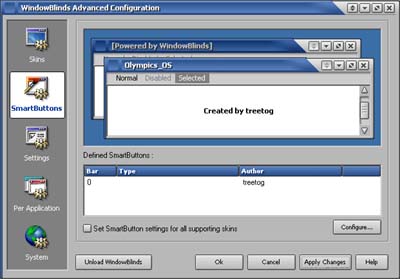
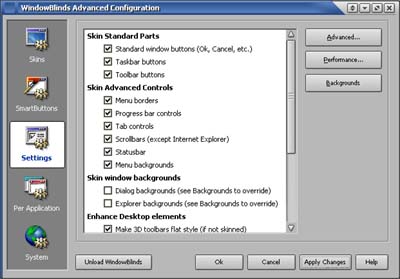
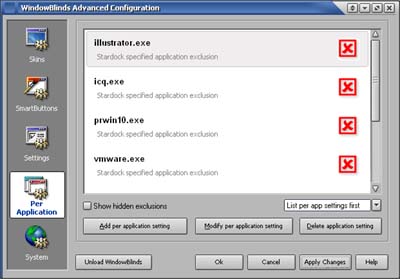
There are tons of great features and additional customization that can be done such as assigning different skins for different applications, adding controls to windows such as winamp controls and even assign "Smart Buttons" to perform specific tasks.
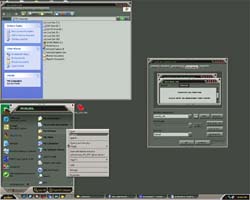
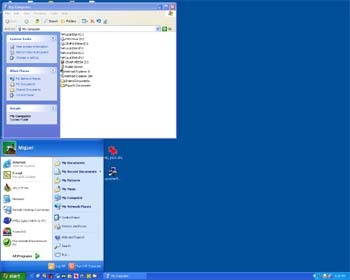
One neat feature WindowBlinds skins add to your windows is a "roll up" button in addition to the minimize, maximize and close buttons. The roll up button allows you to maintain windows open only displaying the title bars. Here is a shot in of this feature in action:
**click to enlarge**
Here are some additional skins worth looking at:
|
**click to enlarge** |
**click to enlarge** |
WindowBlinds is a great application and is highly recommended for those who crave a change and enjoy playing with the Windows GUI. You can download and try it yourself by visiting the Stardock Corp website. WindowBlinds is shareware and costs only $19.95.
If you would like to customize Windows even further, Stardock offers a wide range of applications such as CursorXP, IconPackager and WindowFX. These applications will allow you to change cursors, Icons and apply numerous special effects to Windows.
Shell Replacement
If you would like to take it a step further, there are applications out there that will offer complete shell replacement. They will replace the explorer shell and will give you a completely different look and feel. If this is more up your alley, then the following are worth looking into:
Astonshell.com - Complete shell replacement for Windows. Low resource use.
Talisman Desktop - Another good shell replacement application with lots of themes and icons sets.
We hope you have found this guide helpful. We have provided you with the proper tools & information to easily help you get started. If you have questions, please feel free to share them with us in our forums here!
|