ALTE DOCUMENTE
|
||||||
Table of Contents
Campaign 1776
Introduction
Quick Overview
The Phases
Movement Phase
Road Movement
Bridges
Defensive Fire Phase
Offensive Fire Phase
Melee Phase
Main Features
Command
Morale
Fatigue
Supply
Combat Results
Additional Features
The Campaign Game
Network Play
Play By E-Mail
Design Notes
Tactics
Leader Names and Faces
Troubleshooting
Credits
Hot Spot
Exit Objective
Fog of War
Fixed
Parameter Data
Hot Key
A/I
Advantage
Isolated
Low Fatigue
Medium Fatigue
High Fatigue
Detached
Enfilade
Zone-Of-Control
Local Control
Weapon Type
 Campaign 1776 is a game that covers the
American Revolutionary War. Just about
every major battle of the war is covered in this game, plus several
hypothetical and "what-if battles are addressed. The game can be played alone versus the
computer, or against a human opponent using Play-By-E-Mail and Network Play
(over a Local Area Network or the Internet). The game is turn-based with each side moving and firing in their
designated phase. A series of battles
can be played in turn forming a complete campaign of the war.
The documentation for Campaign 1776 is divided up into several parts:
The Getting Started Help File covering the basics of play.
This User Manual covering the general game.
The Main Program Help File covering issues specific to the main game engine.
The Scenario Editor Help File covering issues specific to the scenario editor.
The Campaign Editor Help File covering issues specific to the campaign editor.
All documentation other than the Getting Started Help File exists in two forms. The on-line version, a Windows Help file, is indexed and has links between related topics. The printable version is in the form of a Microsoft Word Doc file. This file is best printed using a current version of Microsoft Word rather than Wordpad. The Getting Started Help File can be printed directly from Windows Help.
A note on Terminology: Throughout the game the words American and British are used in reference to the two sides in each battle although that is not always accurate. At Kings Mountain, all participants except for one, was an American. At Trenton, most soldiers on the defending side were Hessian. Likewise, it could be argued that all participants at Concord and Lexington were at that time British since the colonies had not yet formally declared their independence. Since it is necessary however to have consistent terminology for the purposes of documentation and explanation, the two words American and British are the standard names used in the game.
 This section
provides a quick overview to playing the game and the
functions of the main program. For more
information, see the various sections on the Phases, Menus, Dialogs, and Other
Features found in the help Contents.
Sides
A Revolutionary War Battle is played by two sides, one American and one
British. A battle may be played by one
person against the computer, or by two persons using a variety of modes such as
Two-Player Hot Seat, Play-By-E-Mail (PBEM), or
Network Play . See the Modes Menu in the Main Program Help
File for more information on these modes.
Hexes
Each
battle is played on a map made up of hexagons (hexes). Each hex measures 125 feet across. Each hex contains terrain which affects
movement and combat in that hex. See the
Hex Info Area in the Main Program Help File
for more information on terrain and its effects.
Turns
Each battle is conducted in turns each of which typically represents 5 minutes
of real time, although this may vary by scenario. Each player has a number of units under their
control, some of which are on the map at the beginning of the battle, while
others arrive as Reinforcements. See the
Units Menu in the Main Program Help File for
more information.
Units
Typically, each unit is a company of Infantry, a troop of Cavalry, or a piece
of Artillery. Each Infantry and Cavalry
unit has a strength value in increments of single men, while each Artillery
unit has a strength value in number of guns. In addition there are specialized units such as Leaders and Supply
Wagons. Infantry, Cavalry, and Artillery
units are capable of firing on enemy units (for Cavalry, only when Dismounted)
and each has a range value indicating the number of hexes that unit may fire. See the Hex Info Area in the Main Program Help File for more information on these
values.
Phases
Each turn of the battle is divided into Phases. A Phase will be under the control of one side or the other. A complete turn is made up of a total of 8
phases. For example, if the American
player is the first player in each turn, the phases will be:
American Movement Phase
British Defensive Fire Phase
American Offensive Fire Phase
American Melee Phase
British Movement Phase
American Defensive Fire Phase
British Offensive Fire Phase
British Melee Phase
At the beginning of each Phase (under Local Control) the Phase Dialog is displayed (see the Main Program Help File ). In each phase only certain actions are possible. Movement is restricted to the Movement Phase and firing is restricted to the Fire Phases, Defensive and Offensive. The Melee Phase allows hexes containing enemy units to be assaulted and possibly captured. See the Movement Phase, Defensive Fire Phase, Offensive Fire Phase, and Melee Phase for more information.
Selecting
Units
Most actions require that units first be selected. Clicking on a hex on the map with the left
mouse button causes that hex to become the current Hot
Spot. The units in the current
Hot Spot are displayed in the Hex Info area (see the Main
Program Help File ). These units
may be selected by clicking on their pictures in the Hex Info Area with the
left mouse button. Alternatively, all
units in a hex may be selected by double clicking on the hex with the left
mouse button. Once selected, units may
be moved in the Movement Phase by right clicking on the adjacent hex to move
to. Selected units may fire in a Fire
Phase by right clicking on the target hex.
End Of Game
As each player finishes their phase, they advance the battle to the next phase
by using the Next Phase function of
the Phase Menu (see the Main Program Help File
). This continues until the time limit
specified in the scenario at which point the win, lose, or draw outcome of the
battle is determined. Winning and losing
are determined by a calculation based on the ownership of certain Objective hexes and the relative losses
of the two sides. See the Victory
selection of the Info Menu (in the Main Program Help
File ) for more information on victory conditions.
 The Movement Phase is used by the current
side to move units under their control. It is also used to perform certain functions such as changing facing and
formation (see the Command Menu in the Main Program
Help File ). No combat occurs
during the Movement Phase. Each unit is allocated a certain movement allowance at the beginning of
the Movement Phase. Each unit may use some, all, or none of its movement allowance during
that phase. Unused movement allowance
points are not accumulated. Note that
depending on the scenario, certain units may be Fixed
which prevents them from being moved.
Units must be selected before they are moved. Once selected, units may be moved to an adjacent hex by clicking on that hex with the right mouse button. Alternatively, it is possible to move the selected units to a nonadjacent hex by clicking the starting hex with the left mouse button, dragging the mouse to the ending hex while holding the mouse button down, and then releasing the mouse button. This will cause the computer to calculate a minimum-distance path from the starting hex to the ending hex and automatically move the selected units according to that path. Note that not all moves are possible depending on the terrain and movement allowance of the selected units.
Movement costs vary depending on the terrain being moved into and any hexsides being crossed. In general it is not possible to cross a Creek hexside except at a Ford or Bridge.
Formation
Infantry units may move while either in Line or Column formation although movement is more efficient in Column. The formation of Infantry units may be changed using the Change Formation function of the Command Menu. Note that Infantry can only change to Line formation before moving in that phase (see Design Notes for an explanation). Artillery units must be limbered in order to move. Changing to this state is performed using the Change Formation. Cavalry may move in either a mounted or dismounted state, although movement is more efficient when mounted. Again the Change Formation function is used to change this state.
In addition, certain units may enter Extended formation. This represents the open order formation used by skirmishers as opposed to the shoulder-to-shoulder formation used by units in line. Units designated as Light as well as all Militia units may use Extended formation. Indian units are restricted to Extended formation whenever they are not in Column.
Line
Disruption
By default, Infantry units in line formation that enter Village or Marsh
terrain automatically become Disrupted.
Depending on the scenario, there will be roads and trails on the battlefield. These facilitate movement under certain circumstances. In order to take advantage of Road Movement, the unit moving must be in either Column formation (for Infantry), Mounted formation (for Cavalry), or Limbered (for Artillery). In addition, no more than one non-Leader unit may move through the hex containing the road or trail at one time.
Normally movement into Water hexes is prohibited. However, depending on the scenario, Bridges may be present that allow Water hexes to be crossed. However, in order to move onto a Bridge, the unit must be in Column formation (Mounted for Cavalry, or Limbered for Artillery) and no more than one non-Leader unit may attempt to enter or leave the Bridge hex at one time.
Column
Movement
It is possible to move several units at a single time using Column
Movement. The units to be moved should
all belong to the same organization and should be lined up in one hex after
another, or in the same hex as they would be when first placed as
reinforcements. You should double click
on the head of the column to select all units in that hex. Then either drag and release while holding down
with the left mouse button, or right click in the destination hex, while
holding down the Ctrl (Control)
key. This will move the first unit in
the column towards the destination hex while moving each unit in turn along the
same path.
Note that Column Movement is applied to units based on their organization and that the organization is determined by the top unit of those selected. For example, if the a unit from a particular Regiment is selected at the head of the column, then Column Movement will move all other units of the Regiment in the same hex or in hexes leading from that hex. Likewise, if a higher level leader is the top unit selected, the Column Movement will move all units from the leader's organization starting from the first hex. In this way it is possible to easily bring larger organizations on the map as reinforcements and march them into battle with a small effort.
Night Turns
Special
rules apply during Night turns. Units which attempt to move in line formation
during Night turns automatically become Disrupted. Also, Artillery which unlimbers during Night
turns becomes Disrupted.
 During the Defensive Fire Phase, the opposing
player gets a chance to fire on the enemy before being fired upon and being
engaged in melee. It therefore
represents the ability of the defender to have first fire. No movement is possible during this
phase. Defensive Fire is subject to the
normal restrictions of firing including facing. However, it is possible for units with Low Ammo to fire during the
Defensive Fire Phase (see the Design Notes for why this true in the Defensive Fire Phase and not the
Offensive Fire Phase).
Firing effectiveness depends on the Weapon Type of the firing unit, the range from the firing unit to the target hex, the Fatigue of the firing unit, and under Optional Rules, the Quality of the firing unit. Leaders have no effect on firing effectiveness.
Facing Restrictions
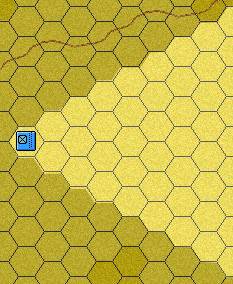 A unit must be
facing the target unit before it can fire. A unit faces one of 6 hex vertices represented by the facings
"Up-Right", "Right", "Down-Right",
"Down-Left", "Left", and "Up-Left". For each facing there are two frontal
hexsides which are adjacent to the hex vertex. The target unit must be within the area determined by these two
hexsides. For example, for a unit facing
Right, the unshaded region in this picture indicates those hexes the unit is
facing.
Range and Line of Sight Limitations
A target unit must be within range before it can be fired upon. If you right click on a unit's picture in the Unit List display, it will show you the range of that unit. In addition, the target unit must be within the Line of Sight of the firing unit. The Visible Hexes option of the Display menu can be used to determine the hexes that are visible from the current Hot Spot.
Fire Modifiers
The following modifiers are applied to ranged fire.
Units which have not moved during their turn get a defensive benefit from fence and stone hexsides. All units get a defensive benefit when behind an embankment hexside or behind breastworks. The actual benefit is determined by Parameter Data and can be found by using the Parameter Data option of the Help menu .
Units may get a defensive benefit from the terrain of the hex they are in. The benefit is shown in the Terrain Info box of the Unit List.
The target unit receives a defensive benefit when it is at a higher elevation than the firing unit. This benefit is normal for a single elevation change and is doubled for any elevation change of 2 increments or more. The actual value of this benefit can be found in the Parameter Data .
A Cavalry unit which is mounted or in the act of dismounting is subject to a fire modifier when fired upon. The value of this modifier is in the Parameter Data.
An unit in column formation or one that is fired upon by a firing unit that it is not facing, is subject to an Enfilade fire modifier. The value of this modifier is in the Parameter Data.
A firing unit that has Medium Fatigue , has 10% subtracted from its fire value. A unit that has High Fatigue has 20% subtracted from its fire value. A unit with Maximum Fatigue has 40% subtracted from its fire value. Fatigue modifiers are doubled for artillery.
If the firing unit is Infantry or Cavalry and the Quality Fire Modifier optional rule is in effect, then 10% is added to its fire value if it has a Quality of A or B, and 10% is subtracted from its fire value if it has a Quality of E or F.
Disrupted units fire at half effectiveness.
Losses against units in Extended formation are halved.
Fire values against Supply Wagons are doubled.
Artillery fire values are based on the number of guns times 50 in addition to the normal fire value modifiers.
Cavalry
Effects
Dismounted
Cavalry fires at ¾ effectiveness to account for the horse holders. In addition, in the first Defensive Fire
Phase after changing formation from
mounted to dismounted, Cavalry is considered dismounting and is subject to the
normal mounted Cavalry fire modifiers.
Fire Casualties
Fire casualties are calculated using the standard Combat Results based on the effective fire value of the firing unit with a Low Combat Value of 2 and a High Combat Value of 15.
Example: Suppose an Infantry Unit of 34 men equipped with Muskets fires at an enemy infantry unit 1 hex away. The standard range effectiveness of a Musket at range 1 is 6. Thus the standard fire value for the unit would be 204 (=34 x 6). The low end combat result would be 0.408 (= 2 * 204 / 1000) and the high end combat result would be 3.06 (= 15 * 204 / 1000). The actual combat result would be randomly determined between these two extremes. Randomly based on the fractional part of the actual combat result, the combat result is truncated up or down. This if the actual combat result was calculated to be 2.40, then this would determine a combat loss of 2 men 60% of the time and a loss of 3 men 40% of the time.
 The purpose of
the Offensive Fire Phase is to allow
units which may have advanced during the Movement Phase to fire after
movement. All fire modifiers and
restrictions described in the section on Defensive
Fire Phase apply to the Offensive Fire Phase as well.
Offensive Fire Modifiers and Effects
Units which fire in the Offensive Fire Phase after movement in the preceding Movement Phase do so at half effectiveness.
Artillery batteries which have moved in the preceding Movement Phase cannot fire in the Offensive Fire Phase (see the Design Notes for which this also applies to changes in facing).
Units which are Low On Ammo cannot fire during the Offensive Fire Phase
In the first Offensive Fire Phase after changing formation from mounted to dismounted, Cavalry is considered dismounting and cannot fire.
Units which do not fire in the Offensive Fire Phase, receive a 10% bonus to the melee strength if they attack in the subsequent Melee Phase (see the Design Notes for an explanation).
 During the Melee Phase, the controlling player may
initiate melee attacks against enemy units in adjacent hexes. In order for a unit to be committed to a
melee attack, they must be un-Disrupted and be facing the defending hex (see
the Design Notes for why Disrupted units
cannot melee attack).
Certain restrictions apply to units that are committed to a Melee attack. Fixed, Disrupted, and Routed units cannot Melee attack (see the Design Notes for why this applies to Disrupted units). Units must be Facing the hex they are attacking. Infantry units and dismounted Cavalry cannot Melee attack non-Isolated mounted Cavalry. Artillery, and Supply Wagons cannot Melee attack. A unit cannot Melee attack a hex they could not legally move into (it is not possible to Melee attack across a Creek hexside for example). Units may only Melee attack once in each Melee Phase. Cavalry which has dismounted in the preceding Movement Phase cannot melee attack. The total number and strength of the attacking units may not exceed the stacking limitations of the defending hex.
Melee Modifiers
Melees are calculated using total number of men of the attacking side and the total number of men of the defending. Dismounted Cavalry may Melee, but does so at ¾ effectiveness to account for the horse holders. Modifiers may be applied to the calculation of the defending men.
Each defending Artillery gun counts as 25 men.
Routed and Isolated units have their defending strength divided by 4. However, units which are Routed and Isolated defend with a strength of 0.
Units which have already defended in melee and have retreated into a hex that is then attacked in melee have their defending strength divided by 2.
Supply Wagons defend against melee with a strength of 0.
Modifiers are applied to the melee strengths.
If no attacking units have fired in the preceding Offensive Fire Phase, then 10% is added to the attacking strength
If the attacking units have a Leader with them, then 10% is added to the attacking strength.
If the defending units have a Leader with them, then 10% is added to the defending strength.
If the defending units are attacked (by a non-Leader) from a hexside they are not facing, then 20% is added to the attacking strength.
The largest hexside modifier of all of the hexsides the attackers are attacking through is applied to the attacking strength.
Melee attacks against higher elevations have a modifier equal to the elevation change (in elevation increments) times the Elevation Modifier (see the Scenario Notes for this value). Normally elevation increments are equal to 10 foot elevation changes, but this depends on the map.
If all the attacking units are mounted Cavalry in Clear hexes attacking a Clear hex, then 10% is added to the attacking strength.
Fatigue modifiers apply as described in the section on Fatigue.
Optionally, Quality modifiers may apply as described in the Optional Rules Dialog of the Main Program Help File .
Units in Extended formation and units without bayonets melee at 1/4 effectiveness.
Special Melee Effects
When units in Extended formation and units without bayonets are attacked by normal units (those not in Extended formation or having bayonets) and the defending units lose the melee, then the defending loses are halved. This reflects the fact that such units would not stand and fight against an attack such as this and would fall back without contesting the attack.
If both the attacking and defending units consist entirely of cavalry and leaders, then the resulting melee casualties are reduced to ¼ of normal (see the Design Notes for why this is so).
Melee Resolution
The final resolution of the melee is done using the standard Combat Results. The adjusted defending strength is used to calculate attacker casualties using a Low Combat Value of 25 and a High Combat Value of 100. The adjusted attacking strength is used to calculate defender casualties using a Low Combat Value of 10 and a High Combat Value of 50. The loser is the side with the greater casualties (defenders win ties). Melee fatigue losses are 50% more than normal and, in the case of the melee loser, fatigue losses are double. The melee defender is subject to normal Morale Checks based on their losses and must automatically take a Morale Check at the end of the Phase if they lose the melee.
Example: Suppose an infantry unit of 45 men melee attacks an enemy infantry unit of 23 men. Two combat results are determined. The attackers would determine a low end casualty value of 0.45 (= 10 * 45 / 1000) and a high end casualty value of 2.25 (= 50 * 45 / 1000). The casualty loss of the defenders would be randomly determined between these two extremes. Likewise, the defenders would determine a low end casualty value of 0.575 (= 25 * 23 / 1000) and a high end casualty value of 2.3 (= 100 * 23 / 1000). The casualty loss of the attackers would be randomly determined between these two extremes.
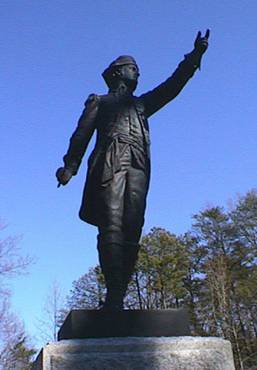 Command refers to the influence leaders
have over the state of the forces under their command. Good use of Command will result
in units being better able to move and fight, while Command failures will result in reduced
capabilities.
Each Leader is assigned a default Command Rating ranging from A
(best) to F (worst). This rating can be affected in a positive way
by the Leader's commander (if he has one) provided the Leader is not Detached. At
the beginning of each player's Movement Phase, a Command Test is performed for all leaders currently on the map. The Command Test begins with the highest
commanding leaders on the map and proceeds downward through the command
hierarchy. Each Leader's Command rating
is translated into a number by converting A to 6, B to 5, and so on down to F
to 1. This number if compared to a
random die roll from 1 to 6. If the
Leader's number is greater than or equal to the die roll, the Leader has passed
the Command Test for that turn. A Leader
that has failed his Command Test will have his Command rating displayed in
Yellow in the Hex Info Area (see the Main Program
Help File ). A Leader which
passes his Command Test will
pass a +1 Command Bonus modifier down to the Command ratings of his subordinate
commanders (except to Detached Regiment
Leaders). If a Leader receives a Command Bonus from his superior and
passes his Command Test, his
Command rating will
be recorded as the higher number for that turn. For example, a Brigade leader with a nominal Command rating of C which receives a +1
Command Bonus from
his superior and passes his Command Test, will have a Command rating for that turn of B. In addition, a Leader which passes his
Command Test will
pass a Command Bonus down to
his subordinates which is one more than the Command Bonus he received. A Leader which fails his Command Test passes no Command Bonus to his subordinates
regardless of any Command Bonus he had
received.
Here is an example. Suppose the command hierarchy at a battle consisted of
Army commander: Gen. G. Washinton. Command Rating of B.
Division commander: Maj. Gen. N. Greene. Command Rating of C.
Brigade commander: Brig. Gen. Muhlenberg. Command Rating of C.
Regiment commander: Col. J. Reed. Command Rating of E.
The Command Test begins with Washington whose number for the Command Test is 5. Suppose that the die roll is 3 and thus Washington passes his Command Test this turn. Washington passes a Command Bonus of 1 to Greene which gives Greene a number of 5 (= 4 + 1) for his Command Test. Suppose that the die roll is 4 and thus Greene passes his Command Test giving him a Command Rating of B for this turn. Greene passes a Command Bonus of 2 to Muhlenberg which gives Muhlenberg a number of 6 for this turn. Thus Muhlenberg will pass his Command Test this turn and thus passes a Command Bonus of 3 to Reed which gives Reed a number of 5 (= 2 + 3) for his Command Test. Suppose that the die roll is 6 and thus Reed fails his Command Test and keeps his nominal Command Rating of E for this turn.
After all Leaders have been through the Command Test, they are used to determine if Disrupted units become un-Disrupted that turn. A Detached unit is given a value of 1 for the Test for Undisruption. A non-Detached unit whose Leader has passed his Command Test is given a value of 1 plus the current numerical Command Rating of his commander. If a random die roll is less than or equal to this value, then the unit becomes un-Disrupted.
During Night turns, all Leaders and units have a Command value one less than normal. Thus, a Leader with a Command Rating of A would have a numerical rating of 5 during Night turns and a Detached unit would have a value of 0 in the Test for Undisruption (and thus be unable to become un-Disrupted).
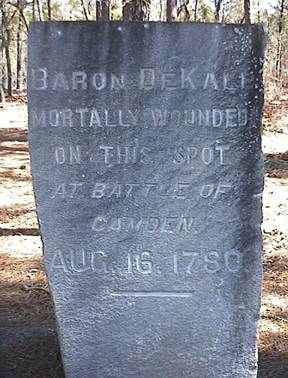 Morale refers to the mental state of
the fighting units and the effect leaders have on restoring that state in the
forces under their command. Units with
good Morale and with
inspiring leaders will fight better than units with low Morale or uninspiring leaders. Often a smaller force can overwhelm a larger
one if it has superior Morale.
Each unit is assigned a Quality value ranging from A (best) to F
(worst). This Quality value is the basis
for determining the unit's current Morale. Each Leader is assigned a Leadership value ranging from A (best) to F (worst). This Leadership
value determines the extent the leader will be able to affect the Morale of the units under his command.
When a unit suffers casualties due to combat, it will take a Morale Check to see if it Routs or
becomes Disrupted at the end of the Phase. In addition, units with Fatigue level 90 that take a Fatigue loss also
are required to take a Morale Check. The Quality value of the unit is used as the
base value for Morale by converting
A to 6, B to 5, and so on to F to 1. Modifiers are applied to this base Morale to obtain the final Morale value for the Morale Check.
If the unit is stacked with a Leader, then 1 is added to the Morale
If the unit is Low On Ammo or Out Of Ammo, then 1 is subtracted from the Morale
If it is a Night turn, then 2 is subtracted from the Morale
If the unit has Medium Fatigue, then 1 is subtracted from the Morale
If the unit has High Fatigue, then 2 is subtracted from the Morale
If the unit has been fired upon Enfilade, then 2 is subtracted from the Morale
If the unit is Disrupted, then 1 is subtracted from the Morale
The resulting Morale value is compared with a random Die Roll from 1 to 6, and if the Die Roll exceeds the Morale value, then the unit fails the Morale Check. A unit that fails the Morale Check during a Defensive Fire Phase becomes Disrupted, while a unit that fails the Morale Check during any other Phase becomes Routed. If a Routed unit fails the Morale Check, it stays Routed, but also loses a number of men based on the amount the Die Roll exceeds the Morale, times 25 for Infantry and Cavalry, which is reported as lost stragglers. Unless the unit has High Fatigue, unlimbered Artillery is not subject to routing.
When a unit routs, all units in the same hex as the unit and all units in adjacent hexes to the unit must also take a Morale Check. If any units in adjacent hexes fail the Morale Check, then this process is carried over into hexes adjacent to those hexes.
At the beginning of a player's Movement Phase, Rally Checks are performed on Routed units to see if they Rally. Routed units which Rally become Disrupted and are eligible to become un-Disrupted starting with the next turn. Again the Quality of the unit is the base value for Morale for the Rally Check. These Modifiers are applied to this value to result in the final Morale value.
If the unit is stacked with a Leader of the same organization or a higher organization as the unit and if the Leadership rating of the Leader is higher than the Morale value, the Morale value is set equal to that rating. If the Leadership rating is already equal to the Morale value, then 1 is added to the Morale value.
If it is a Night turn, then the Morale value of the unit is divided by 2 with fractions rounded up (for example 5 becomes 3).
If it is a Day turn, then the Morale value may be affected by Division and Army Leaders in adjacent hexes using the same process for Leaders in the same hex.
A random Die Roll from 1 to 6 is compared with the resulting Morale value, and if the Die Roll is less than the Morale value, the unit becomes un-Routed.
 Fatigue refers to the detrimental
effects combat has on the physical condition of the fighting units.
Fatigue values range
from 0 (none) to 90 (highest). Within
this range, they are further divided into Low Fatigue
(0 to 29), Medium Fatigue (30 to 59), and High Fatigue (60 or higher). Leaders do not suffer from Fatigue. Fatigue values
represent the Combat Fatigue of the
unit and are not intended to represent the simple physical fatigue of being winded (see the Design Notes for
more discussion on this distinction).
When units are fired upon, they make
suffer a Fatigue loss as a
result. Furthermore, units participating
in Melee also suffer Fatigue losses as a result of
combat. Units with a Fatigue level of 90 cannot have their
Fatigue value
increased further, but whenever a Fatigue loss is suffered by such a unit,
they must take a Morale Check at the end of
the Phase.
If a unit has Medium Fatigue, then
1 is subtracted from its Morale value during Morale Checks.
10% is subtracted from the melee strength when the unit participates in a Melee attack.
10% is subtracted from the fire value when the unit fires. If the unit is Artillery, then 20% is subtracted.
If a unit has High Fatigue, then
2 is subtracted from its Morale value during Morale Checks.
20% is subtracted from the melee strength when the unit participates in a Melee attack (this overrides the affect of units with Medium Fatigue).
20% is subtracted from the fire value when the unit fires. If the unit is Artillery, then 40% is subtracted.
If a unit has Fatigue level 90, then
40% is subtracted from the melee strength when the units participates in a melee attack.
40% is subtracted from the fire value when the unit fires. If the unit is Artillery, then 80% is subtracted.
A unit may be eligible to recover Fatigue at the beginning of a player's Movement Phase provided it has not Moved, Fire, participated in Melee, or been Fired upon with any effect from the time of the player's previous Movement Phase. For each such unit a random value from 0 to twice the applicable recovery rate, determined by Parameter Data associated with the current battle, is subtracted from the unit's Fatigue value. See the Parameter Data Dialog in the Main Program Help File for the recovery rate values.
 Supply refers to the ammunition that
units have available to fire during the battle. A unit may become Low On Ammo or Out Of Ammo during the battle reducing
or eliminating their ability to fire their weapons. Supply Wagons are used to maintain
supply levels for
the forces on the map. Each unit of
strength of a Supply Wagon
represents enough ammunition to resupply 10 men.
Each time an Infantry unit fires, there is a certain probability that this will
result in a reduction in the unit's ammunition level (see the Design Notes for a discussion of why this can result
in reduced ammunition levels in the first turn). The ability for Artillery units to fire is
based on the Ammo Level for their side. If the Isolation Effects Optional Rule (see the Main
Program Help File ) is being used, then Artillery units can also become
Low or Out Of Ammo when Isolated.
The probability chance that a unit will suffer a loss of ammo while firing is determined by Parameter Data.
A unit that is Out Of Ammo cannot fire again until it is resupplied. A unit that is Low On Ammo can only fire during the Defensive Fire Phase (see the Design Notes for why this is the case). Being Low or Out Of Ammo affects the Morale of the unit.
Units can become resupplied at the beginning of the player's Movement Phase provided they are not Routed and they can trace a path no longer than 5 hexes long which does not go through enemy units or empty hexes in their Zone-Of-Control to a friendly Supply Wagon. This resupply will reduce the Strength of the Supply Wagon by 1 unit for every 10 men in the Unit. Supply Wagons that are reduced to a Strength of 0 are automatically removed from the map.
 A common combat
results calculation is used for both
fire and melee results. The combat
results calculation is based on four
parameters: a combat value, a modifier, a Low
Combat Value (LCV) and a High Combat
Value (HCV). For fire combat, the
combat value is the adjusted fire value of the firing units. For melee combat, the combat value is the
adjusted strength of the opposing side. The given modifiers are applied to the given combat value to arrive at
the effective combat value. The Low
Combat Value and High Combat Value are the extreme possible casualties
resulting from a base-line combat value of 1000. The effective combat value is used to scale
these accordingly resulting in low and high possible casualties. Finally a random value is selected between
the low and high casualty values to arrive at the final combat result.
For example, given a combat value of 400, a modifier of 25%, a Low Combat Value of 5 and a High Combat Value of 25, the effective combat value would be 500 (= 400 + 25%). This would be ½ of the base-line combat value of 1000. Thus the low casualty value would be 2.5 (= 5 / 2) and the high casualty value would be 12.5 (= 25 / 2). The resulting casualty value would be randomly generated between 2.5 and 12.5 for this combat. Finally, based on the fractional part of the casualty value, it is randomly rounded up or down. For example, if the casualty value was calculated to be 3.7, then 30% of the time this is rounded down to 3 and 70% of the time is rounded up to 4.
Artillery losses resulting from enemy artillery and infantry fire is calculated on the basis of 1 gun = 25 men. Combat losses less than 25 men result in a probability of a 1 gun loss proportional to the value. Thus a combat loss of 5 men applied to an artillery unit would result in a probability of 5/25 = 20% that a one gun loss would occur.
Fatigue results are calculated as random values between the casualty value and 3 times the casualty value.
When Morale Checks are applicable, they are determined based on a probability using the given loss as:
loss / (loss + 6)
Thus a unit that takes a loss of 6 men has a 50% chance of requiring a morale check and a unit that takes a loss of 24 men has an 80% chance of requiring a morale check.
When the optional rule Alternative Calculation of combat results is chosen for fire or melee results (see the Main Program Help File ), then the resulting casualty value is based on the average of two default casualty calculations. This produces values which are more likely to be in the midrange of the casualty interval rather than uniformly distributed.
 The Campaign Game links together individual
battles and their outcomes to form a complete campaign. To being or continue a campaign game, run the
Campaign Front End from the Campaign
1776 program group.
A campaign consists of a series of Situations. Each Situation presents both sides in the campaign
with a list of possible Choices. Based on the selections made among these
choices, a particular Battle will be
fought by the two sides. Depending on
the Outcome of the battle, the
campaign will branch to another Situation in the campaign, or possibly to the
campaign Conclusion.
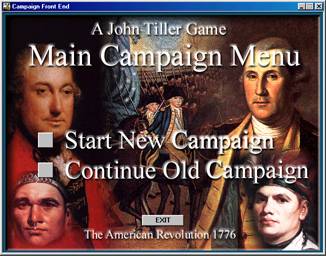 The Campaign
Front End begins by asking you if you want to start a new campaign or continue
an existing one. Of course, the first
time you run the Front End, you'll select that you want to start a new
campaign. In general, there are multiple
campaigns to choose from. There are four
campaigns that are distributed with Campaign 1776. The first campaign The American Revolution covers the entire war using three
situations, one in the North, one in the Center, and one in the South. The campaign Gates vs. Burgoyne covers the 1777 campaign at Saratoga. The campaign Washington vs. Howe covers the 1777 campaign for Philadelphia. The campaign Greene vs. Cornwallis covers the 1781 campaign in the
Carolinas. In addition, you can create
new campaigns by using the Campaign
Editor.
When you start a new campaign, you will be asked to specify a filename for the campaign. Note that campaigns are stored in files with the extension cpf. You should use a name that is descriptive of the campaign so that you can have several campaigns going at one time and keep track of them.
 When you start
a new campaign, you will be prompted by the Situation Dialog to pick the side you want to play and other
settings. There are three possible Modes
you can select. If you select A/I (Conservative) then you will play
against the computer and the computer will be making optimal choices during the
campaign. If you select A/I (Reckless), you will also be
playing against the computer, but in this case, the computer will be making
random choices during the campaign. Often this results in more interesting results, although not necessarily
the most competitive play. If you select
Play-By-E-Mail, then you can play
the campaign against a human opponent using e-mail to send the turns back and
forth. During the campaign, you normally
will be transferred to the Main Program to fight battles. The victory outcome of these battles will determine
the next situation you encounter in the campaign. If you select Use Expected Values, then instead of fighting each battle using the
Main Program, an average victory outcome will be used to immediately branch to
the next situation in the campaign. You
will use this option, when you want to very quickly jump from situation to
situation in the campaign without having to fight each battle in detail. Finally, you can select from a list of
situations in the campaign. Normally you
will select the first situation, as this is the starting point for the
campaign, but you also have the option of selecting an intermediate one if you
wish to start the campaign somewhere in the middle.
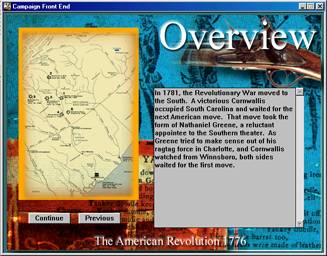 Each campaign
begins with an overview. This overview
will describe the campaign setting and displays a map of the area over which
the campaign will be fought. When a
campaign game is played by two human players, both players get to see this
screen.
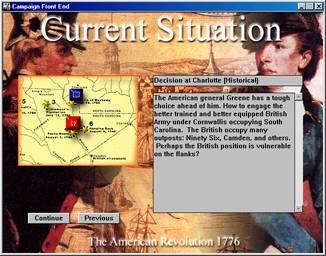 At the
beginning of each Situation, a screen is displayed identifying the Situation,
showing the various forces involved, and describing the Situation. Both sides of the campaign get to see this
screen.
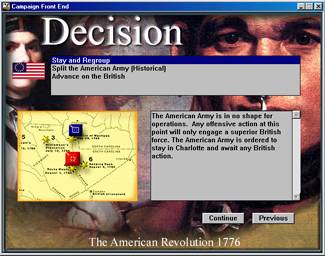 The Decision
screen is where you make your choice about how to conduct the campaign. You will be given a list of choices at the
top of the screen. As you click on each
choice, a description of that choice is displayed and the map is updated to
illustrate that choice. You should keep
in mind that in general, no situation has a best choice. The best choice will be determined by the
corresponding choice made by your opponent, something you won't know until both
sides have decided. So you should weigh
the possible outcomes you feel are associated with each choice, and decide
which one you wish to pursue in that situation. Note that each side in the campaign sees a different screen at this
point. Each side only sees the choices
for their side and will be unaware of the choice made by the other side.
 Once both sides
have made their choices, the resulting battle is determined and each side will
get a message describing the battle. When Use Expected Values is selected, this message will have a Cancel
button in addition to an OK button. If
you select the OK button, then the Expected Value of the battle will be used to
determine the campaign branching. If you
select the Cancel button, then the game will transition to the Main Program so
that the current battle can be fought in detail.
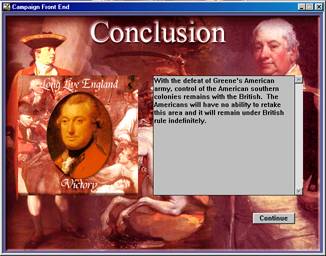 In general,
each battle outcome will cause the campaign to branch to the next Situation in
the campaign. However, depending on the
outcome and the Situation, the campaign will eventually branch to a terminating
situation. Here, the overall outcome of
the campaign is determined and described.
When you play a campaign using Play-By-E-Mail, then you will receive messages at various times indicating that the campaign file is ready to be e-mailed to your opponent. You should mail your opponent the cpf file containing the campaign at this point. Note that this single file contains all information associated with your game and that no other files need be included.
Summary of Campaign Play Modes
There are a wide variety of ways that campaigns can be played. For the briefest possible campaign, play against the computer (A/I play mode) and select "Use Expected Values". In this way, a complete campaign can be completed in a manner of minutes. For a longer game and more detail, select "Use Expected Values", but then select a battle to fight in detail by selecting Cancel when the encounter message is displayed. The time required to finish the battle can by varied by choosing Manual or Automatic play mode within the battle itself. In this way, a complete campaign can be completed in an hour or so. Then, for a longer campaign, skip the "Use Expected Values" option and play each battle in detail and in Manual mode. This type of campaign will require a couple of hours to complete. Next, you can play a campaign using Play-By-E-Mail. Note that you can choose the "Use Expected Values" option when playing under PBEM if you just want to see how your campaign choices play out against a real opponent. This approach would require a day or more to complete a campaign. Again, you can choose the "Use Expected Values" option, but then Cancel this option at the time of a battle to play out the battle in detail. In this way, a PBEM campaign would be about the same length of time as a normal PBEM battle if you selected a single campaign battle to play in detail. Within the battle itself, you can choose the Automated Defensive Fire optional rule to double the speed that you complete the battle. Finally, to get the longest possible campaign, you would skip the "Use Expected Values" option and the Automated Defensive Fire optional rule which would result in a campaign lasting a very long time. In summary, a campaign can be played in a manner of minutes, days, or even years in the extreme cases.
This section describes the details associated with multi-player Network Play. Microsoft's Direct Play is used for this purpose. Note: Direct Play supports a number of protocols such as TCP/IP for Internet play and IPX for Local Area Network play. However, there are problems with some IPX drivers so if you have any problems playing a game using the IPX protocol, you should try connecting over your LAN using TCP/IP instead.
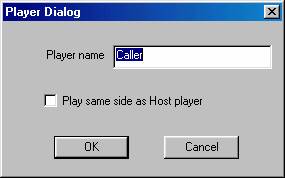 The Player
Dialog is displayed so that each player can specify their name and to specify
if they want to be on the same side as the Host player or the opposing side.
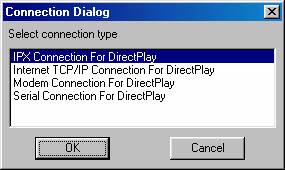 Next, the
Connection Dialog is displayed for both the Host and the Caller so that the
connection type can be selected. The
standard connection types include Internet Play via TCP/IP and Local Area
Network (LAN) Play via the IPX protocol. In addition, standard modem dial-up and serial (i.e., null-modem)
connections are possible.
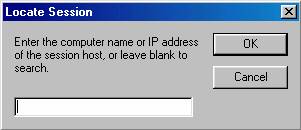 Before choosing
the TCP/IP connection type, you should make sure you are already connected to
the Internet via your ISP (Internet Service Provider). In addition, the Modem Host should run the
Windows standard application WINIPCFG.EXE found in the
Windows directory and note their IP Address. In most situations, this IP Address will change every time you make a
connection to the Internet. This IP
Address will have to be communicated to the Caller (using e-mail or chat for
example). The Caller should enter this
IP Address when prompted via the Locate
Session dialog to establish a connection with the Modem Host.
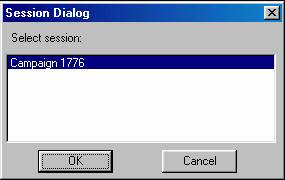 If you are the
Caller, then once you make a connection to the Host computer, you will be
provide a list of Direct Play sessions to connect to. Select the Campaign 1776 session.
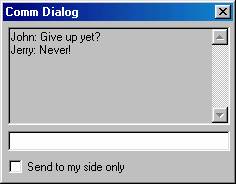 Once a
connection has been established, the Comm Dialog will appear and allow both
players to communicate with each other. You can type messages in the area at the bottom of the Comm Dialog and
press Return to send them. All messages
are displayed in the top area of the Comm Dialog prefaced by the name of the
player sending the message. In
Multi-Player Network Play games, you can limit the sending
of the message to players of your side, by selecting the option at the bottom
of the Comm Dialog.
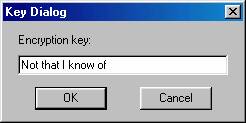 If you are the
first Caller of the opposing side, you will be prompted to specify an
Encryption Key to be used to encrypt the battle file on the Host computer. This encryption will prevent your opponent
from trying to access the battle file in your absence. Be sure to remember your Encryption Key and
specify it exactly the next time you open an existing battle or else a read
error will occur. If you trust your
opponent, it is OK to leave the Encryption Key blank.
Multi-Player
In general, both sides of a Network game can have more than one person assigned to them. The Host player and the first player to connect playing the opposing side, will be the Commander for their respective sides. By default, the Commanders control all units for their side. Additional players on each side can be assigned commands by the Commander. Each player can only move and fire units under their command. The Multi-Player Dialog described in the Main Program Help File describes the actions used to assign commands to players and to manage Multi-Player features.
This section describes the details associated with Play-By-E-Mail (PBEM). PBEM is initiated either from the Campaign front-end or through the Play-By-E-Mail option of the Modes Menu (see the Main Program Help File ).
 When a game is
started under the PBEM option, the player starting the battle will be prompted
with the New Scenario Dialog (see the Main Program
Help File ) to select the side they wish to play, the Fog of War option, any change to the Advantage value, and Optional Rules. When control of the game passes to the
opposing player, the main program will save the PBEM game in a file with
extension bte and notify the player that the file can now be E-mailed to
their opponent. The player should send
the bte file either
Zipped up or as an attachment in an E-mail.
When the other player receives the E-mail, it is essential that they copy the bte file into the appropriate game folder. By default, this game folder is \Program Files\HPS Simulations\Campaign 1776, but this can be changed during installation. Once the bte is copied, the player can start PBEM mode either from the File Selection Dialog (see the Main Program Help File ), or through the PBEM option of the Modes Menu (see the Main Program Help File ).
 When the player
opens the PBEM file, they will be prompted to view the battle replay. If they notice that the replay is not for the
opposing side, they have opened their own PBEM file in error and should
immediately select Cancel. Otherwise, they can select Yes or No to either view the replay or advance directly to their turn.
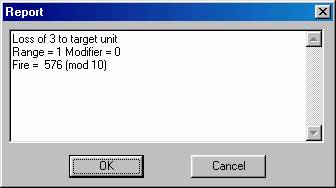 During the
battle replay, combat results are reported in a dialog. Select OK
to close the dialog and continue normally. If you select Cancel, the
replay will continue but no subsequent combat results will be reported. Pressing the Escape (Esc) key will terminate the replay.
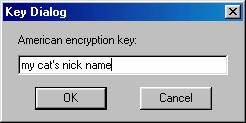 When a PBEM
battle is saved with the PBEM Encryption Option enabled (see the Settings Menu
in the Main Program Help File ) or if the file
has already been encrypted by the opposing player, then the player will be
prompted for an Encryption Key. On
subsequent turns, the identical key must be entered by the player in order to
read the file. Note that a PBEM battle
can be encrypted even after play has begun, but once encrypted, it cannot be
converted back into an un-encrypted form.
 This section
provides explanation for certain game features.
Why can't you use the Undo Movement
function of the Command Menu when Fog of War
is in effect? If this were allowed,
you would be able to send out units on multiple scouting missions with the
option of returning them to their starting location and thereby determining
unfair information on the location of enemy units. You might say that the Undo should only be
disabled if the units being moved run into unknown enemy units, but even
knowing that there are no enemy units in a certain direction is unfair
information if the moving player is allowed to undo the move.
Why can't an Infantry unit change to Line formation after it has moved? Line and Column formations are a trade-off relative to each other. While movement is more efficient in Column formation, units can only fire when in Line formation. If units were allowed to move in Column formation during a Movement Phase and then change into Line formation at the end of the phase, it would allow units to unfairly use Column formation for movement without suffering any of the adverse affects from using this formation.
Why does it take so long for units to recover from Fatigue? In the game, Fatigue is used to represent combat fatigue, not the physical state of being winded. As such, the physical effects of combat fatigue are felt long term and do not wear off through simple rest. In many Revolutionary War battles, the end of the battle was determined by fatigue and not by losses. In larger battles, commanders had to be careful to rotate their fighting units and not commit any one force too long to battle. Having higher Fatigue recovery rates would permit the unrealistic ability for commanders to rest units for short periods of time and then recommit them to battle, something that was not common historically.
 What is the justification
for the Quality Fire Modifiers Optional Rule? Are you saying that A and B units are sharpshooters? No, this is not the intent of the rule. The rule is meant to reflect the more
efficient and higher rate of fire that higher quality units were capable of,
and the corresponding lower rate of fire that lower quality units generally
had. Units with experience were able to
keep their guns unjammed during a hot battle, even to the point of having
slightly smaller caliber bullets on hand to use after their guns had become
clogged from burnt gunpowder. Lower
quality units could not sustain high rates of fire due to their inexperience
and poor training. They also had poor habits
such as sometimes inadvertently firing their ramrods at the enemy and thus
reducing their ability to fire. For the
same reason, higher quality units were more proficient with the use of the
bayonet and thus the justification for the Quality Melee Modifiers Optional
Rule.
Why aren't the Optional Rules called Advanced Rules? The primary reason for having Optional Rules is two fold. First, Optional Rules are intended to provide some variety to game play. As such, they are intended to put a new twist on familiar situations and keep the game interesting. Second, Optional Rules are intended to provide an outlet for disagreements over how certain issues are to be approached. That is, rather than debate an issue to death, an Optional Rule is often provided so that differing viewpoints are supported in the game, even if they are not agreed to by 100% of the user population. Given this intention, Optional Rules should never be confused with Advanced Rules which are intended to provide more realism or detail but at a sacrifice of playability or simplicity. An Optional Rule could conceivably reduce realism or detail as long as it provided some interesting variety into the game or provided a useful simplification that improved playability under certain circumstances.
 Why isn't the
Victory Points for Leader Casualties Optional Rule a default rule? Wouldn't killing George Washington be a
significant event for the British player? Every rule must be evaluated for what it motivates players to do. In this case, awarding points for leader
casualties motivates the player to hide his leaders away from the battle to
avoid losing Victory Points. For
example, the player would never risk Washington in the front line at Princeton
for fear of losing Victory Points and would keep him carefully hidden away in
some safe place. Conversely, players would
be motivated to focus their fire primarily on hexes containing leaders in hopes
of picking up Victory Points. Having
this rule as a default rule would skew the battles away from the historical
outcomes in a way that would detract from the games as learning tools. Given the tactical nature of the battles,
losing Washtington at Brandywine for example is felt even in the absence of
this rule since his replacement, and all replacements in the line of command,
will generally be of lesser quality than the original leader and thus this will
have a detrimental effect on the American Army.
I just had my entire army rout away! The default routing logic is bogus! The routing logic causes the rout of a single unit to sometimes spread to adjacent units and so forth in a way that can have a major effect on a force. Establishing the correct balance in this logic is a matter of interpretation. If you have a large rout occur, check the following factors that affect morale. Did your units have High Fatigue? Were they Low or Out of Ammo? Were they of mediocre quality? Was it a Night turn? Experience has shown that game players conduct their attacks with far greater aggressiveness than was ever shown on the actual battlefield. Historically, leaders were very cautious in the commitment of their troops and were careful not to keep units in battle for too long for fear they would not hold. If you have just had D quality units, low on ammo, with Fatigue level 90, rout during a Night turn, don't think that this was an unrealistic event.
Why have the Isolation Optional Rule which causes Isolated units to defend in melee at ¼ strength? This rule is intended to have two effects. Commanders in the Revolutionary War were always very cautious of their flanks. They often withdrew from a position before they had been overwhelmed simply because their flanks were threatened. This rule is intended to motivate the player to think in these terms. Secondly, the Revolutionary War was fought in many cases as a gentleman's war. Being surrounded was considered to have been bested and most often resulted in the surrender of the surrounded troops rather than any fight to the death. The surrender of British troops at Saratoga is a good example of this. The ¼ modifier to defending strength is intended to reflect the tendency of the Isolated units to surrender when pressed.
Why isn't the Partial Retreats Optional Rule a default rule? Retreats from a hex by units that have just lost a melee are necessarily very chaotic events. Certainly with a breakdown in command and morale, it would not be possible to find some optimal displacement of units that would just fit in the retreating hex. A good analogy would be a burning building where quite often a large number of people perish even though there are exits readily available. The dynamics of this situation is known as choking and results in greatly reduced flow through openings. Based on this, there is justification for concluding that obstructions to their retreat would often result in the surrender of the defeated troops rather than some optimal reduction.
I had a unit lose ammunition on the first turn of the game. That's ridiculous! Is it? Having a full complement of ammunition was never guaranteed in any battle. While most often, a unit had enough ammunition to ensure the ability to fight for some time, breakdowns in command and organization often resulted in ammunition problems. Adding an ammunition level to each unit in the game would simply increase the micromanagement necessary to play the game without adding any benefit and would in fact detract from the game by including information that could hardly be known by higher level commanders.
I don't understand the Low Ammo rules. Why can units with Low Ammo fire during the Defensive Fire Phase and not the Offensive Fire Phase? Do they have bullets or don't they? The distinction here is based on the fact that units low on ammunition will start to save their shots and not use them unless absolutely necessary. Since the Defensive Fire Phase is the point at which defending units get to fire on their attacker, this would be a good example of when units would use their precious ammunition. Not allowing fire during the Offensive Fire Phase is the point at which the lack of ammunition is applied and thereby motivates the player to not use these units for attack. The end result in the game is a good one causing a reduction in aggressive ability by units low on ammo but retaining the ability for units low on ammo to deliver a good blast when threatened.
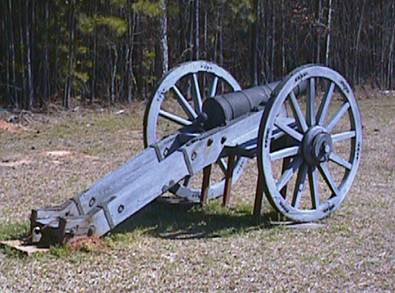 I think
artillery batteries that change facing should be allowed to fire in the
subsequent Offensive Fire Phase. All
they are doing is turning the guns to a new direction which hardly takes a full
5 minutes. In general there is more to a change of
facing by an artillery battery than turning the guns. In fact, the 60 degree field of fire given to
units and artillery in particular represents such simple redirection of the
guns to a new direction. Beyond this
arc, changes cannot be achieved simply through turning of the guns. Simply turning the guns and delivering a
volley outside of this arc would end up shooting into the backs of your fellow
battery mates. Therefore, changes of
facing by batteries would involve moving the guns and caissons to new positions
which, although perhaps not requiring a full 5 minute turn, would be more
involved than it might appear. The
affect of this restriction on the game is also a good one since it makes
artillery vulnerable to flanking maneuvers, something that was true if general.
Why can't Disrupted units conduct a melee attack? The state of Disruption in the Revolutionary War game represents a state of disorder caused by combat. The effectiveness of a Disrupted unit is considered diminished and this affects movement, firing, and in this case melee. For melees, Disruption is meant to include effects such as being pinned under fire and a general state of confusion resulting from combat. Historically these conditions most often resulted in the withdrawal of the attacking units or the taking of cover by the attacking units. In either case, a charge into the enemy position was not possible. Multiple accounts exist describing how charges were made again and again against enemy positions only for the attacking units to fall back to their original positions without success. Despite the boldness of their leaders, it just was not possible to bring the fight to the enemy when the attacking troops were sufficiently affected by defensive fire. In the game, the effect of this rule will be two fold. First, attacking units, despite their success, will often become Disrupted and therefore the effectiveness of their subsequent fighting will be diminished. Second, it motivates the keeping of a reserve so that units in good order are available at key points in the battle. Both of these effects are good for the game.
Can you explain why units that have not fired in the Offensive Fire Phase receive a +1 melee differential modifier in the Melee Phase? Given the slow reload rate of Revolutionary War weapons, leaders often found that when units were allowed to fire during an advance, they were reluctant to continue advancing with their weapons unloaded. This often resulted in the order to units that they not fire during a charge but rather advance without stopping. The additional vigor with which the advancing units conduct their attack is the basis for the modifier.
I melee attacked an unsupported Artillery battery and was defeated. This can't be right. Melees have two possible outcomes. In the first, the attacker wins the melee and displaces the defending units from the hex. The second outcome results in the defenders retaining the defending hex. A failure of the attacking units to take the defending hex should not be interpreted so much as a victory for the defending units, but rather simply a failure of the attacking units to conduct a successful melee. In the case of a melee attack against Artillery, a failure to take the defending hex means that the attackers had so much trouble conducting the charge or were so ineffective in their charge, that the defending hex could not be considered taken. If you wish, you can consider the melee in this case to be ongoing, although this is not part of the game engine. The bottom line is that no melee can be guaranteed to be an automatic victory unless the defending hex is free of fighting units.
 How come PBEM
Encryption is just an option? Doesn't
everyone want to prevent PBEM cheating? There's one very important thing that you should realize about PBEM
cheating: it cannot be prevented. While
encryption of the PBEM file and the use of PBEM passwords does deter the casual
cheater, it does not and cannot prevent all cheating. Why? The problem with attempting to encrypt the PBEM file is that the code
required to encrypt and decrypt the file plus, most importantly, the encryption
key is located in a very handy place to the would-be cheater: the main
program. A hacker of modest abilities
would be able to determine everything they needed to know by inspecting the
main program object code and very quickly come up with a program to encrypt and
decrypt PBEM files. Would the person
you're playing go to that much trouble? Does the person you're playing know someone who would? And finally, don't think that there is any
way to prevent someone from replaying the PBEM battle until they know far more
than they should about your position and have found the optimal fire and combat
outcome as well. Write something to the
registry? Hide a secret file on their
hard drive? Come on, those are so
obvious that even someone with only a small amount of motivation would be able
to circumvent them. So think about
cheating as a layered problem:
Is the person you're playing with familiar to you and someone you trust? Don't bother with encryption, it just gets in the way.
Are you wanting to use passwords just so you don't inadvertently open the file during your opponent's turn? Sure, use encryption for this.
Are you playing a good natured competition with someone who is probably not sufficiently motivated to hack the encrypted file? Encryption will work here too.
Are you playing someone you don't trust and need some way to stop them from any form of PBEM cheating? Don't bother. You'll drive yourself nuts trying to figure out if they've somehow hacked the encryption to get a win.
Why the change to double Fatigue firing effects on Artillery? Based on experience, players found that it was just too unrealistic for Artillery to remain under enemy fire turn after turn accumulating Fatigue and perhaps the occasional loss, but not really suffering enough to motivate the player to withdraw the battery. Surely as a result of this fire, the battery, while perhaps not losing cannons, is suffering damage to its crew and equipment that has a detrimental effect on its ability to fire. This attrition to the ability of the battery to fire is the basis for the increased Fatigue firing effects.
Why are melee casualties for mounted cavalry vs. mounted cavalry reduced from normal? Based on several historical accounts, it appears that while mounted cavalry clashes were very colorful events with much bravado and swinging of sabers, that compared with the number engaged, casualties resulting from these encounters were generally very light. Playtesting has shown that in the absence of such a modification, cavalry casualties become unhistorically high.
 This section
contains information that the player may find helpful in playing the game. Since the Revolutionary War was fought using
linear tactics, there are
similarities between this period and others such as the Napoleonic period and
the American Civil War. But there are
some important differences you should keep in mind.
"Don't fire until you see the whites of their eyes!" There is a bonus given to the first time a unit fires in the battle. This reflects the fact that weapons of the period tended to foul after being fired several times and that the first few firings of the weapon were therefore more effective. You should wait until your enemy is within short range to take the most advantage of this effect.
Keep in mind that your cavalry can fight dismounted. The cavalry in the game represents dragoon units. These carried guns and could dismount and fight on foot. Since there is not a lot of cavalry in any battle, you cannot use your cavalry the same way you would in a Napoleonic battle. In general, cavalry charges will only be effective against routed or other vulnerable units. Otherwise, you should use your cavalry for scouting and as advance units. For example, at Princeton, the British cavalry was used to ride ahead and hold an important position until the infantry could join it.
Use the Extended formation to improve the defensive abilities of your units. Extended formation represents the open order formation used by skirmishers as opposed to the shoulder-to-shoulder formation used by units in line. Light units and militia can use this formation to improve their ability to withstand the fire and charges of units in line while retaining their own fire power.
Artillery will not have a significant effect on the battle. In each battle you will not have a great amount of artillery to use. In addition, it will generally consist of the smaller guns such as 3 and 6 pounders. It will not be possible to base a strong defensive position on cannon as you would in Napoleonic or Civil War battles.
Remember that the standard unit in the game is the company. In games where the regiment is the standard unit, the column formation actually represents the relative location of individual companies, each of which has deployed in line. Therefore, remember that your companies will always fight in line formation and that their relative position to each other will determine the formation of their regiment. Likewise, there is no square formation in the game since this is again determined by the relative position of the companies.
As the American player, you should be very aware of the differences in quality between your regular forces and your militia. Depending on the battle, you will have a varying amount of militia in your army. You should be careful how you utilize the militia as they will not stand up to fighting with the British regulars. Morgan at Cowpens is probably the best example of how to effectively use militia, while Gates at Camden is probably the worst example.
American militia is very significant when the "Rifle Fire Effects" Optional Rule is used. The use of this rule will result in very high leader casualties among the British player. This effect is the result of two key facts. First, the rifle was much more accurate than the smoothbore musket. This allowed the use of aimed fire, that is, fire directed at a specific target. Second, the Americans were not reluctant to target individual leaders in battle, something that the British considered ungentlemanly conduct. The result was that British officers took extremely high casualties in the Revolutionary War with the battles of Bunker Hill, Saratoga, Cowpens, and Guilford Court House being good examples of this effect.
 There is
far less documentation on the Revolutionary War than more modern conflicts such
as the American Civil War or World War II. Very little specific Order of Battle information is available in the
general literature. In many cases, the
leaders of individual organizations, particularly regiments, is not readily
available. In addition, very few images
of the leaders exist. In contrast to the
American Civil War, where the wide spread use of early camera technology was in
effect, individuals in the Revolutionary War had to rely on paintings for their
portraits, a costly and time-consuming process. Thus, there are significant gaps in the knowledge about leaders, their
names, and their faces. To provide a
continuous database for the game, it was necessary to introduce place-holder
names and faces for some of the leaders. To help identify these for the player, the following conventions have
been used:
When a leader's name is not known, a place-holder name has been introduced which is followed by a period. For example, the leader name Col. Hamilton. would be an example of a place-holder name since it is followed by a period.
Likewise, when a leader's portrait is not available, a place-holder image has been used. This place-holder image is marked with a red dot to distinguish it from an actual portrait.
 Here are some
answers to some common problems.
I'm trying to install the game, but when
I put the game CD in my drive, nothing happens. What do I do now?
There are two possible problems. One
is that the software thinks the game is already installed on your system. If this is possible, perform the uninstall
operations you find below. The other
possibility is that there is a problem with the autorun configuration on your
system. To check this, double-click on
My Computer and double-click on your CD drive. If this starts the installation process, then fine. Otherwise, you should see the files on the
game CD. Find and double-click on the
Install program. And if this doesn't
work, then double click on the game folder, Campaign 1776 for example, and
double-click on Setup.
At the end of the installation, I got an error message that a directory could
not be deleted. Is this OK?
Yes, this is fine. There is a bug in
the installation software that causes this problem if you deselect the final
installation options. But otherwise, the
game should work fine.
I think I may have accidentally deleted
a file, or I may have a corrupted file. How do I fix that?
If you think you have one or two files that need fixing and you know the
names of the files, then you should be able to find the files on the CD and
copy them to the game folder. Remember
however, that any file copied from the CD will become read-only and you
probably want to select the file and change its properties to remove this
attribute. If this sounds too hard, or
if you want to make sure that your installation is correct, then you should
reinstall the game.
I want to make sure that all my files
are correct. How do I reinstall the
game?
In order to reinstall the game, you must first uninstall the game. Just to be on the safe side, you should copy
any battle files you have to another folder before you do this. If you have concerns about bad files in your
installation, you may also want to delete the game folder after finishing the
uninstall. Once the uninstall has been
done, then you just reinsert the game CD, and it should perform a autorun
installation. If this should fail to
happen, then find the install program on the game CD and double click on this.
You say that I have to uninstall the
game before I reinstall it. How then do
I uninstall the game?
From the Start button, go to Settings, then Control Panel, and double-click
on Add/Remove Programs. In the list that
is displayed, find the name of the game and double-click on that entry. This should initiate the uninstall process.
When I uninstall the game, I get a message that the game folder is locked. Is this a problem?
No, it is only telling you that there are files in the folder, probably battle files, that are left over after the install and that it cannot delete the folder as a result. After the installation is done, you can look at the files in the game folder and decide if you want to save any of them or just delete the game folder.
Instead of doing the correct uninstall
process, I tried just deleting the game folder. Now when I try to uninstall the game, it says that there is a missing
file. Now what do I do?
Ok, at this point you have to edit your registry. Be very
careful. The registry is the single
most important file on your computer and if it gets corrupted, then you may
have to reinstall Windows. But if you
need to, here are the steps you take:
From the Start button, select Run, and then enter: \windows\regedit
When the Registry Editor runs, look on the left-hand side and double-click on HKEY_CURRENT_USER, then double-click on Software, then double-click on HPS Simulations.
At this point, you should see one or more entries with the name of the game. For example, for Campaign 1776, you should see an entry named Campaign 1776 and another named RWB. For each of these entries, click on the entry, then right click, and select Delete.
Exit the Registry Editor.
Once you have performed these steps, then when you insert
the game CD, the autorun installation should run and you will be able to
reinstall the game.
I want to see the files on the CD, but
when I double click on the CD icon, it doesn't do anything.
By default, when you double-click on the CD icon, it invokes the autorun feature. So, what you need to do to see the files on the CD is right-click on the CD icon, and select Open.
I don't think DirectX is properly installed on my computer. How can I fix that?
A copy of DirectX is on your game CD. Double-click on My Computer, then Right-click on the CD Drive and select Open, then double-click on the game folder, then double-click on the DirectX folder. Finally, double-click on DXSetup. When this runs, click on the ReInstall DirectX button.
I just added another drive to my system, and now the game doesn't play the intro video or the background sounds. How do I fix that?
The installation process records the location of your CD drive so the software can find files associated with the game that are not copied to your hard drive. When you add a drive to your system, it probably changed the drive letter of your CD drive. If you are adventurous, you can try editing your registry to fix the problem, but the safe way is to uninstall the game and reinstall it (see above).
I want to move the game from one location on my hard drive to another. Is that possible?
As above, there are registry entries associated with the installation that will be affected by this if you move the game folder to another location. The sure way of doing this is to uninstall the game and reinstall it (see above).
I found an install program on the CD, but when I double-click in it, nothing happens.
By double-clicking on the install program, you are invoking the autorun procedure. After the game has been installed, this has no effect. If you want to reinstall the game, then you have to uninstall it and reinstall it (see above).
 Publisher: Scott Hamilton
Design and Development: John Tiller
Artist: Joseph, The Genius, Amoral
Uniform Research: Mark Adams
Background Music: Thomas Hook (Vocalist:
Jennifer Davis)
Playtesters: Mark Adams, Bill Keys,
Mark Trowbridge, Skip Taylor, and Roger Batchelder
Additional Review: Gregory Sturm
Smith and John Kincaid
Painting George Washington at Monmouth:
Andy Thomas
Contact Information: https://www.hpssims.com or 408-554-8381
Highlight
To display a unit on the map with a yellow outline.
The hex on the map currently selected with the red hex outline.
An objective hex where points are awarded to the owning side for removing units from the map at that hex.
An option that causes certain information to be hidden from the opposing player such as the location of units which are not spotted and the arrival of enemy reinforcements.
Units which are Fixed cannot move until Released, fired upon, or meleed against, but may fire themselves and may change formation.
Basic data from a pdt file that applies to the current scenario.
A keyboard character which when typed performs the same function as a menu selection or toolbar button.
Artificial Intelligence. In this case, this represents the automatic movement, firing, and combat by units under the control of the computer program.
A change in the outcome of internal tables used by the main program so as to give one side in a battle a generally more favorable result over the other side. Typically used to balance battles against the computer.
Units are Isolated if it is not possible to find a path from the unit to an edge of the map that is free of enemy units or their Zone-Of-Control.
A Fatigue level from 0 through 29.
A Fatigue level from 30 through 59.
A Fatigue level of 60 or higher.
A unit is Detached when it is beyond the Command Radius of its commander. A Regiment Leader is Detached when he is beyond the Command Radius of his commander.
Fire on a unit that comes from a direction the unit is not facing.
The 2 facing hexes of a unit in Line Formation capable of firing.
A two-player game is under Local Control when the current phase is under your control, and under Remote Control when it is under the control of your opponent.
The type of weapon carried by a particular unit. See the Scenario Notes for a description of the various types and their range effectiveness.
Index
C
Combat Results 20, 21
Command 14, 15
Credits 43
D
Defensive Fire Phase 9, 10
Design Notes 31
F
Fatigue 18, 19
I
Introduction 3
L
Leader Names and Faces 40
M
Melee Phase 12
Morale 16, 17
Movement Phase 6
N
Network Play 27, 28
O
Offensive Fire Phase 11
P
Play By E-Mail 29
Q
Quick Overview 4
S
Supply 19, 20
T
Tactics 38
The Campaign Game 21
Troubleshooting 41
|