Table of Contents
The Early American Wars Campa 111w2217b ign Editor
Introduction
Campaign Data
The Display
Outcome Matrices
Notes on Creating a Campaign
Org Mapping Files
Menus
File Menu
Data Menu
Help Menu
Dialogs
Campaign Dialog
Situation Dialog
Choice Dialog
Outcome Dialog
Branch Dialog
Situation Window
Other Features
Toolbar
The Early American Wars Campa 111w2217b ign Editor supports the creation and modification of Campaigns for use in the Early American War series of games including Campaign 1776 and others.
A Campaign consists of a series of Situations. Each Situation offers each side in the Campaign a list of Choices. Each side picks one of these Choices not knowing what the other side has decided. After each side has selected their Choice, then the selections are cross referenced to arrive at an Outcome. An Outcome consists of a Scenario in a Module and 5 other Situations associated with the 5 possible victory conditions that can result from a battle: Major Defeat, Minor Defeat, Draw, Minor Victory, and Major Victory. In addition, an Expected Value is associated with each Outcome for use by the A/I (Artificial Intelligence). The Scenario is fought by the two sides and the American victory condition resulting from this battle is used to determine the next Situation according to the 5 Situations associated with the Outcome. This process is repeated and continues until a Terminal Situation is reached which represents the resolution of the Campaign.
The Campaign Editor display shows the Campaign data using a standard Windows Tree Control. After a Campaign file is read in, the Situations associated with the Campaign are displayed as branches of the control.

Scenarios
preceded by a map symbol ![]() are Branch
Situations that involve battles leading to other Situations. Scenarios preceded by a stop sign symbol
are Branch
Situations that involve battles leading to other Situations. Scenarios preceded by a stop sign symbol ![]() are Terminal
Situations representing an end to the Campaign. The first Situation listed is the default
starting point for the Campaign.
are Terminal
Situations representing an end to the Campaign. The first Situation listed is the default
starting point for the Campaign.
Clicking on the plus sign preceding a Branch Situation, or double clicking on the Situation name expands the Situation displaying the American Choices, British Choices, and Outcomes.
Each set of Choices, American and British consists of a list of options that can be chosen by that side. Clicking on the plus sign preceding the Choices, or double clicking on the name, expands the Choices displaying the list of possible options.
Each
option in the list is preceded by a question mark symbol ![]() indicating that it will be presented to the
player during the Campaign as a possible option. Each option is labeled such as A1, A2, . for
the American Choices and B1, B2, . for the British Choices. Following that is an Optimal Probability which indicates the probability that the A/I
will pick that Choice. These Optimal
Probabilities are calculated using Game Theory using the Expected Outcome
values described below.
indicating that it will be presented to the
player during the Campaign as a possible option. Each option is labeled such as A1, A2, . for
the American Choices and B1, B2, . for the British Choices. Following that is an Optimal Probability which indicates the probability that the A/I
will pick that Choice. These Optimal
Probabilities are calculated using Game Theory using the Expected Outcome
values described below.
The Outcomes are a matrix having as many rows as there are American Choices and as many columns as there are British Choices. Expanding the Outcomes one level displays the rows and expanding any row displays the entries in that row.
Each
matrix entry is preceded with a battle symbol ![]() indicating that it represents a battle that
will be fought in the Campaign depending on the Choices of the two sides. For example, the above display shows that if
the British side chooses option B1
and the American side chooses option A2,
then the scenario The Battle at Cowpens
will be played. Furthermore, this
scenario has the filename Cowpens_a.scn. The number in square brackets, [-30] is the Expected Outcome of this battle. Positive numbers indicate a battle favorable to the British side and
negative numbers indicate a battle favorable to the American side. These values are used by the A/I in
determining the Optimal Probabilities described above. In addition, when a Campaign Game is played
with the Use Expected Outcomes
option, these values are used to determine a victory outcome according to the
following:
indicating that it represents a battle that
will be fought in the Campaign depending on the Choices of the two sides. For example, the above display shows that if
the British side chooses option B1
and the American side chooses option A2,
then the scenario The Battle at Cowpens
will be played. Furthermore, this
scenario has the filename Cowpens_a.scn. The number in square brackets, [-30] is the Expected Outcome of this battle. Positive numbers indicate a battle favorable to the British side and
negative numbers indicate a battle favorable to the American side. These values are used by the A/I in
determining the Optimal Probabilities described above. In addition, when a Campaign Game is played
with the Use Expected Outcomes
option, these values are used to determine a victory outcome according to the
following:
Expected Outcome <= -75 American Major Victory
-75 < Expected Outcome <= -25 American Minor Victory
-25 < Expected Outcome < 25 Draw
25 <= Expected Outcome < 75 British Minor Victory
75 <= Expected Outcome British Major Victory
Finally, expanding an Outcome displays 5 Branches associated with that battle.
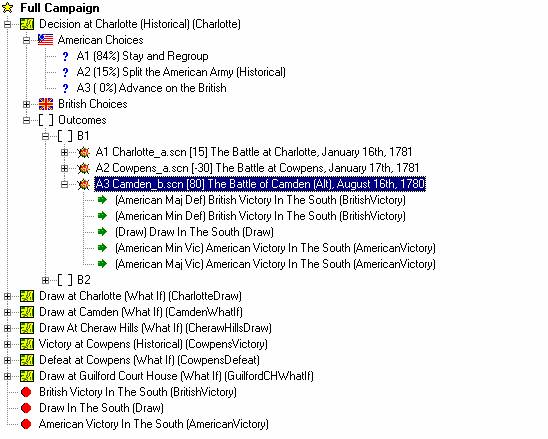
Each
Branch is preceded by an arrow symbol ![]() indicating that it identifies the next
Situation in the Campaign. The 5
Branches are associated with the victory conditions resulting from the battle
for the American side: Major Defeat, Minor Defeat, Draw, Minor Victory, and
Major Victory. Based on the American
victory level resulting from the battle, the Campaign Game will branch to the
corresponding Situation.
indicating that it identifies the next
Situation in the Campaign. The 5
Branches are associated with the victory conditions resulting from the battle
for the American side: Major Defeat, Minor Defeat, Draw, Minor Victory, and
Major Victory. Based on the American
victory level resulting from the battle, the Campaign Game will branch to the
corresponding Situation.
Each Situation has a matrix of possible Outcomes based on the Choices available to each side. As such, each matrix represents a Zero-Sum Two-Person Matrix Game. You assign to each Outcome an Expected Value which is used by the A/I to determine an optimal strategy for each Situation. The calculation uses the standard Simplex Method from Linear Programming to arrive at the Optimal Probabilities. In this calculation, there are two special cases which you should avoid when designing the Campaign.
The matrix is said to have a Dominant Row when there exists a row in which each entry is greater than or equal to the corresponding entries in another row. In Game Theory this means that there is no reason to have the second row as the player of the row choices will always choose the Dominant Row over the second row since it represents a consistently better payoff. Likewise, the matrix is said to have a Dominant Column when there exists a column in which each entry is less than or equal to the corresponding entries in another column. This means the player of the column choices will always choose the Dominant Column over the second column for the same reason as before. Matrices with either a Dominant Row or Dominant Column contain choices that the player will never choose if pursing an optimal strategy and such matrices should be avoided in the design of the Campaign.
A second case is when the matrix has a Saddle Point. A Saddle Point occurs when there is a matrix entry which is less than or equal to all other entries in its row, and greater than or equal to all other entries in its column. This means that the optimal strategy for each player is to consistently choose the corresponding row or column. As such, a matrix with a Saddle Point represents a trivial game that should be avoided.
The following are some notes and advice about how to create a good campaign.
Keep it simple. If you think about the campaign data, you realize that n choices for one side and m choices for another result in n x m possible combinations. Each combination can have as many as 5 branches. You can see how the greatest danger in creating a campaign is attempting to consider too many possibilities and never being able to finish it. This means you've got to make some hard decisions about what to include and what not to include in your campaign.
Try to offer 2 or 3 choices to each side in each situation. Each situation should include the historical option of course, but should include at least one alternative. Limiting a side to a single choice prevents them from making any decision in a situation and should only be used in rare cases. Three choices will allow you to offer up a good alternative plus an interesting hypothetical. Trying to allow more than 3 choices runs the risk of causing the campaign data to grow so much that you have trouble finishing all the possible branches. Note that when you have an unequal number of choices for the two sides, then mathematically, there will be a choice associated with the side with more choices with a 0% probability. Although this means that the computer player will never pick this choice, it can still represent an interesting choice for the human player.
Don't drag out the campaign. Most historical campaigns only consisted of a few major battles. You should avoid bringing your campaign to a close if one side or the other gets a significant victory. You may in fact want to limit the full campaign to a narrow set of outcomes and quickly resolve other possibilities in favor of one side or the other. Introducing quick resolution into your campaign will keep each side on their toes knowing that a major mistake on either part will terminate the campaign.
Don't try to use all 5 possible branches. Although you can build as many as 5 branches from a given scenario, this will quickly result in too many combinations in your data and you will have trouble finishing all of them. You should limit the number of possible branches to between 1 and 3 non-terminal branches. Normally 2 non-terminal branches will address most situations. You can always use terminal branches to finish off a campaign which has resulted in a significant outcome. Also, you may encounter situations where the two choices don't result in a major battle. That is, one side may choose to retreat while the other side chooses to regroup. When that happens you can use an outcome with a single branch, called a Skip Scenario to keep the campaign going. A Skip Scenario is typically a rear-guard action of no major consequence, but allows the players to fight a battle before going on to the next situation.
Start with the historical choices and outcomes. It will help you see how complicated your campaign is by first going through and just addressing the historical choices and outcomes leaving all other choices and outcomes undone. This will allow you to at least see how one thread in the campaign works out. Having done this, you can go back through and build the other outcomes into the campaign, but doing so in a way that avoids unnecessary branching.
For all but the historical scenario, start with the expected values and derive the scenarios. That is, after coming up with the choices and entering the historical scenario and its historical expected value, you look for combinations of expected values which result in non-trivial choice probabilities. That is, no one choice should have a 100% probability of selection, although it is possible and necessary sometimes that choices have a 0% probability. After you know what expected outcomes give meaningful results, you then know how to construct the what-if scenarios.
For each choice, there should be a reason for picking that choice, and a reason for not picking it. These reasons should be based on the possible responses of the opposing player. In other words, no choice should be a no brainer either for picking it or not picking it. If each choice has some merit (and they all should), then you must be sure that for each choice there is a corresponding choice by the opposing player that acts as a counter to that choice. This will introduce uncertainty and risk into each situation.
Org Mapping Files allow losses from one battle to carry over to the next when the Orders of Battle of the two battles are not identical. This allows you to create a campaign where there are reorganizations during the course of the campaign.
An Org Mapping File is defined relative to the source and target orders of battle. For example, if you want the losses from scenario_a.scn to carry over to the next scenario scenario_b.scn in the campaign, then scenario_a.scn is the source and scenario_b.scn is the target. Assume that scenario_a.scn is based on the order of battle file scenario_a.oob and that scenario_b.scn is based on the order of battle file scenario_b.oob. To create an org mapping file between these order of battles, you create a file called scenario_b.org. You do this using a standard text editor such as Notepad so that you can save the file as plain text.
In the file scenario_b.org you first put the line:
scenario_a
This indicates that you are about to define a mapping from the source order of battle scenario_a.oob. Following this first line, you then put a variable number of mappings. Each mapping consists of two identifiers such as:
1.3
These identifiers identify organizations or individual units in the two respective orders of battle, source followed by target. You determine these identifiers by using the Write OB Id's to File option under the File menu in the Scenario Editor. For example, if the id refers to the organization Division A in scenario_a and the id refers to the organization Division B in scenario_b, then this mapping indicates that each unit under Division A is to be mapped to the corresponding unit in Division B. That is, a unit with id will be mapped to the unit and so forth.
You end the list of mappings with a line that only has a on it. So a complete mapping might look like:
scenario_a
1.3
1
2
Notice how more specific mappings such as to must occur more general mappings such as to on the line below it. In general, the first mapping that applies in the list will be used for a given unit.
If a source is identified, but then followed immediately by the terminator, that indicates that no loss mapping should occur between the source and target scenarios. You do this when you have battles in the campaign that are based on unrelated orders of battle.
In a single mapping file, you can list multiple sources each with their own mapping. After entering the first source mapping, you then start the next on the line following the terminator of the first.
Note that campaign mappings will apply to the last two battles in a campaign. That is, unit losses will not only be applied from the immediately preceding battle to the current one, but also, if needed, from the battle prior to the preceding battle. The purpose behind this is to allow a battle to occur in the campaign that does not utilize the full organization involved in the campaign and still have previous losses from the larger organization carry forward.
To learn more about Org Mapping Files, you should review the org mapping files included with the game. These illustrate the features of Org Mapping Files discussed in this section. Remember that you do not need to define Org Mapping Files in a campaign based on an unchanging Order of Battle.
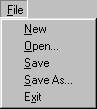
The File Menu is used to read and write Campaign Files.
 Select
New to start a new Campaign from
scratch.
Select
New to start a new Campaign from
scratch.
Select Open to open an existing
Campaign File. Note that Campaign Files
have the extension .cpd by default.
Select Save to save the current
Campaign to a file. If a filename does
not already exist for the current Campaign, then you will be prompted to
specify one.
Select Save As to save the current
Campaign under a different filename.
Select Exit to exit the Campaign
Editor.
The Data Menu is used to modify the data associated with a Campaign.
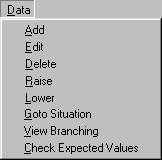 Select
Add to add a new Situation or
Choice. If the currently selected item
is a Situation, then this selection adds a new Situation after the current
one. If the currently selected item is
the top line of the Display, then this selection adds a new Situation to the
start of the list of Situations. If the
currently selected item is an individual Choice, then this selection adds a new
Choice after the current one. If the
currently selected item is the parent of the individual Choices (either
American Choices or British Choices), then this selection adds a new Choice to
the beginning of the list.
Select
Add to add a new Situation or
Choice. If the currently selected item
is a Situation, then this selection adds a new Situation after the current
one. If the currently selected item is
the top line of the Display, then this selection adds a new Situation to the
start of the list of Situations. If the
currently selected item is an individual Choice, then this selection adds a new
Choice after the current one. If the
currently selected item is the parent of the individual Choices (either
American Choices or British Choices), then this selection adds a new Choice to
the beginning of the list.
Select Edit to modify the values
associated with the current selection. You may only edit Situations, individual Choices, individual Outcomes,
Branches, and Campaign introduction information. If a Situation is selected, this menu item
will display the Situation Dialog. If an individual Choice is selected, this
menu item will display the Choice Dialog. Likewise, if an individual Outcome or Branch
is selected, this menu item will display the Outcome
Dialog or the Branch Dialog
respectively. Finally, if the top line
of the Display is selected, then this menu item will display the Campaign Dialog.
Select Delete to delete the current
selection. You may only delete
Situations and Choices.
Select Raise to raise the currently
selected Situation or Choice in its list.
Select Lower to lower the currently
selected Situation or Choice in its list.
Select Goto Situation when you have
selected a Branch and you want to find the Situation this Branch corresponds
to.
Select View Branches to display all
of the possible Situation branches that can result in the current Campaign
using the Situation Window.
Select Check Expected Values to check the expected values for saddle points and dominant rows or columns. Note that this is done automatically when a campaign file is opened.
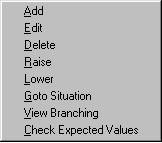 The
selections in the Data Menu are also available as a pop-up
context menu in the Display area. Right-clicking in the Display area will display this menu with
selections relative to the currently selected item.
The
selections in the Data Menu are also available as a pop-up
context menu in the Display area. Right-clicking in the Display area will display this menu with
selections relative to the currently selected item.
The Help Menu is used to display information about the Campaign Editor including this Help file.
 Select
Contents to display this Help file.
Select
Contents to display this Help file.
Select About to display information
about the Campaign Editor including version and copyright information.
The Campaign Dialog is used to edit introductory information about the Campaign such as title and description.
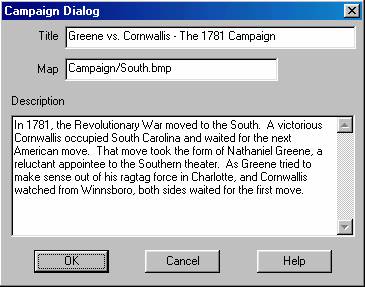 The
Title of the Campaign is associated
with an overview of the Campaign in the game.
The
Title of the Campaign is associated
with an overview of the Campaign in the game.
The Map is the filename of a BMP
file that is displayed to provide a graphical representation of the overall
Campaign.
The Description is an overview of
the Campaign that is displayed to both sides in the game prior to starting the
Campaign.
The Situation Dialog is used to edit information about a Situation.
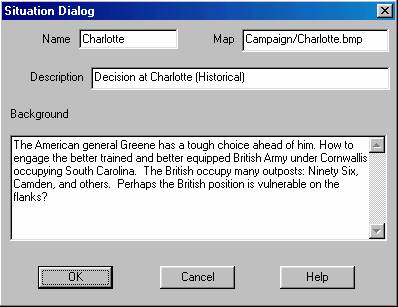 The
Name of the Situation is generally a
short name given to the Situation which is only used for internal cross
reference and is not displayed in the game to the user. The Name of a Situation cannot contain
spaces.
The
Name of the Situation is generally a
short name given to the Situation which is only used for internal cross
reference and is not displayed in the game to the user. The Name of a Situation cannot contain
spaces.
The Description of the Situation is
a one line description associated with the Situation that is displayed in the
game.
The Map is the filename of a BMP
file that is displayed in the game to provide an overview of the Situation.
The Background text is a paragraph
which is used to provide an overview of the Situation to the user in the game.
The Choice Dialog is used to edit information associated with a player Choice.
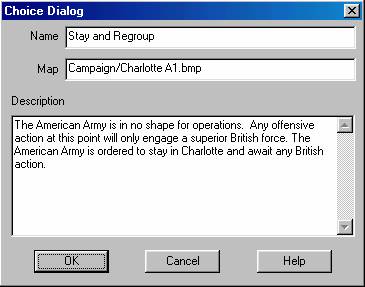 The
Name is a one line description of
the Choice displayed to the player in the game.
The
Name is a one line description of
the Choice displayed to the player in the game.
The Map is the filename of a BMP
file that is displayed in the game to provide a graphical representation of the
Choice.
The Description is a paragraph which
explains the Choice and reasons why the Choice may be a good one in that
Situation.
The Outcome Dialog is used to modify information associated with an Outcome.
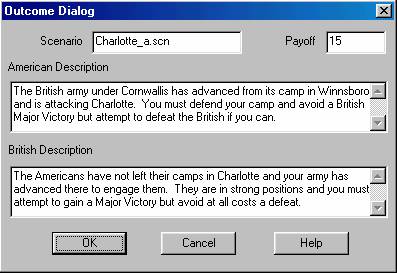
The
Scenario is the filename of the
scenario to be fought.
The American Description is a short
description of the upcoming battle that is displayed only to the American
player just before the scenario is started.
Likewise the British Description is
a short description of the upcoming battle that is displayed only to the
British player just before the scenario is started.
The Payoff value is the Expected
Outcome value associated with the scenario.
The Branch Dialog is used to modify the target of a Branch.
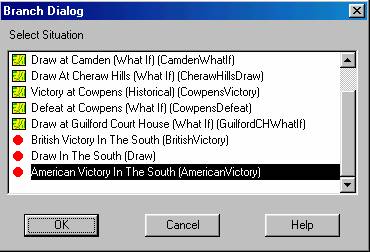 The
Branch Dialog displays a list of Situations in
the Campaign. The current target of the
Branch is selected by default. Selecting
a Situation in the list and clicking OK, or double clicking on a Situation,
will close the dialog and associate that Situation with the Branch.
The
Branch Dialog displays a list of Situations in
the Campaign. The current target of the
Branch is selected by default. Selecting
a Situation in the list and clicking OK, or double clicking on a Situation,
will close the dialog and associate that Situation with the Branch.
The Situation Window is used to display all of the branching that occurs in the current Campaign.
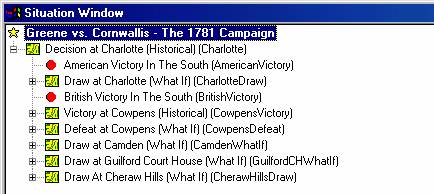
The Situation Window is displayed as a result of the View Branching menu item of the Data Menu. It displays a tree showing the possible branching Situations from each Situation.
The Toolbar is located at the top of the display just below the Menu Bar. The Toolbar is used to facilitate commands which otherwise are available through menu selections.
![]() New - start a new Campaign.
New - start a new Campaign.
![]() Open - open an existing Campaign file.
Open - open an existing Campaign file.
![]() Save - save the current Campaign to a
file.
Save - save the current Campaign to a
file.
![]() Add - add new Situation or Choice after
current selection.
Add - add new Situation or Choice after
current selection.
![]() Edit - make changes to the information
associated with the current selection.
Edit - make changes to the information
associated with the current selection.
![]() Delete - delete the current Situation
or Choice.
Delete - delete the current Situation
or Choice.
![]() Raise - raise the currently selected
Situation or Choice.
Raise - raise the currently selected
Situation or Choice.
![]() Lower - lower the currently selected
Situation or Choice.
Lower - lower the currently selected
Situation or Choice.
![]() Goto - goto the Situation associated
with the selected Branch.
Goto - goto the Situation associated
with the selected Branch.
![]() View - view the possible Situation
branches in the Situation Window.
View - view the possible Situation
branches in the Situation Window.
![]() Help - display the contents of this
Help File.
Help - display the contents of this
Help File.
Index
B
Branch Dialog 14
C
Campaign Data 2
Campaign Dialog 11
Choice Dialog 12
D
Data Menu 10
F
File Menu 9
H
Help Menu 11
I
Introduction 2
N
Notes on Creating a Campaign 6
O
Org Mapping Files 9
Outcome Dialog 13
Outcome Matrices 5
S
Situation Dialog 11
Situation Window 14, 15
T
The Display 2
Toolbar 15
|
