Sometimes your portraits are marred by dull or distracting backgrounds. Use the Magic Extractor tool to replace that boring background with an interesting backdrop! The Magic Extractor tool is especially useful if your subject has wispy hair on a solid background. While it won't catch everything, it allows you some control over those wisps. (Hair is painfully hard to manage and most often requires pain 21521n1318v staking editing.)
|
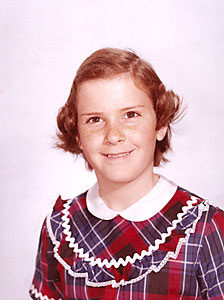
Before
|
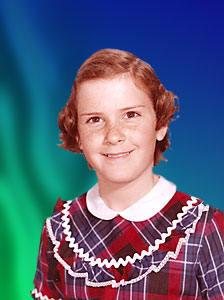
After
|
|
|
|
Replacing a background involves two steps:
Extract the person from the boring background.
Replace the background with something interesting.
Open the file that contains the person you want to extract from the background.
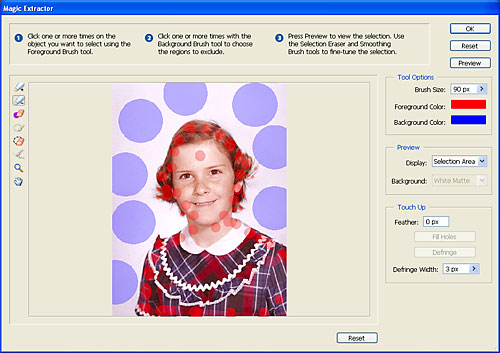
From the Image menu, select Magic Extractor. The Magic Extractor window is displayed. The following example shows the tools in the Magic Extractor window:
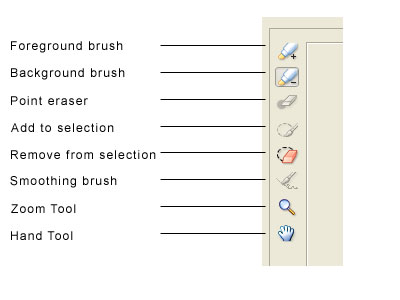
Click the Foreground brush and paint over the person you want to extract with different sized dots. Make sure that you cover areas that look similar in color to the background. To change the brush size while you are painting, press the left bracket key ([) to reduce the brush size, or the right bracket key (]) to increase the brush size. Use small brush strokes to cover delicate areas like the hair fringes that you want to retain. If you make a mistake, use the Point Eraser tool to remove the errant point.
Click the Background brush and paint over the background with dots or strokes. If the background is uniform in color, you can use a large brush stroke and place a few large dots over the area. In this example, the red dots cover the foreground and the blue dots cover the background:
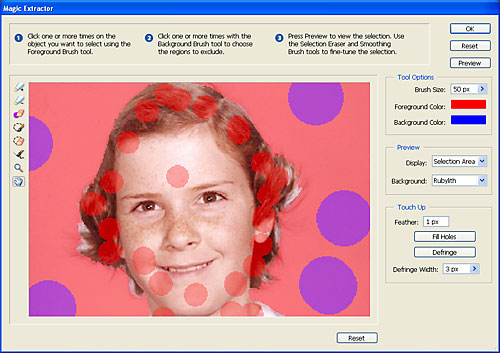
Click Preview to preview your selection. Select the type of background for the preview. The following example uses the Rubylith background to help in making further adjustments.
Use the Zoom and the Hand tool to focus on areas where you want to fine-tune the selection.
Select the Add to Selection tool to add more areas to the selection. In this example, we used a small brush to add some hair wisps to the selection.
Select the Remove from Selection tool to remove areas from the selection. In this example, we used a small brush to remove some white background pixels that were still selected.
Select the Smoothing brush to smooth any remaining rough edges, especially around the wispy hair.
In the Touch Up section, enter a Feather size of 1-2 pixels and a Defringe size of 3 pixels. Click Defringe.
Click OK. The subject is now extracted and the background is replaced with transparent pixels.

In the Layers palette, press Ctrl, then click the New Layer icon to create a new layer below the portrait layer.
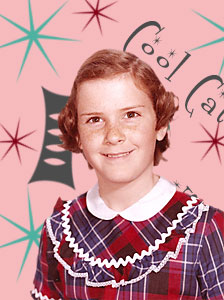
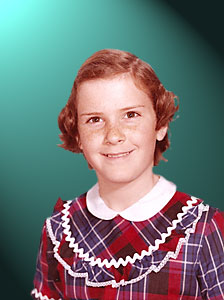
Fill the new layer with the background of your choice. For example, fill it with a Cool Fifties pattern, a Satin Gradient background or a background to which you have applied a Lighting Effects filter.
|
Fifties Pattern |
Lighting Effects |
|
|
|
|