Start Programme
The first time you start Sketchup 6.0 it may look something like this:
The point where the 3 axes meet is called ORIGIN (meaning "beginning")
It is important to understand the meaning of the red, green and blue lines you see in the main screen a 727t192h rea. Look at the illustration below. The figure (the man) stands on the floor - defined by the red and green lines (axes). The walls behind the figure are defined by the blue/red and the blue/green axes respectively. This is a 3 dimensional drawing, or a 3D-drawing. In SketchUp we draw in 3 dimensions most of the time, but it is sometimes easier to start the drawing in 2D. When drawing in 2D it is useful to know where we are drawing, i.e., is it on the floor (seen from the top)? on the wall (seen from the front)? Or on the wall (seen from the right)?
The default (standard) setting in SketchUp is 3D. In most cases it is convenient to start drawing on the floor or on one of the walls. Below you see settings where we draw on the floor and on the walls (front or right views) respectively. These settings are called views.
Drawing 2D on the floor (Top view).
Notice that
the blue axis is now pointing towards you.
Drawing 2D on the wall (Front view)
Notice that the blue axis is pointing upwards
Drawing 2D on the wall (Right view)
Notice that the blue axis is pointing upwards
Change Settings - make your own template:
We want to
make a template with settings appropriate to our profession (architecture) and
to our location (
We will adjust the following settings:
Point on person with the "arrow cursor" and click
Press "delete" and the person disappears
When you start SketchUp for the first time it opens up with a set of toolbars called "getting started". These toolbars are purely for starters and for amateurs. We will now install professional toolbars, but only those we need so far. Follow these steps:
Click on "View" -> "Toolbars" -> uncheck "Getting started" (click)
Click on "View" -> "Toolbars" -> check "Large tool set" (click)
Click on "View" -> "Toolbars" -> check "Standard" (click)
Click on "View" -> "Toolbars" -> check "Shadows" (click)
3. Activating the "view" toolbar and setting view: Click on "View" -> "Toolbars" -> "Views".
This is what the new toolbar looks like:
And this is how the buttons work
Try to hover your mouse on top of the icons - one at the time.
And now try clicking on a button at a time and notice the changes on the screen!!
Click on "Top". Compare screen with the illustrations above. You will see that Top View is identical to "floor" view.
Notice: You cannot see the blue axis. It is pointing straight at you from "origin".
Before you go to the next step, make sure you have clicked on "top" view.
4. Setting units
Click on "Window" -> "Model Info" -> "Units"
Change settings to match these
5. Set location
Click on "Window" -> "Model Info" ->"Location"
Change settings to match these
6. Set Dimensions
Click on "Window" -> "Model Info" ->"Dimensions"
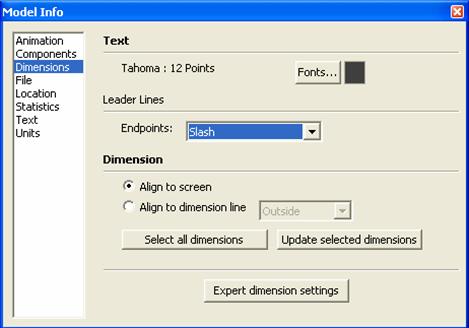
Change settings to match these
7. Saving new settings as template
We have now made the changes we want at this stage.
Next step is to save these changes in such a way that SketchUp will start up with our "personal settings" next time we start the programme. Do as follows:
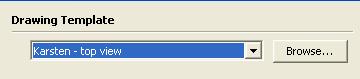
C:\Program files\Google\Google SketchUp 6\Templates . Give the file a name like "Karsten - top view" (use your own name)
F
CONGRATULATIONS !!
YOU ARE NOW READY TO START USING THE PROGRAMME
|
