Module 2
Table of Contents
Attaching attributes to dimension Month_C
Creating dimensions P&L, CUR, BALANCE
Creating dimensions P&L, CUR with the Dimension Editor
Creating dimension Balance with a dimension worksheet 646h78g
P&L - Creating the view Record
Formatting the values for the dimension Cur
In this module you will learn how to create, modify and design dimensions. Furthermore you will create cubes and fill them with data.
The model that we worked on in module 1 had following dimensions:
Now we want to expand our model with these dimensions:
Year
Month_c
P&L
Cur
Balance
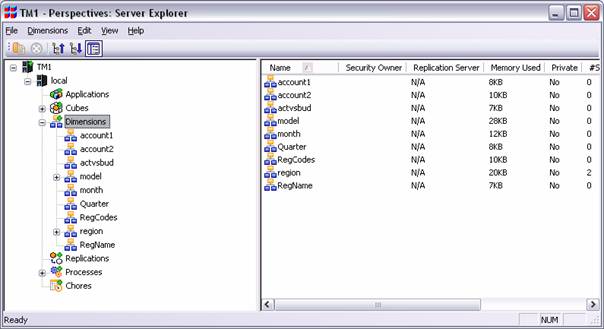
Do a right-click on dimensions in the Server Explorer. Select Create new dimension from the context menu. TM1 opens the Dimension Editor. It is very similar to the Subset Editor, but you have additional possibilities like:
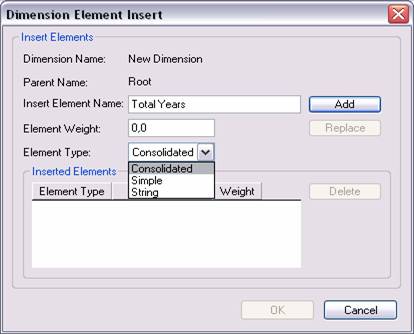
Create the element Total Years. This should be a C-element, therefore you have to choose the Element Type: Consolidated and then click Add.
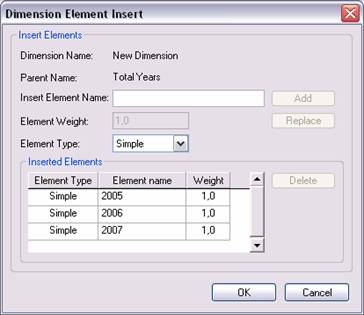
Afterwards add following years as subordinated elements to Total Years:
Select Edit → Insert Child in the Menu Insert the years and select the element type simple. Then press Add.
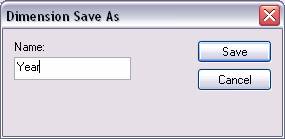
Save this dimension as Year.
The dimension month already exists. In this dimension months are added up to quarters and quarters are accumulated to years. This is useful for profit and loss accounting but not for the balance sheet or already accumulated values. We will create a new month dimension, where the n-elements will contain cumulated month values.
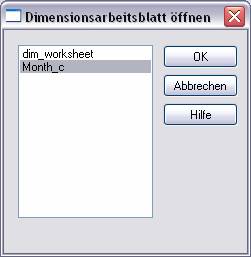
We have prepared an Excel worksheet in the data directory \doc. Copy the file Month_c.xdi into the data directory \tab by using the Windows Explorer Then open the TM1 menu in Excel and choose Dimension worksheet→Open. Select Month_c.
The *xdi worksheets give us the possibility to create and edit dimensions in Excel. In the first column you define if you
Write the name of the element in column B. Column C defines the weights of the different elements of a consolidation. If there are no entries in column C TM1 uses the default value of 1.
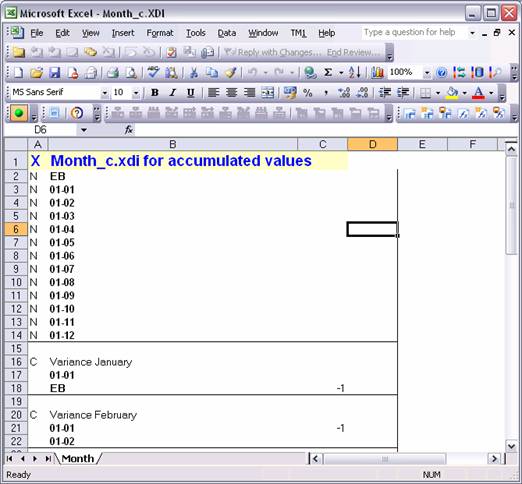
The file Month_c.xdi is already prepared. You can compile directly, by choosing dimension worksheet 646h78g s→Save in the TM1 menu. Hereafter, on the one hand the file Month_c.xdi is saved and on the other hand month_c.dim is generated or updated in the TM1 database.
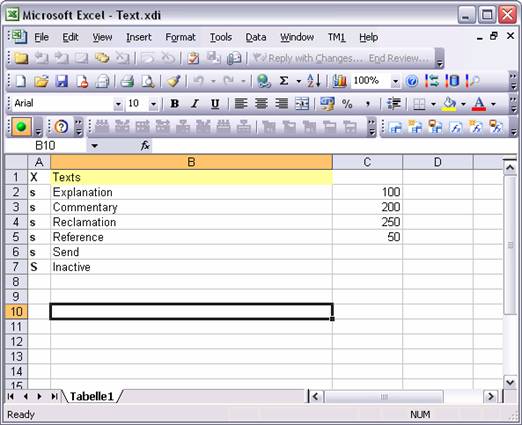
Create the dimension Text using the same method. Here we also have prepared the file text.xdi in the data directory \doc Copy this file in the \tab directory.
For saving text information in TM1 string elements have to be generated. Text elements cannot be arranged hierarchically. In case of string elements the maximum length of the elements (number of characters) can be defined in column C. If nothing is entered in column C the maximal capacity of 256 characters is used.
You have to save the dimension worksheet 646h78g using the TM1 Menu so it is saved in TM1.
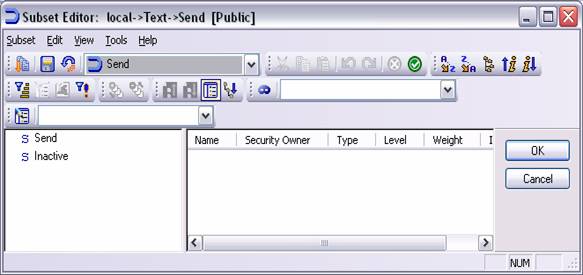
We return to the TM1 Server Explorer. Select from the dimension text the elements Send and Inactive and save this subset as Send.
We will attach several attributes to dimension Month_C. First we will have a look at the dimension month Click on the dimension month with the right mouse key and select Edit element attributes in the context menu. Then following window is displayed on your screen.
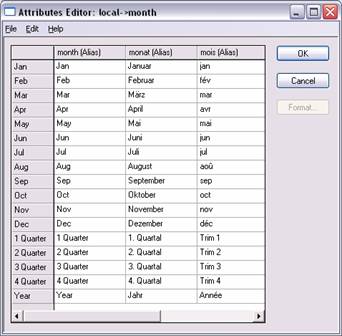
Now open the Attributes Editor for Month_C. Select the menu item Edit→
Add new attribute and name it month. Pick alias and enter the notations
Create in the dimension Month_C the following attributes:
Enter in Asparagus an "r" at each month that includes an "r" - leave the others empty.
Enter in Days the number of days each month has (here the leap year is not taken into consideration).
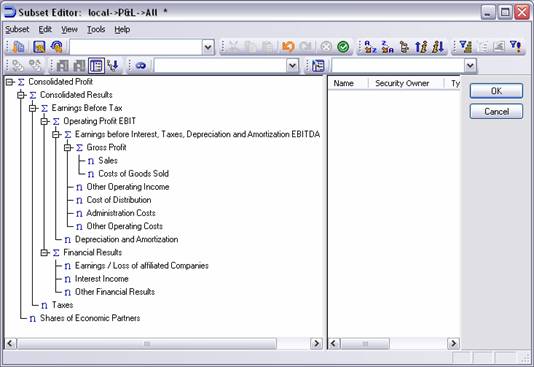
Open the pdf-file Report_P&L from the directory \pdf. Create the dimension P&L corresponding to the report. Take notice of which elements are child and which elements are parents. Your new dimension should look like this:
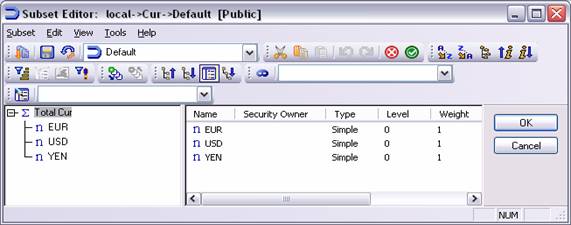
Creating the dimension Cur (Currency):
Create the dimension Cur with the elements EUR USD and YEN. Add the C-element Total Cur and subordinate the three currency elements.
Create a new spreadsheet. Open Excel and choose in the menu bar the option TM1 Dimension WorkSheets→New. Create the dimension Balance.
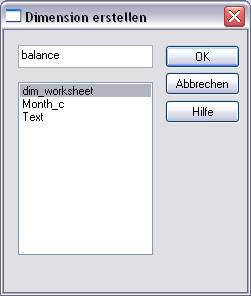
Confirm with OK. TM1 opens a blank dimension worksheet 646h78g with a predefined format.
For element definition use column A for definition of the element name use column B and to fix the weight of the element use column C
For every single element a whole line is reserved in the Dimension WorkSheet.
The other columns are not considered during the generation of the dimension.
For defining a consolidated element you have to set a 'C' in column A. Then list all the child elements of the consolidation below it.
Try to create the balance dimension on your own!
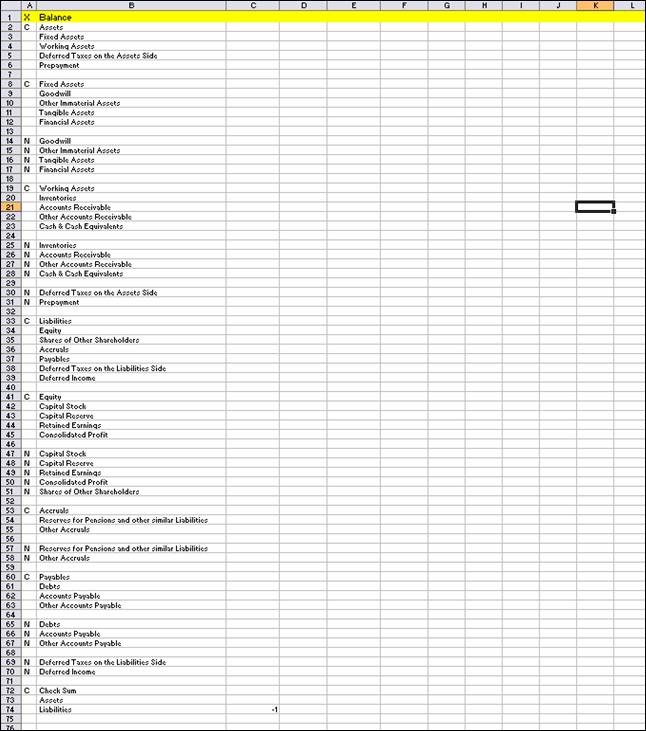
Choose TM1 Dimension WorkSheets Save, to compile and save the dimension.
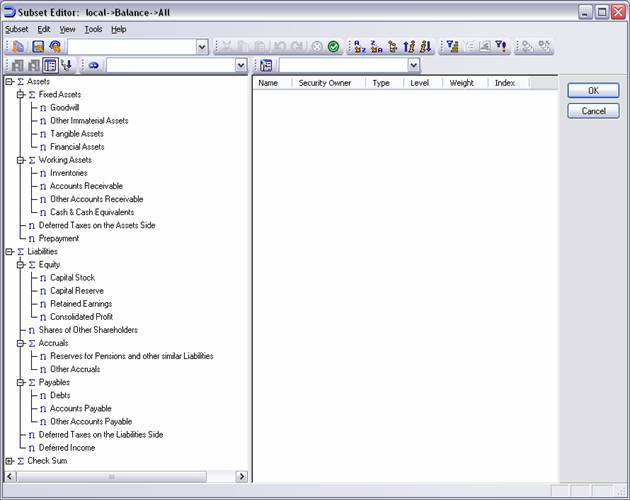
If you open the TM1 Server Explorer now, you will find the dimension balance. Open the dimension in the Subset Editor.
In this part we will explain, how to create new cubes with the already existing dimensions. You will learn how to enter data into these cubes and define rules.
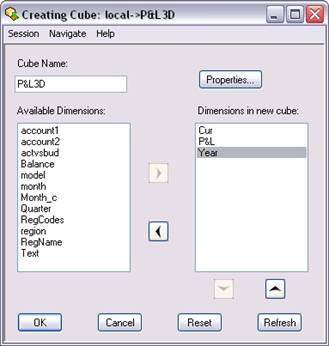
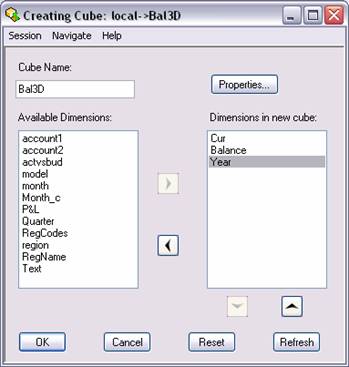
Create a new cube by using the Cubes context menu and select Create new Cube. In the window on the left all available dimensions are displayed. Use the arrow button to move the dimensions into the right window - this selection will be taken to create the new cube. The dimension order in the right window can be edited.
Please take care of the order of the dimensions, because otherwise the rules, slices.are not consistent and compatible with each other. (Cur, P&L, Year)
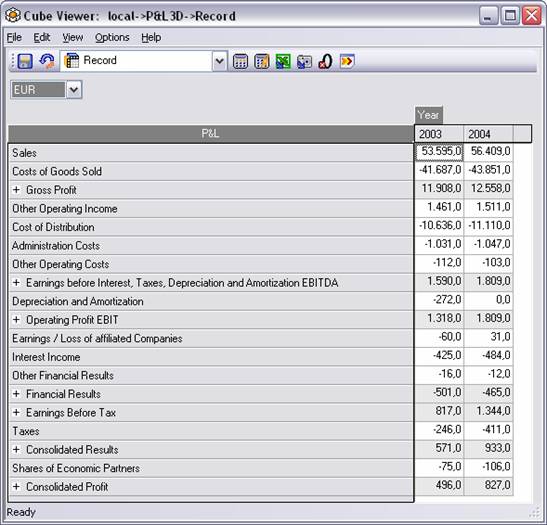
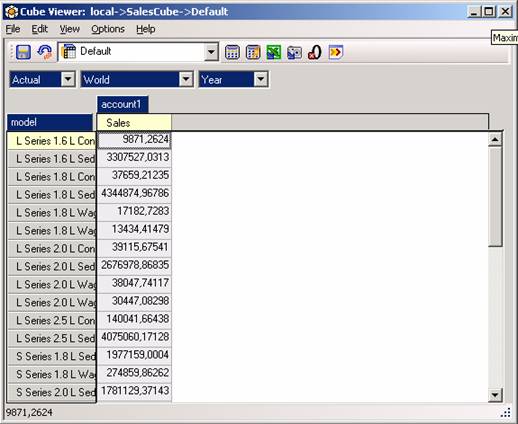
Open the Cube Viewer and create the following view:
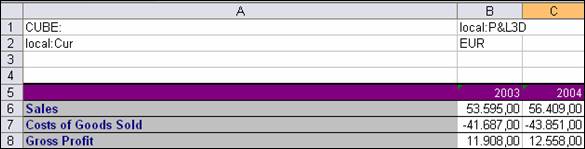
Save this view as Record. Then record the values according to the instruction. You can only enter values in the lowest level (0 or N-element level). These cells are white. If your C-element values do not match the sums, although the N-elements are correct, you have made a mistake in the structure of the dimension (hierarchy).
After recording and formatting the values you should get this result:
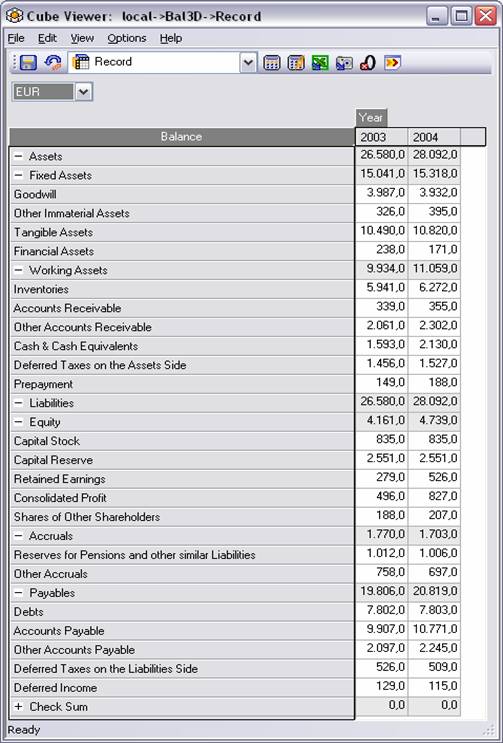
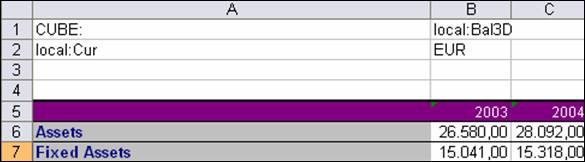
Now create the Bal3D cube in the same way as you did with the P&L3D cube before. Balance should be the second dimension in this cube.
Create a Record View and then key in the values according to the sample. Now the following should be displayed:
In order to calculate values in TM1 you can create "Rules". They are linked to the particular cube within which the result should be entered. Values for calculation can be taken from any other cube.
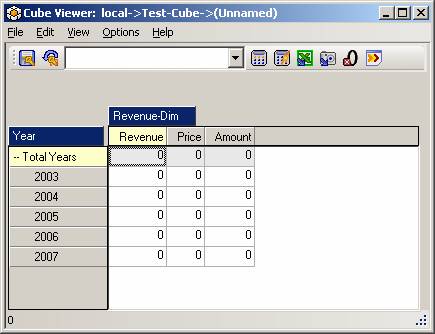
In order to have the revenue calculated automatically, we will create a rule:
Open the Rules-Editor by pressing the right mouse button on the cube "Test-Cube" and select the menu item "Create Rule.":
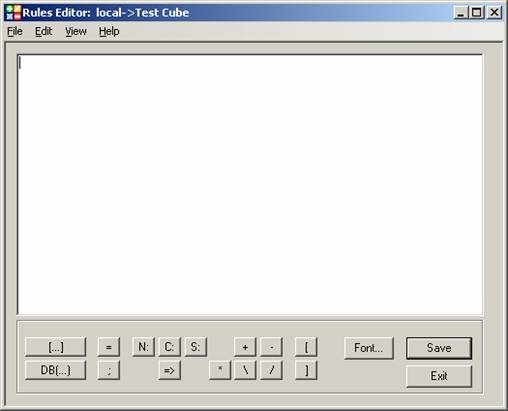
The most important functions of the Rules-Editor:
![]() The brackets [.] define an area
that references the current cube
The brackets [.] define an area
that references the current cube
![]() DB(.) defines an
area in any cube
DB(.) defines an
area in any cube
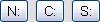 Restrict
the selection on N-, C- or S-elements
Restrict
the selection on N-, C- or S-elements
The Syntax for a Rule looks like this:
[Domain]=[Formula];
[Domain] defines the range of values where the values are written on, which can be the whole cube, a particular dimension or a single value only.
['Revenue']=['Price']*['Amount'];
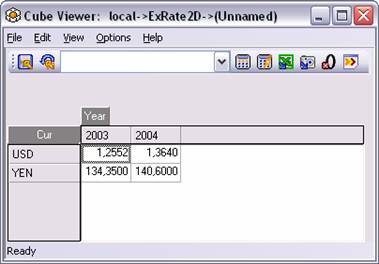
For the conversion of balance sheet values in USD and YEN we create a two dimensional conversion cube called ExRate2D with the following dimensions:
Enter the following exchange rates into the ExRate2D cube:
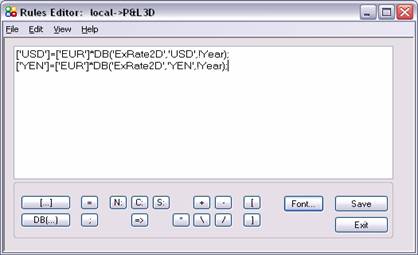
For the conversion from EUR to USD and YEN, we will write rules for both cubes Bal3D and P&L3D. These rules will convert the EUR values into USD and YEN based on the cube
ExRate2D
Click with the right mouse key on P&L3D and select Create Rule. from the context menu. Use the Rules Editor to create the two rules for the conversion as shown in the following screenshot:
Create the rule for the Cube Bal3D You can use Copy and Paste for transferring the rule from P&L3D to Bal3D.
Format the values for the dimension currency as follows:
Open the Attributes Editor for the dimension Cur. Select Edit Element Attributes . in the context menu of the dimension Cur.
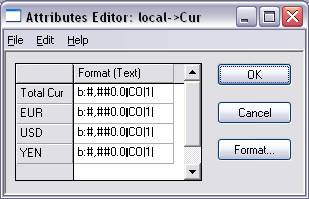
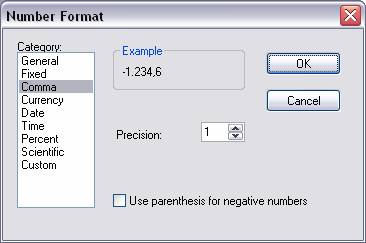
Afterwards edit the element format as shown in the screenshot below. Therefore click in the menu bar Edit Edit Element Format .
Create a slice for both cubes based on the Record View and copy them in one Excel Book with two sheets:
Format the slices (Excel Format Auto format) and save this book as Report_Bal3D_P&L3D.xls in the directory \xls.
With the Printer Wizard you can quickly print a lot of reports. Based on a slice, you can select which versions should be printed. Therefore you determine which title dimension and which elements should be used.
The following menu can be reached by clicking the Icon Print Report (see page 39, Module 1) or by using the TM1 menu bar.

Please select P&L3D and click Next.
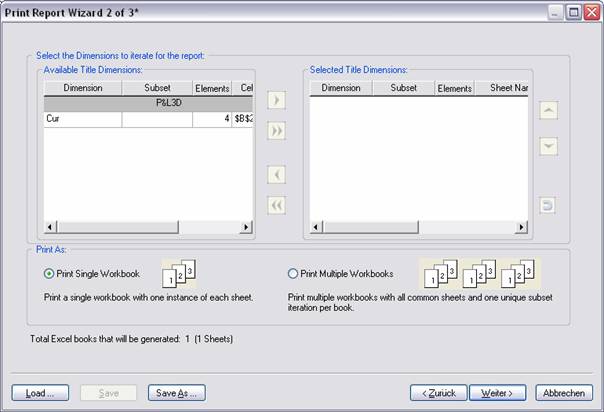
Here you have to select the title dimensions and whether you want to print a single workbook or multiple workbooks.
Now select the Title Dimension you like to print and click the button Add Selected. You will see the following wizard on your display:


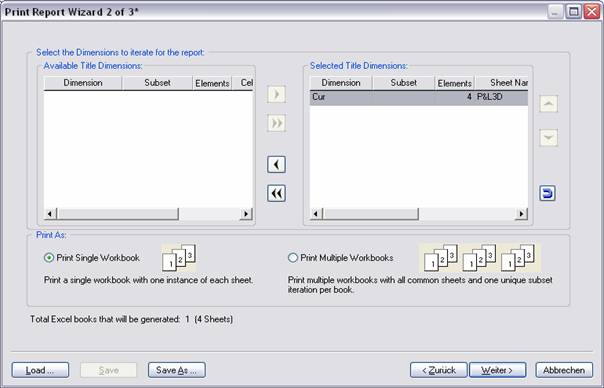
Press the button Edit Subset in order to make a selection in the dimension Cur.
![]()
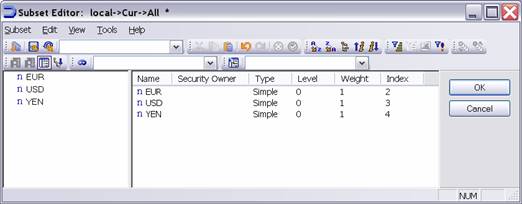
Choose the elements EUR, USD and YEN, save this subset as All_currencies and confirm with OK. Single reports for each of the currencies will be generated.
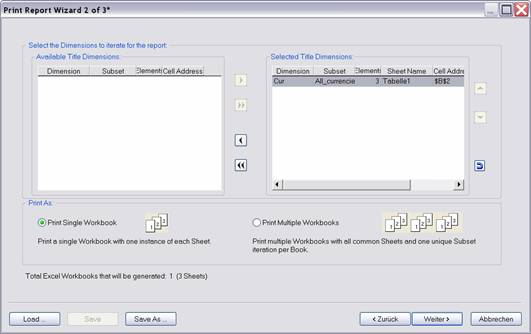
Press Next once again. The last window of the print report wizard appears.
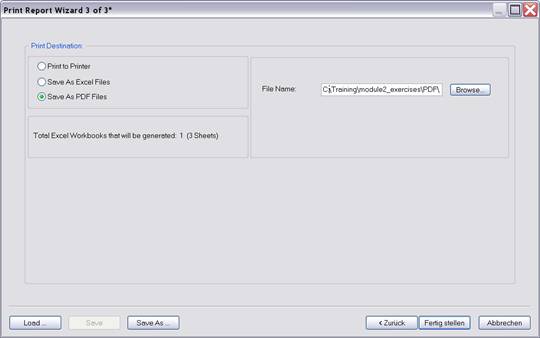
Select Save As PDF Files. Enter the File Name Report.pdf and save it in the \pdf directory.
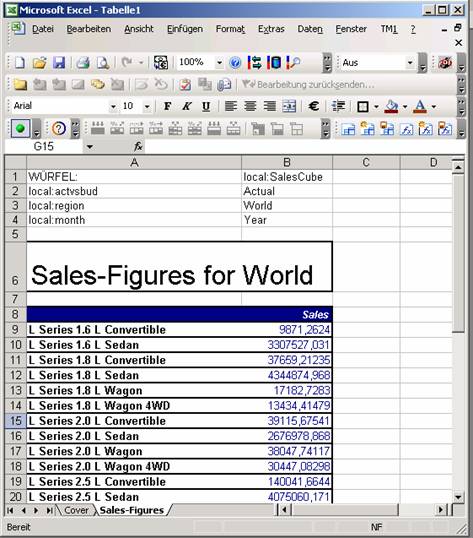
TM1 offers simple functions to create and print substantial and clearly arranged reports. Those reports are based on Excel tables. The following report is generated by showing the sales figures for the particular countries:
Now select both sheets and continue.
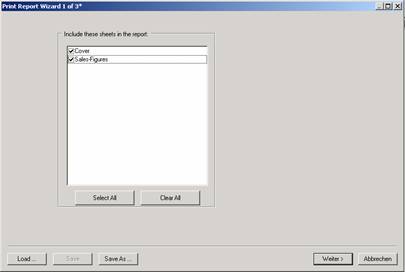
Select the desired title dimensions: In this example region and Add selected.
Click on the subset-button afterwards.


The next window asks whether you want to save the print job or not. Answer NO.
Now the PDF document should be created.
|
