The Deltry Paper Airplane
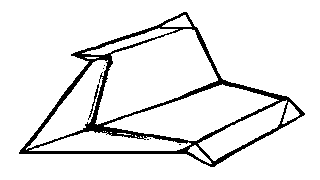
The Deltry paperairplane is easy to fly, and very easy to make. It flies slowly, and very smoothly and gently. And it holds together nicely. It's a good bet to become the standard paper airplane people make, because it's easy and the results are amazingly good.
Because this is the simplest plane here, and the first, pardon us for explaining how to create it quite slowly and carefully, so that everyone can follow along, in twelve very simple steps.
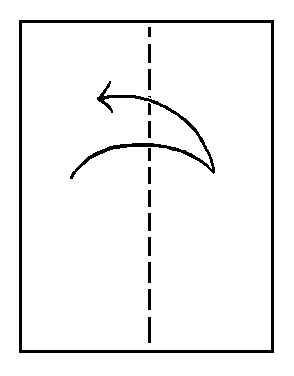
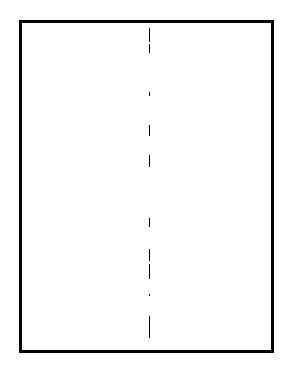
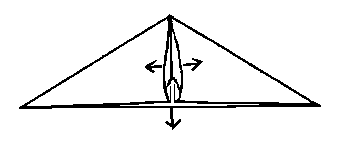
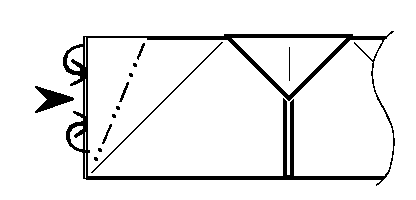
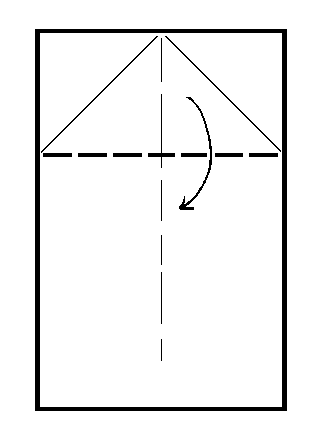
1. Take an 8 1/2 by
2. After this point, the result of one folding operation will be shown together with the next folding instructions.
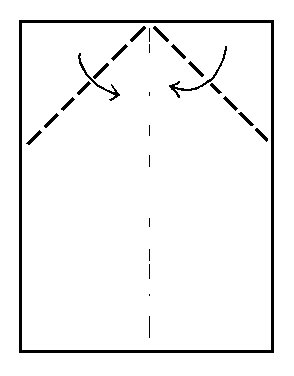
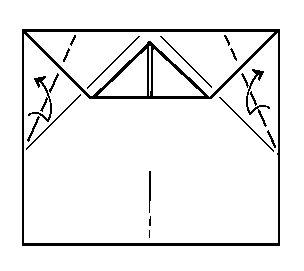
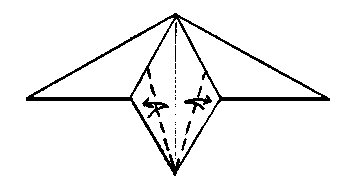
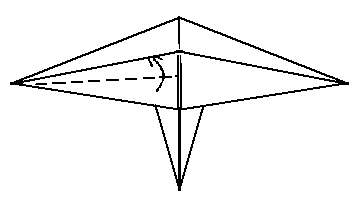
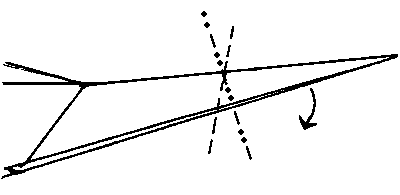
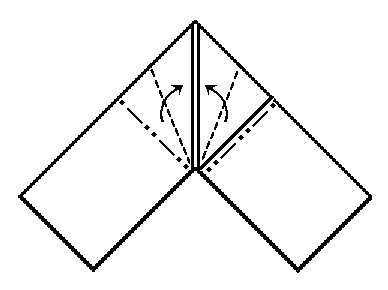
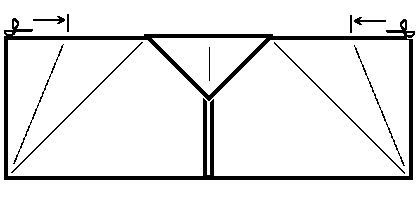
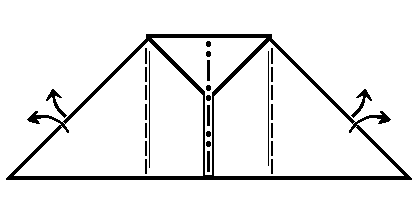
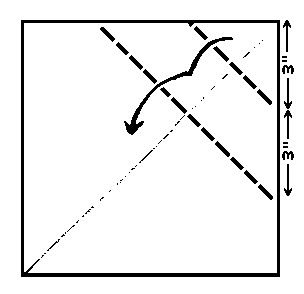
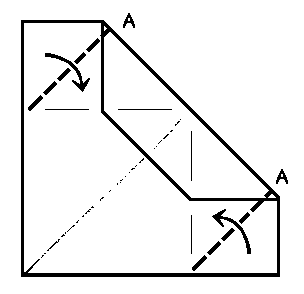
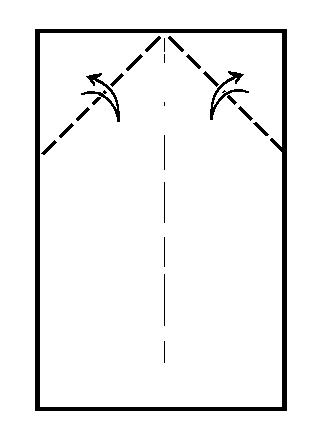
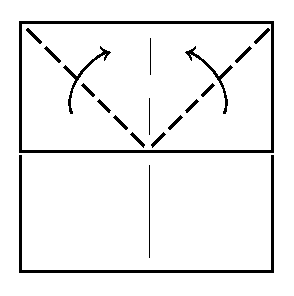
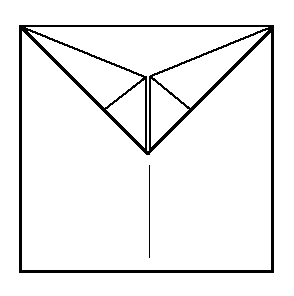
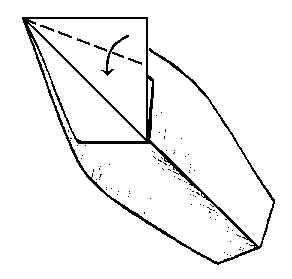
3. Now fold down the top corners inward to the center crease along the dashed "valley folds" shown, making two new right-angle triangles visible in illustration 4.
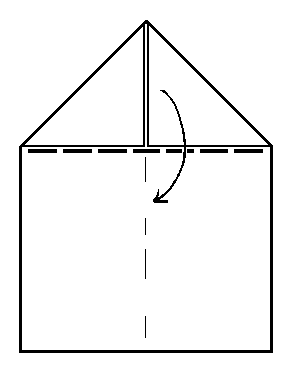
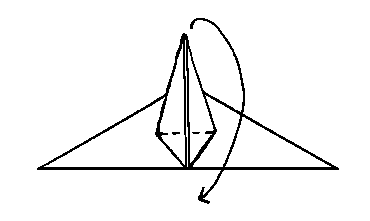
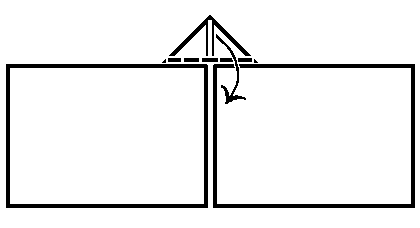
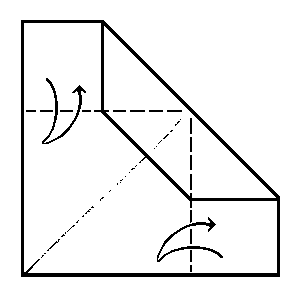
4. Fold the large top triangle (made up of the two small triangles you just created in step 3), over and down.
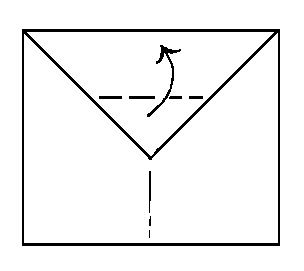
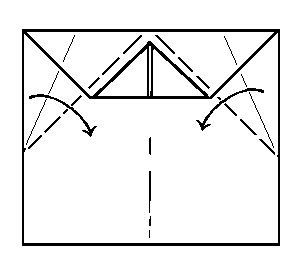
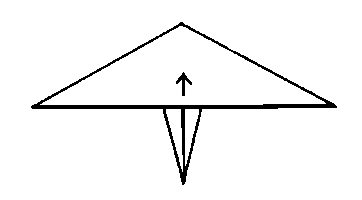
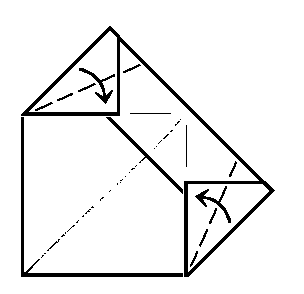
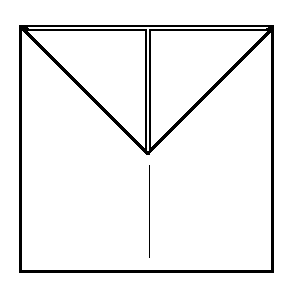
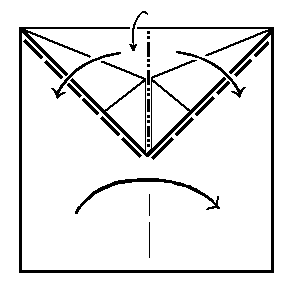
5. Fold the lower part of the tip of the large tria 545x2316f ngle up again. But note - not quite all the way up to the top.
6. Leave about 3/8ths of an inch of space from the top. This will help the flaps to lock under tightly and keep the airplane together when it's done.
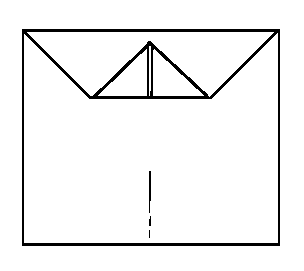
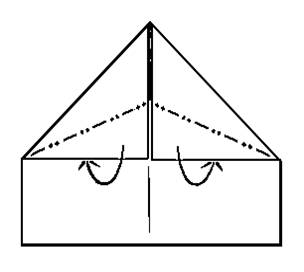
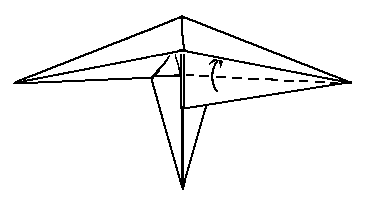
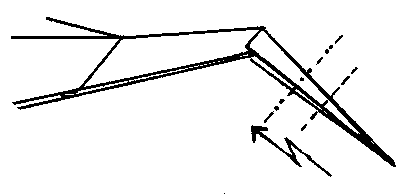
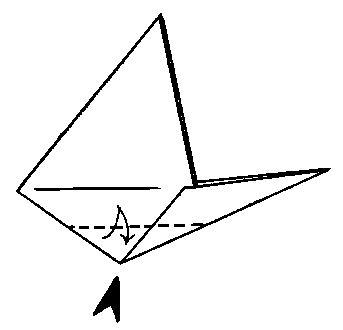
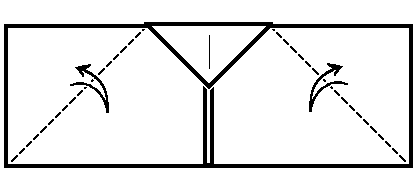
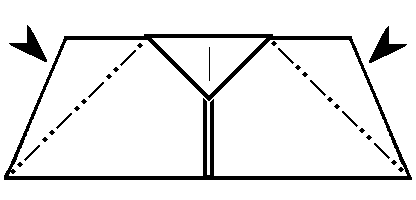
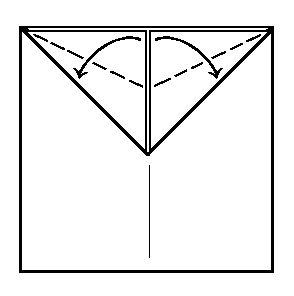
7. Fold and unfold two top triangles, much as you did in step 3, where the dashed valley folds are shown. Just as in step 3, the inner edges of the new triangles should line up with the center line of the plane you are making. That is to say, don't try to fold right up against the tip you folded up in step 5, since that tip is supposed to be a bit lower.
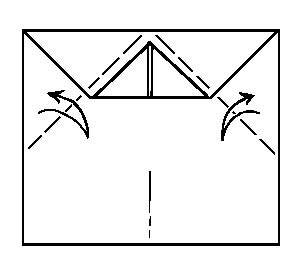
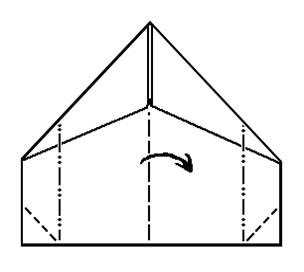
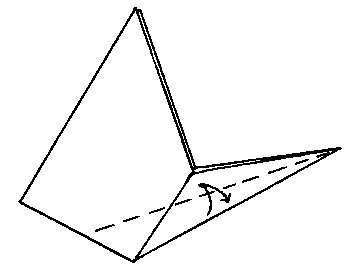
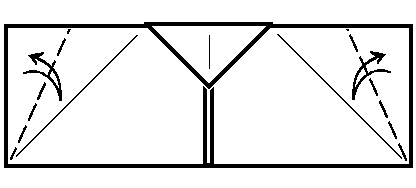
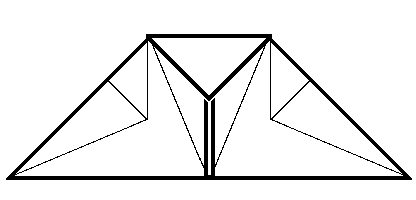
8. Now bisect the new folds you made, using the previous creases you just made in step 7 as a guide. Fold and then unfold along the two dashed lines, leaving you back where you started, having created two new upper creases.
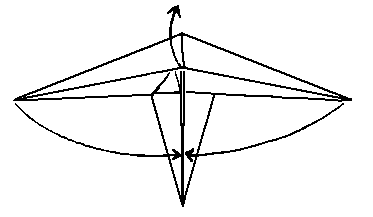
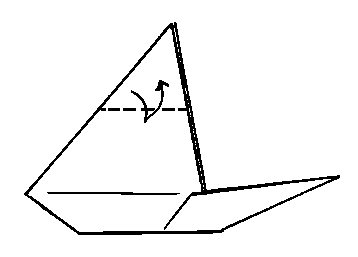
9. Now you can fold the two large right angle triangles down again, repeating the first part of step 7. For the moment, ignore the two new creases you just created in step 8.
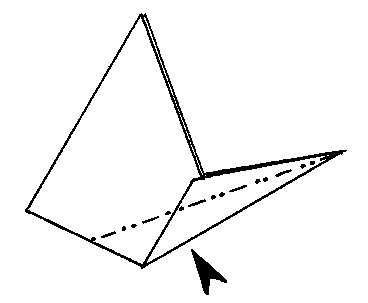
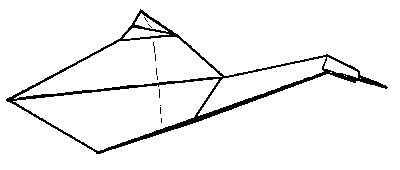
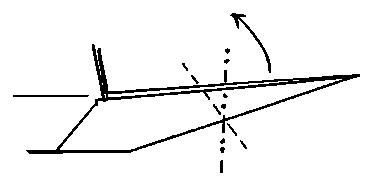
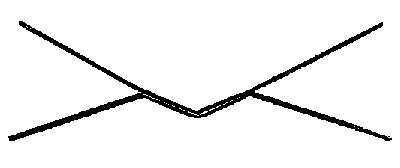
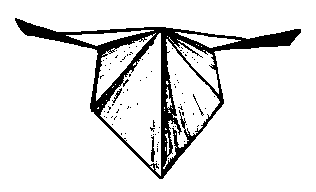
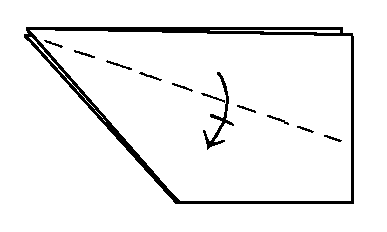
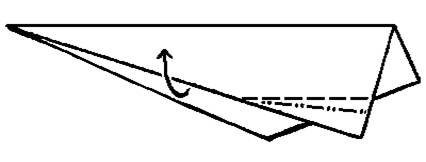
10. Fold along the two dotted-and-dashed "mountain folds", tucking the lower triangles well underneath, snugly locking them in place. (These two triangles of paper go under the tip you folded up in step 5.) The next diagram, Diagram 11, actually shows this being done. You've almost made a paper airplane.
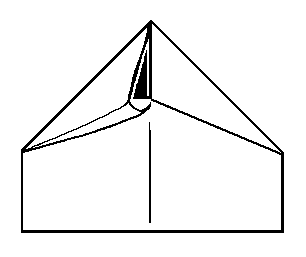
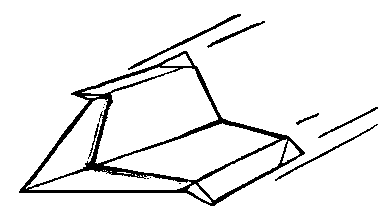
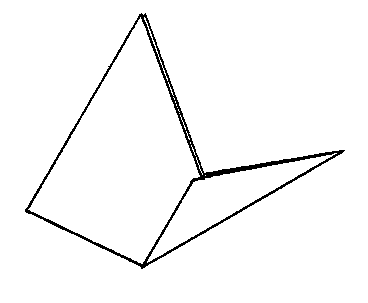
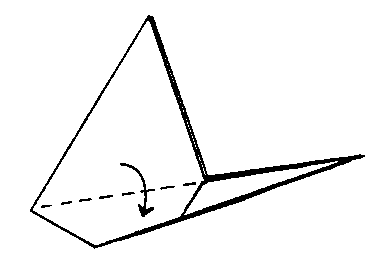
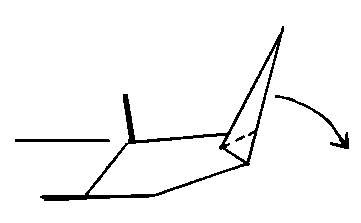
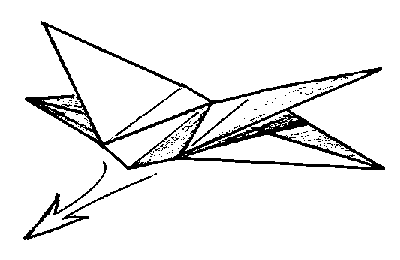
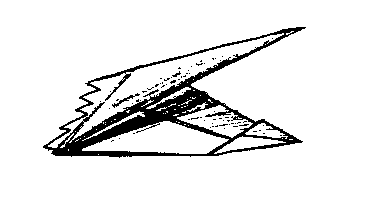
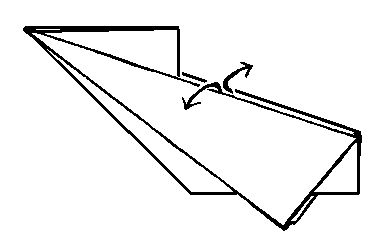
11. The tucking operation shown in progress. Tuck it way under so that everything holds together.
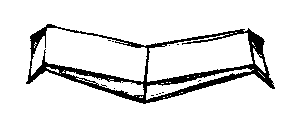
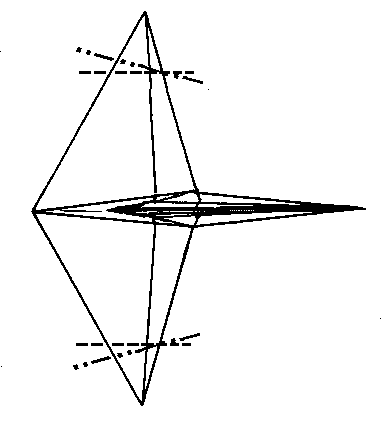
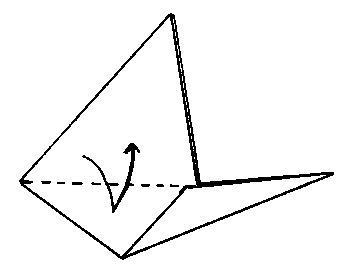
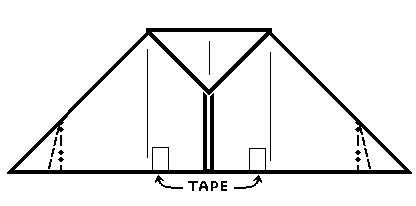
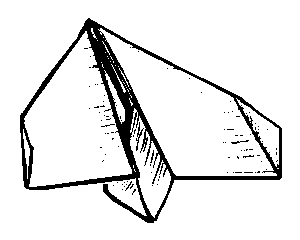
12. Now you have to make a few partial folds and the airplane is complete. Be sure to distinguish the dashed "valley folds" (that create a valley) from the dashed-and-dotted "mountain folds" that create slight hills. Take a peek ahead at illustrations 13 and 14 on the next page to see the paper airplane you are trying to create, if you like.
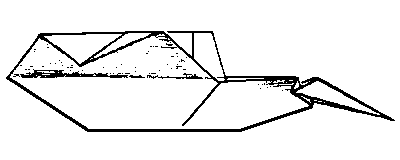
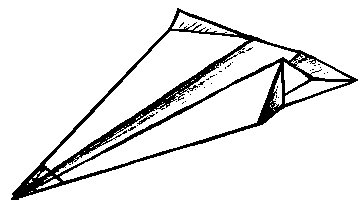
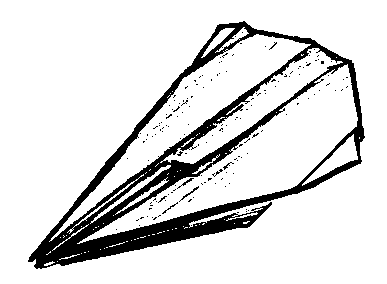
13. The Deltry aircraft in flight - remember that it's a very slow flyer, much slower (and more graceful) than most paper airplanes. Don't throw it, just release it while your hand is moving forward slowly. One good grip is shown below in diagram 15.
14. Front view.
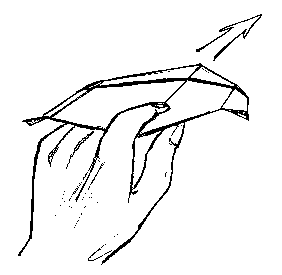
15. This isn't the only way to grip the Deltry paper airplane in order to launch it, but it's the easiest way. Gently now! This plane soars at a leisurely pace, it doesn't speed anywhere. It flies best if you don't throw it, so much as release it as your hand moves forward a little. You may want to point it's nose just a little downwards as you launch it.
16. There is another way to fly the Deltry, which makes for fast, unpredictable, swooping flights - you might want to blunt its sharp paper just a little first, though, so it doesn't become a menace to passers-by. This way of launching the Deltry works best when the airplane is new, and hasn't accumulated any minor warps into its wings. Fold the left and right halfs of the plane together, flat (the left and right wings folded up until they're against each other.) now grasp the plane along the bottom (which was the middle of the paper) most of the way towards the front, between thumb and forefinger. Launch swiftly - this way, the Deltry flys quite a bit faster - but it's flight is also a lot less predictable. With this faster launch, your paper airplane may well make a sharp turn early in flight, as it's wings start to open up a little, and swoop past someone's nose at high speed.
The Condor
Origami Paper Airplane
True origami, and a flying paper airplane as well! The Canada Goose, Duck and the Condor are all for fairly advanced folders, who can make very accurate folds, from the start. All three share a common structure, so the first folds for the Duck are the same as for the Goose. Later in these instructions you'll have a chance to finish your model as any of the three, choose the Duck then. Or if you are confident that you remember the instructions for the Canada Goose, go to the bottom of this page, and skip to the last instructions for the Condor.
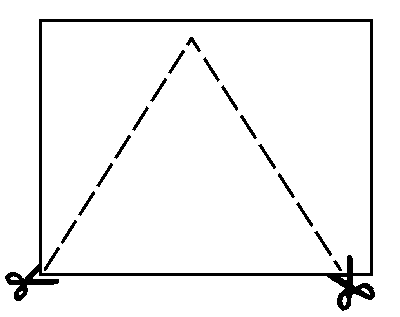
1. Cut out a triangle of paper with a base of
2. Fold and unfold the triangle in half, in order to crease it, along each of the three lines shown.
The Canada Goose (etc)
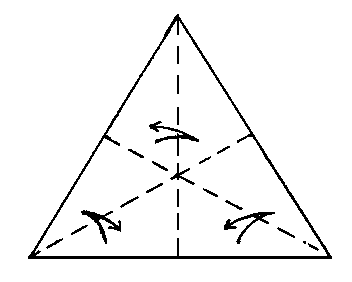
3. Push in the sides of the triangle, bringing its tip up to a free-standing peak.
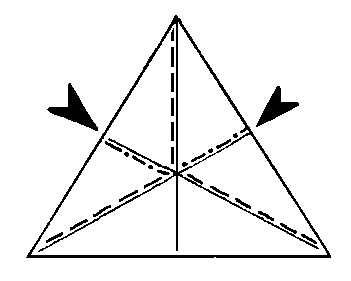
4. Now, very carefully, squash fold that peak straight down, bringing its sides out and its tip down.
5. Crease central diamond as shown, bringing the lower outside edges just up to the center crease.

6. First score the horizontal line between the tops of the new creases from step 5, with the edge of a fingernail - this is about to become a new valley fold. Then lift the bottom tip of the central diamond up and over along this fold, reversing the 2 creases you made in step 5.
As the tip goes up, this will bring the lower outside edges of the central diamond and move them inwards toward the centre.
7. Fold the tip down, then flip the model over.
8. Now open up the the large triangle of paper s1ightly.
9. Next, a delicate and fussy fold - which involves tucking in a long, thin flap. Score a line with the edge of a ruler (rubbed along the fold). The fold should go just below the points of the now elongated central diamond (not visible in diagram 9. underneath the fold.
9b. Repeat for the other side.
10. Then flatten by bringing the "wingtips" together as shown.
10a. You've now completed the basic structure of the Canada Goose, Duck, or Condor. Now choose which you want to finish it up as...
11. Carefully crease what will be the neck and head of the bird, exactly in half.
12. Then sink the lower half of the neck portion into the middle of the bird, carefully inverting the bottom point.
13. Fold the wings halfway down, until they are at right angles with the neck and body.
14. Crimp both wingtips slightly upward making sure the flap on the leading edge bends with the rest of the w1ng.

15. Take out the crease along the length of the wings by working it back and forth a bit, so that the wings are left perfectly flat.
16. As noted in th1s enlargement of the nose section, cr1mp the last half of the nose down from, and on the outs1de of, the rest of the neck.
17. Now double up the head of the beast to form a beak.
18. Et Voila! the f1n1shed goose. To fly: grip with thumb and forefinger just above the bottom point, and let it glide away gently. Gently! A beaut1ful flyer.
NOTE - if you have trouble with step 11, sinking the bottom of the body into the middle, try creasing the fold shown both forward, and back, behind the bird a few times before trying to invert the bottom section. Also - you may notice, while doing steps 9 and 10, that the corners of the flaps curl over a very little, if so, just flatten the curl into a small triangle, and continue.
If the goose has trouble flying check to insure that its wing surfaces are not warped, then, if neccesary, try adjusting the angles of the wingtips. If you make the bird with fairly th1n paper, it may grant you a few slow, and graceful sweeping flaps of its wings as it flys.
Although a
THE CONDOR AND THE DUCK:
The next two paper airplanes on the main page are two variations of this basic design: THE CONDOR, and THE DUCK. In both cases, they follow the regular CANADA GOOSE instructions up to and including step 10, then switch over to the variant's instructions and diagrams for the finishing steps.
The Condor
11. Fold the wings down and then back up.
12. Crease the bottom point parallel to the new crease by folding the tip up to the crease and back. (Then turn the bird over and crease the other way.) Finally sink the point into the body.
13. Again, parallel to the crease dividing wing and body, fold the wingtip down to just meet that crease, and then back up.
14. Crimp the neck up.
15. Then reverse-fold the tip back down to form the beak.
16. Adjust the wings. where they have already been creased. so that they slope first up and away from the body, and then back down.
Fly the condor by gripping the middle of the body. underneath the wing, and releasing it gently. The Condor is a more delicate and tempermental flyer than the Goose. Its wingtips may need frequent slight adjustments. Also try to make sure that its wing surfaces are not warped.
The Moth
The Moth is an origami paper airplane of moderate difficulty.
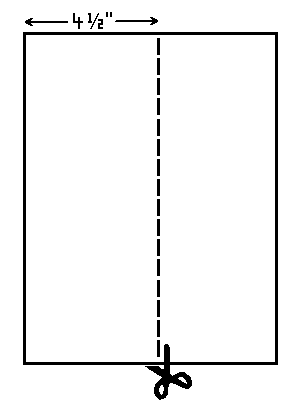
1. The first step in making this paper airplane
is to cut a 4 1/2 by
2. By folding and unfolding, crease it in half vertically...
3. ...and horizontally.
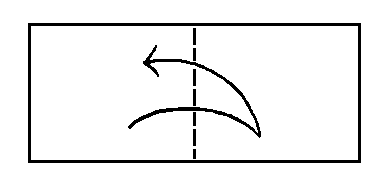
4. Now fold the rectangle in half along the diagonal shown, lining up the creases as you fold it over.

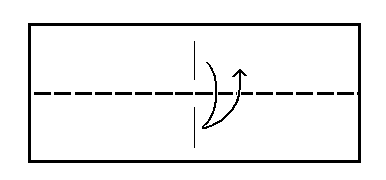
5. Fold the edges in towards the center.
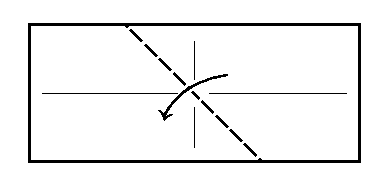
6. First, fold back the lower portions along the main mountain (dotted and dashed) folds. Next, fold those edges in to meet the center, folding along the valley (dashed) folds, to get diagram 7.
7. Now, fold the top tab over along the valley fold shown. This won't stay flat as it's shown in the next few diagrams. Don't worry about that, ignore the fact that it won't stay down for now, and refold it firmly when you get to diagram 14.
8. Crease by folding back and forth along the valley fold shown so that the outer edges line up with the lower edge, and back again.
9. Then fold back and forth using the creases you made in diagram 8. as a guide, so that the edge just meets the creases.
10. Cut the top edges up to the first crease...
11. ...then fold the flaps into the center.
12. Reverse fold as shown, sinking the outer triangles into the center of the wing - be very careful not to let the previously sunk flaps spring up again and foul you up. These flaps should end up folded under a second time, locking them into position.
13. This is the "X-ray" view of the result, showing what's been folded inside and is now invisible - it's how things should look if you held the model up to a strong light.
14. Crease the triangles close to you back and forth along the valley folds shown - but very lightly. Leave the triangles underneath them (which will become the upper wings) undisturbed. Also valley fold in the center, slightly, where the mountain fold is marked.
15. Front view of the the Moth. Spread the wings out somewhat, adjusting the result until you get a frontal silhouette shown. If the center doesn't stay folded, make the center angle more extreme.
16. The Moth paper airplane in flight. To launch, hold in the middle of the center fold with forefinger above, thumb below, and slide your hand forward, angling the moth slightly downward - and very gently and slowly release it to fly away. (More flying instuctions are given with diagram 17.)
17. The moth should fly as is, but it can be a finicky little flyer at times. If it flys slowly and/or sloppily, tape the back edges together as shown here. If it dives into the ground, crimp the lower wing edges as shown here and in diagram 18. If it starts to bank and turn sharply all the time, or to spiral into the ground, try changing the angle the wings are spread at, or making one side's wings spread more than the other. If that's no help, check to see that all angles are identical on both sides of the moth, and that no one wing surface is oddly warped, even slightly. The center angle of the 'body' of the Moth may also be adjusted as desired, and if you do crimp the lower wings, the angles of those crimps may be adjusted for better flights, too.
18. Crimp the paper aircraft's lower wingtips if you need to.
The Slider
1. Cut a sheet of paper to an 8 1/2 square,
then crease that square along the diagonal. Next measure out
2. Fold and unfold the top edges into the center, to crease them.
3. Taking the new creases as a guide, fold in the corners as shown.
4. ...and fold the corners in half again (bisecting them).

5. Now take the corner tabs and fold them over and underneath the broad center flap, flattening 'til they are snugly locked in position.
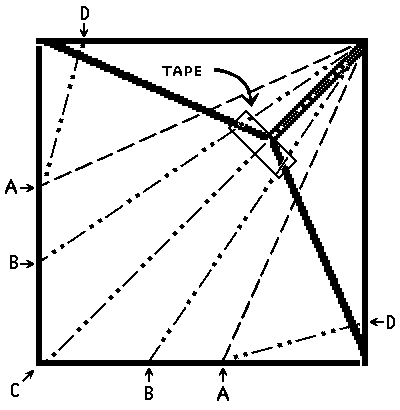
6. Tape where shown, then fold the wings into shape, folding up along "A" first. Next, flip the plane over and squash it so that the "A" folds are up against the "C" center folds. This will enable you to fold along the "B" lines. Next, open up and adjust the plane until it resembles illustrations 7. and 8. Lastly, fold up the tabs along lines "D", and tape the nose open, as in fig. 7.
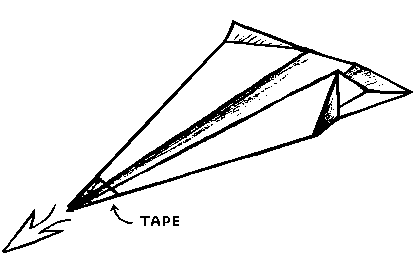
7. The Slider in flight.
8. Rearview of the Slider.
Zump

1. Cut an 8 and 1/2 by 11 sheet of paper in half (to 8 1/2 by 5 1/2 inches) before starting.
2. Then take one of the two halves, turn it upright and begin by creasing it along the middle.
3. Fold and unfold the top triangles as shown.
4. Fold down the top along a line marked by the end of the creases just made in step 3.
5. And refold the now precreased corners (triangles) back up.
6. Next...
7. Fold the two upper triangles in half, so as to bisect them, as shown.
8. Now...
9. Fold the upper large triangle up into the middle of the sheet, while folding the whole thing in half at the same time. (See diagram 10 on the next page to see w you're trying to achieve with this.)
10. Fold down BOTH wings, approximately where indicated Note that this makes the wings a bit smaller than the body.
11. Carefully open up the paper airplane, keeping the center triangle together and to one side, with the smaller flap held against the opposite side as in diagram 12...
12. Now fold the center triangle in half, tuck it in, and fold the paper airplane flat again.
13. Crimp the wingtips as shown and lift the wings up so that they are angled slightly upward.
14. The finished Zump.
15. To launch, hold near the back, underneath, and don't try to fly the Zump too quickly.
|
