|
Applying Water-Based Interior Finish In the past, obtaining a furniture quality finish required compressors, spray guns, and untold hours waiting for solvent-based finishes to cure. Today, with water-based stains and polyurethane, anyone can achieve a beautiful finish in a very short time, using only paintbrushes and rags. Lowe's is happy to provide this information as a service to you. |
|
|
|
Prepare the Surface
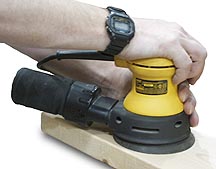
Finishing highlights the beauty of wood, but the process also magnifies imperfections. Sand the wood smooth and repair all defects before finishing.
|
|
||
|
Orbital sander |
||
|
|
|
||
|
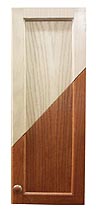
Stain vs. natural |
||
|
Apply Stain
Stain shades vary in appearance on different wood species. Always test stain on wood of the same species as the material with which you are working. When possible, test in the same type of light prevalent where the stained material will be displayed. Colors appear to change when they are exposed to different light sources, based on the spectral colors that make up the light. Yellow is the dominant color in incandescent light (regular light bulbs), and blue-green is dominant in fluorescent light (common in most shops).
|
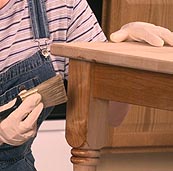
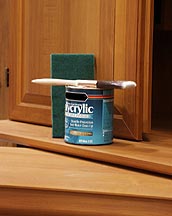
Apply Topcoat Once you achieve the desired effect with the stain, protect it from scratches and moisture damage with a topcoat of clear, water-based polyurethane.
|
|
|