TV2K - TXT
COLOUR TELEVISION RECEIVER
l &n 858e46i bsp; &n 858e46i bsp; SYSTEM PAL/SECAM,B/G,DK, I.
l &n 858e46i bsp; &n 858e46i bsp; POWER INPUT AC 170-245V(50/60Hz)
l &n 858e46i bsp; &n 858e46i bsp; POWER CONSUMPTION 60W
l &n 858e46i bsp; &n 858e46i bsp; AERIAL IMPEDANCE 75OHM UNVALANCED
l &n 858e46i bsp; &n 858e46i bsp; TUNER VOLTAGE SYNTHESIZER TUNING
l &n 858e46i bsp; &n 858e46i bsp; RECEIVING CHANNELS VHF-L E2-S6
VHF-H S7-S41
UHF E21-E69
l &n 858e46i bsp; &n 858e46i bsp; PROGRAMME MAX.99 PROGRAM MEMORIES
l &n 858e46i bsp; &n 858e46i bsp; PICTURE TUBE 14
l &n 858e46i bsp; &n 858e46i bsp; SOUND OUTPUT 2.0W
l &n 858e46i bsp; &n 858e46i bsp; SPEAKER 3W 8 OHM
l &n 858e46i bsp; &n 858e46i bsp; AV JACKS FULL SCART 1
CAUTION: Before servicing the chassis, read the Safely Precaution
X -Ray radiation Precaution and Product Safety Notice in this manual.
Excessive high voltage can produce potentially hazardous X-RAY RADIATION. To
Avoid such hazards the high voltage must be specified limit. The normal value of the high voltage of this receiver is 24.5KV +/-2KV under 230V AC power source. The high voltage must not exceed 27KV.
Each time a receiver requires servicing the high voltage should be checked following the HIGH VOLTAGE CHECK procedure in this manual. It is recommended the reading of the high voltage be recorded as a part of the service record. It is important to use an accurate and reliable high voltage meter.
The primary source of X -RAY RADIATION in this TV receiver is the picture tube. For continued X-RAY RADIATION protection, the replacement tube must be exactly the same type tube as used in this TV receiver.
Some parts in this receiver have special safety-related characteristics for X-RAY RADIATION protection. For continued safety, parts replacement should be undertaken only after referring the PRODUCT SAFETY NOTICE below.
SAFETY PRECAUTION
WARNING: Service should not be attempted by anyone unfamiliar with the necessary
Precautions on this receiver.
The following are the necessary precautions to be observed before servicing this chassis.
1. &n 858e46i bsp; Since the power supply circuit of this receiver is directly connected to the AC power line. An isolation transformer should be used during any dynamic service to avoid possible shock hazard.
2. &n 858e46i bsp; Always discharge the picture tube anode to the CRT conductive coating before handling the picture tube. The picture tube is highly evacuated and if broken, glass fragments will be violently expelled. Use shatterproof goggles and keep picture tube away from the unprotected body while handling.
3. &n 858e46i bsp; When replacing a chassis in the cabinet, always be certain that all the protective devices are put back in place, such as: nonmetallic control; knobs, insulating covers, shields, isolation resistor-capacitor, network, etc.
4. &n 858e46i bsp; When replacing parts or circuit boards, disconnect the power cord.
5. &n 858e46i bsp; When replacing a high voltage resistor (metal oxide resistor) on circuit hoard, keep the resistor APP. 10mm(1/2 in.) away from circuit board.
6. &n 858e46i bsp; Connection wires must be kept away from components with high voltage or high temperature.
7. &n 858e46i bsp; If any fuse in this TV receiver is blown, replace it with the FUSE specified in the chassis parts list.
8. &n 858e46i bsp; The receiver is designed to operate with 230V(50Hz) AC mains.
Many electrical and mechanical parts in this chassis have special safety-related characteristics are often passed unnoticed by a visual inspection and the X-RAY RADIATON protection afforded by them cannot necessarily be obtained by using replacement components rated for higher voltage. The use of substitute replacement parts that do not have the same safety characteristics as specified in the parts list may create shock, fire, X-RAY RADIATION or other hazards.
An automatic degaussing coil is attached around the picture tube, degaussing the tube properly in about one second after the set is switched on. If the receiver is moved or faced on a different direction, the power must be switched off at least 15 minutes in order that the automatic degaussing circuit operated properly. External degaussing is necessary if the automatic degassing proves ineffective after the set is moved.
CAUTION: To avoid X-ray hazards and result in a nominal display width, B+ voltage must be set in the scale of 108.0V+/-0.5V.
1. &n 858e46i bsp; Make sure the AC power supply is 230V, 50Hz.
2. &n 858e46i bsp; Switch on the TV receiver, tune in an active channel.
3. &n 858e46i bsp; Measure the voltage between C641 on Main P.C. Board by DC voltmeter.
4. &n 858e46i bsp; Set contrast, brightness, color to maximum.
5. &n 858e46i bsp; Adjust VR631 on Main P. C. Board for B+108.0V+/-0.5V voltage reading.
CAUTION: There is no high voltage adjustment in this chassis, B+108V voltage directly relates to the high voltage. The high voltage does not exceed 27KV under any conditions.
1. &n 858e46i bsp; Connect an accurate high voltage meter to the second anode cap of the picture tube.
2. &n 858e46i bsp; Turn on the receiver, set brightness and contrast to minimum (Zero beam current).
3. &n 858e46i bsp; Make sure the high voltage does not exceed 27KV.
4. &n 858e46i bsp; NO matter whether the luminance, contrast and chrominance controls are set to maximum or minimum, the high voltage must be kept under 27KV.
Receive a TV test pattern signal; adjust controls for optimum picture. Adjust Focus Control for a well-defined, sharpest display in the center area of the screen.
ADJUSTMENT AND SERVICING THE CHASSIS
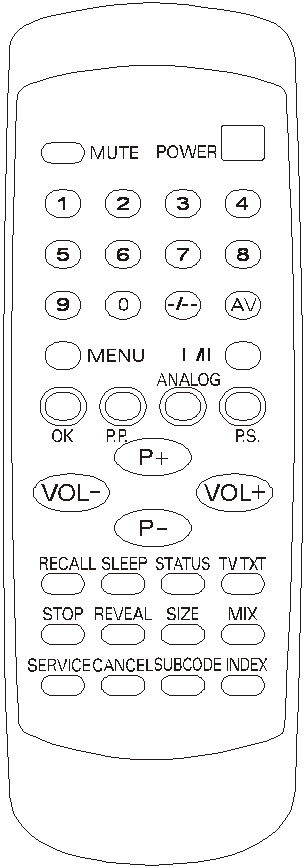
To enter the service mode, a special remote control which contains an additional SERVICE key must be used. See the illustration. Press the SERVICE key on remote control, TV will display service menu as following table 1 line by line. To select the parameter by using the P+/P- keys. To adjust the selected parameter by using the V+/V- keys. To quit the service mode, press the P.P. key on remote control when in the service mode.
Table 1
|
Parameter |
Value 14 " |
Value 20", 21 " |
|
|
Red Gain |
|
|
|
|
DC Red |
|
|
|
|
Green Gain |
|
|
|
|
DC Green |
|
|
|
|
Blue Gain |
|
|
|
|
DC Blue |
|
|
|
|
Apr Threshold |
|
|
|
|
Logo |
|
|
|
|
|
|
|
To enter the table 2, press the OK key for the first time on the remote control when in the service mode.
Table 2
|
Parameter |
Value |
|
|
Tuner AGC |
|
|
|
H position |
|
|
|
VPOS 50 |
|
|
|
VPOS 60 |
|
|
|
VAMP 50 |
|
|
|
VAMP 60 |
|
|
|
Bright max |
|
|
|
Bright min |
|
|
|
Sub Tint |
|
|
|
VCO Coarse |
|
|
|
VCO Fine |
|
|
|
VCO Coarse L1 |
|
|
|
VCO Fine L1 |
|
|
To enter the table 3, press the OK key for the second time on the remote control when in the service mode.
Table 3
|
Parameter |
Value |
|
|
AGC gain |
|
|
|
Option 1 |
|
|
|
Option 2 |
|
|
|
Option 3 |
|
|
|
Option 4 |
|
|
|
Option 5 |
|
|
|
ST Ttext |
|
|
|
H POS OSD |
|
|
|
V POS OSD |
|
|
|
H POS TXT |
|
|
|
V POS TXT |
|
|
Following are the items of the OPTIONS in more details.
OPTION1:
B5=P/N/S Crystals application (0=2 crystals, 1=1 crystal)
B4=Cutoff
B3=Safety_Reset (0=Active, 1=non)
B2=Super Tuner (0=OFF, 1=ON)
B1=Sound Demodulation (0= Intercarrier/MONO, 1=QSS/NICAM)
B0=Logo Display (0=OFF, 1=ON)
OPTION2: (It s better to keep the default setting option2=0)
B5=Half_Contrast (0=OFF, 1=ON)
B4=Color 6db (0=OFF, 1=ON)
B3=APR Feature (0=ON, 1=OFF)
B2=Black Stretch (0=ON, 1=OFF)
B1=Auto Flesh (0=ON, 1=OFF)
B0=Coring (0=ON, 1=OFF)
OPTION3:
B5=AVL (0=OFF, 1=ON)
B4=PIF Over modulation (0=OFF, 1=ON)
B3=Market_France-SECAM L/L' (0=OFF, 1=ON)
B2=Manual/Auto Cutoff (0=Manual, 1=Auto Cutoff)
B1=Mute pin Low/High To control the speaker (0=Low, 1=High)
B0=TDA7449/TDA7439 (0=TDA7449, 1=TDA7439)
OPTION4:
B4=SCART2 (0=OFF, 1=ON)
B3=RGB (0=OFF, 1=ON)
B2=SVHS (0=OFF, 1=ON)
B1=AV2 (0=OFF, 1=ON)
B0=AV1 (0=OFF, 1=ON)
OPTION5 and ST Ttext is for teletext setting only. It normally could not be changed. If it s necessary to adjust the OPTION 5, please read the following information before adjustment.
A. &n 858e46i bsp; For CPUs with English, French, German, Polish or English, French, German, Turkish, Please refer to the setting as below.
1. If OPTION 5 = 00, then the TEXT languages like "ENGLISH, FRENCH, SWEDISH, TURKISH, GERMAN, PORTUGUESE, ITALIAN, RUMANIAN " can be decoded.
2. If OPTION 5 = 02, then the TEXT languages like "POLISH, FRENCH, ESTONIAN, CZECH, GERMAN, SERBIAN, LETTISH, RUMANIAN " can be decoded.
3. If OPTION 5 = 04, then the TEXT languages like "ENGLISH, FRENCH, SWEDISH, CZECH, GERMAN, PORTUGUESE, LETTISH, RUMANIAN " can be decoded.
4. If OPTION 5 = 06, then the TEXT languages ENGLISH, FRENCH, SWEDISH, TURKISH, GERMAN, PORTUGUESE, LETTISH, RUMANIAN can be decoded.
B. For coming new OTP/CPU with English, Russian, Czech, Polish, the setting of the OPTION 5 will be changed as below.
1. If OPTION 5 = 00, then the TEXT languages like "ENGLISH, FRENCH, SWEDISH, CZECH, GERMAN, PORTUGUESE, ITALIAN, RUMANIAN " can be decoded.
2. If OPTION 5 = 02, then the TEXT languages like "ENGLISH, RUSSIAN, SWEDISH, TURKISH, GERMAN, PORTUGUESE, ITALIAN, RUMANIAN " can be decoded.
3. If OPTION 5 = 04, then the TEXT languages like "POLISH, RUSSIAN, SWEDISH, CZECH, GERMAN, SERBIAN, ITALIAN, RUMANIAN " can be decoded.
4. If OPTION 5 = 06, then the TEXT languages like "POLISH, RUSSIAN, SWEDISH, CZECH, GERMAN, PORTUGUESE, ITALIAN, RUMANIAN can be decoded.
Normally, it is supposed not to set OPTION 5 = 01. If you set the OPTION 5 = 01, then the font can be switched by press key MENU on remote control in TEXT mode for TV3K. If you set OPTION 5 = 00, 02, 04, 06, then there is no any activity while press MENU in TEXT mode. Please check.
Removing any R.F. signal source and prevent any stray signal source from entering the tuner by shorting the tuner input inner contact to the out screen.
Inject the 38.9 MHZ carrier into the tuner IF output pin (pin 11).Select the parameter VCO Coarse in the service mode (see Table 2).The VCO Status will appear on the screen. Then press the AV key on remote control, the CPU will adjust automatically until the VCO Status OK appears on the screen. If this can not be achieved, i.e. there is no any pattern on the screen, please adjust the T201 first until a stable pattern appears on the screen. And then press the AV key on remote control. The CPU will adjust automatically once again until the VCO Status OK appears on the screen.
To adjust the picture position and vertical size, select the appropriate parameter in the service mode and adjust as necessary. Please see table 2.
Remote control
|
|
DIRECTIVTY 6m(MIN) |
8m(NOR) |
OK |
|
|
DIRECTIVTY 30 FROM LIGHT AXIS 5m(MIN) |
7m(NOR) |
OK |
|
|
|
|
|
|
|
|
|