As much as I enjoy creating simple Flash animations in FreeHand, I know that there is far more power and sophistication in Flash itself. However, FreeHand does have a few techniques to convert blends, text, text on a path, groups and brushes into animated sequences
To prepare a 10110r178k rtwork for animation:
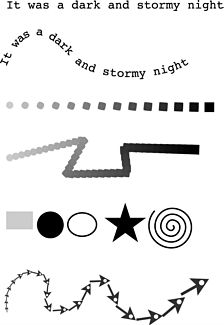
Set text as a single line of type or attach the text to a path (see page 250).
or
Create a blend or attach a blend to a path (see page 219).
or
Group individual items in the order that you would like them to appear.
or
Brushes must be released and ungrouped as many times as necessary until each individual symbol is selected. Then the individual symbols should be grouped into one object.
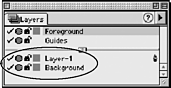
If you want an object to appear throughout the animation, place the artwork on a non-printing background layer (see page 156).
One way to create Flash animations is to put objects on their own layers so that each layer acts like a movie frame. Although you could manually place each object on its own layers, it is much easier to do it automatically.
To create an animation sequence using layers:
Select the artwork to be animated.
Choose Xtras > Animate > Release to Layers. The Release to Layers dialog box appears
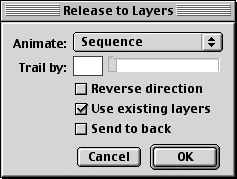
Use the Animate menu to choose one of the following:
o Sequence releases each object individually to separate layers.
o Build creates a stacking effect by copying the objects in sequence to separate layers.
o Drop copies the objects to all layers but omits one object in sequence from each layer.
o Trail copies and releases objects to the number of layers you specify. Objects are copied incrementally to the specified number of layers.
If you have chosen Trail, use the Trail By field to specify the number of layers on which objects will be copied.
If desired, select Reverse Direction to release the objects in reverse stacking order and animate the sequence in the opposite direction.
Select Use Existing Layers to release objects to existing layers, beginning with the current layer.
TIP
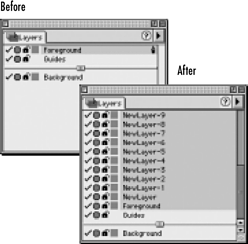
Deselect Use Existing Layers to create new layers for the objects that are released.
If you have chosen Use Existing Layers, you can also select Send to Back to release the objects to the back of the stacking order.
Click OK. The objects appear on new layers
Animation ChoicesThe four animation choices make different movie effects. Sequence creates shows one element at a time. Build adds an element to the previous one. Drop creates the effect of each element dropping into place. Trail displays the new elements as the previous elements disappear. |
|
